Deleting a large list from SharePoint using PowerShell

I recently ran into an issue trying to delete a list over 5,000 items from SharePoint. I tried using Metalogix Content Matrix to delete the list/site, but they all were bound by the threshold. I realized I had to use PowerShell, but research lead to even this having issues deleting the list. The solution was batches of 1,000 items. It takes a few hours to remove 25,000 items, but I was able to delete the list once the items were removed.

I received this error prior to deleting the items in the list using a script via modern UI Site Contents menu:

“My List- 24453 items- We’re sorry, we had some trouble removing this. You can try again from the settings page.”

Similar error on the list settings page:

“The attempted operation is prohibited because it exceeds the list view threshold enforced by the administrator.”

This script on MSDN was able to remove the items so I could then delete the list in the browser: https://blogs.msdn.microsoft.com/ahmedamin/2017/08/03/bulk-delete-sharepoint-items-in-a-large-list-using-powershell/

Here is the script as well:

[code language=”powershell”]

Add-PSSnapin Microsoft.SharePoint.Powershell -ea SilentlyContinue
$web = get-spweb “https://intranet/sites/home”
$list = $web.lists[“My List Title Here”]
$query = New-Object Microsoft.SharePoint.SPQuery
$query.ViewAttributes = “Scope=’Recursive'”
$query.RowLimit = 1000
$query.ViewFields = “”
$query.ViewFieldsOnly = $true
do
{
$listItems = $list.GetItems($query)
$query.ListItemCollectionPosition = $listItems.ListItemCollectionPosition
foreach($item in $listItems)
{
Write-Host “Deleting Item – $($item.Id)”
$list.GetItemById($item.Id).delete()
}
}
while ($query.ListItemCollectionPosition -ne $null)

[/code]

This above script was able to remove the items, then I could delete the list.

All done!

GoDaddy’s domain expiration process explained

I had a good call with GoDaddy today to explain the process of what happens to a domain when it is deleted. I was interested in purchasing a domain that I know was deleted today. Of course, the easiest way is to have the account holder un-delete the domain and transfer it, but in this case the user who deleted it no longer wants to deal with the domain, or me asking to have it transferred (it’s a two-step process and takes time).

When a domain is deleted, the account holder has a few weeks to undo that action. After this time, the domain goes to an expired domains auction. If no one buys it, GoDaddy backorder customers ($25-$35 cost for a backorder, good for a 1-year registration) will purchase it. If you do not have a backorder, you cannot purchase the domain during this time since you are just a normal person. The domain then goes to a secondary auction. The secondary auction expires about 84 days from when the domain was first deleted by the user. That’s why the GoDaddy support team says “about 90 days the domain could be released back for normal purchase” if no one buys it at auction. GoDaddy monitoring on a domain just sends you an email of the status. I suppose you could order a backorder during the auction process if you see no one is purchasing it, then when it closes and goes to backorders you might be able to get it that way.

Here is the time-table for the scenario of what happens to a domain when a user deletes it:

Day Status

0

User deletes domain

26

Expired Domain Auction starts

36

If someone bids, done, domain is sold.
If no one bids, it goes to the first person who Backordered the domain. You cannot simply buy the domain for $9.99, you need to purchase a backorder.

41

3-day floating period the domain is in limbo. Nothing happens here.

43

Secondary Domain Auction starts

84

The domain is released for normal purchase if it didn’t sell


So, if the domain you are looking for is any good, it might sell at auction. Otherwise, purchase a backorder for $25-$35 and hope you get it! If it sells in the auction, you are out the $ for the backorder, so it’s a gamble. In this case, I don’t want to pay (gamble) that no one bids and I will get the domain, since I am just interested in trying to list it for sale myself, so I am passing on purchasing a backorder and just letting it go. I might check back in 84 days but I have a felling it will be purchased.

A good rule of thumb I have noticed is if the domain is worth anything, some domain selling company will snatch it up and you will never see it again. Still waiting for ericschrader.com, I have been waiting for this to fall out of auctions and auction resellers for about 5 years now.

But hey, you might get lucky. I let SharePointEric.com expire a few years ago and it was bought at auction by a reseller, and now it’s back for normal purchase for $11.99 from GoDaddy:

GoDaddy has a cool apprasal tool to check the monetary value of a domain: https://www.godaddy.com/domain-value-appraisal/appraisal/?checkAvail=1&tmskey=&domainToCheck=sharepointeric.com

If you have any tips, post them below.

There is so much to purchasing domains now days, its not like the old days (back before emoji’s).

Updating Visual Studio 2017 Enterprise

Yesterday I noticed a release (VS 2017 Update 6) was released, but my Visual Studio was still running Update 3:

The newest update is version 15.6.

While reading how to update Visual Studio, the article mentioned Visual Studio Installer.

https://docs.microsoft.com/en-us/visualstudio/install/update-visual-studio

So I launched Visual Studio Installer and clicked “Update“. Note, the installer did not tell me what version will be installed, but I knew the latest GA release update is 15.6 (VS current release version https://docs.microsoft.com/en-us/visualstudio/releasenotes/vs2017-relnotes)

Now my Visual Studio shows version 15.6, which is the latest current release:

Microsoft Visual Studio Enterprise 2017 (3)

Version 15.6.0

VisualStudio.15.Release/15.6.0+27428.1

Microsoft .NET Framework

Version 4.7.02556

Installed Version: Enterprise


All done!

Create a SPFx web part to display SharePoint list data based on locale and Graph API data

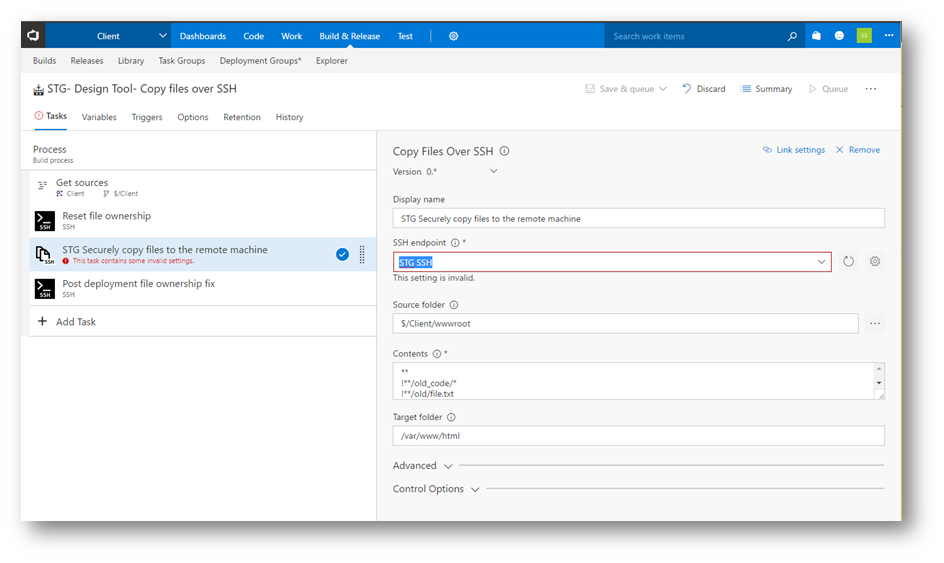
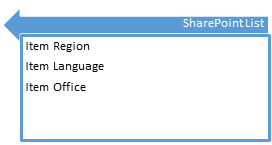
This is an example of how I used the SharePoint Framework (SPFx) to create a modern page/modern experience web part that shows SharePoint list data based on a user’s Language/Locale/Country and some other user profile information from Azure Active Directory using the Graph API.

We onboard guest users using Azure AD B2B to our SharePoint Online tenant using a PowerShell script I documented before. We add some additional profile properties in the CSV when we onboard them, such as Office Location (Which we put whatever we want in here), etc. The issue is, SharePoint Online SPFx web parts do not have a way to pull this information. So, we use the Graph API.

User Data

SPFx Web Part

SharePoint List data

Comparison

Display comparison results in web part

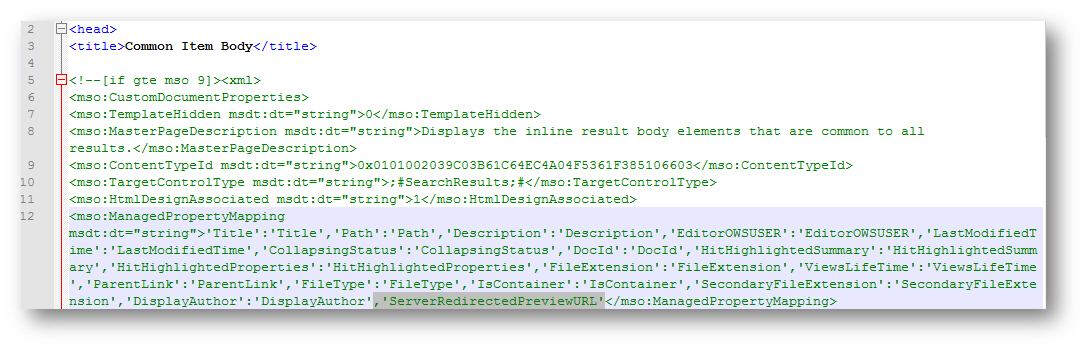
This code will even create the SharePoint list for you using an elements.xml/schema.xml file.

There are some holes in the data structures and list columns since I removed some that are client specific. I did my best to match them up.

Solution

    1. Setup your SPFx environment https://docs.microsoft.com/en-us/sharepoint/dev/spfx/set-up-your-development-environment
  1. Install dependencies for jQuery and Bootstrap (if needed). You only need to run npm install if you don’t use the Yeoman generator (this creates the node_modules folder in your solution. Since these files are not in TFS, I run npm install on new environments when grabbing from source control):

[code language=”bash”]
npm install

npm install –save jquery@2

npm install –save bootstrap
[/code]

  1. Open SPFXProject1\config\config.json and add the path for jQuery and Bootstrap.

[code language=”text”]

"externals": {
"jquery": {
"path": "https://cdnjs.cloudflare.com/ajax/libs/jquery/3.1.1/jquery.min.js",
"globalName": "jquery"
},
"bootstrap": {
"path": "https://cdnjs.cloudflare.com/ajax/libs/twitter-bootstrap/3.3.7/js/bootstrap.min.js",
"globalName": "bootstrap"
}
},

[/code]

  1. Open SPFXProject1\config\package-solution.json and add the Elements/schema assets reference so the SharePoint list can be created. This creates a feature that deploys the list, which is good to know for uninstalling/troubleshooting.

[code language=”text”]…
"features": [
{
"title": "My Web Part Create List Feature",
"description": "Deploys a list named My List for the slider web part, a content type and site columns",
"id": "88d9ea22-0988-4c58-b551-b1c5dc92e211",
"version": "1.0.0.0",
"assets": {
"elementManifests": [ "elements.xml" ],
"elementFiles": [ "schema.xml" ]
}
}
]
…[/code]

  1. Open SPFXProject1\src\webparts\mywebpartname\MySliderWebPart.manifest.json file and add the full width web part zone hack from https://blog.velingeorgiev.com/how-add-spfx-webpart-full-width-column

[code language=”text”]…

"manifestVersion": 2,
"supportsFullBleed": true,

[/code]

  1. Create the elements.xml file in SPFXProject1\SharePoint\assets\elements.xml

[code language=”xml”]<?xml version="1.0" encoding="utf-8"?>
<Elements xmlns="http://schemas.microsoft.com/sharepoint/">
<CustomAction
Title="MyWebPart"
Location="ClientSideExtension.ApplicationCustomizer"
ClientSideComponentId="8ec40281-8c15-4a97-ab64-cc1feeb7a50c"
ClientSideComponentProperties="{"testMessage":"Test message"}">
</CustomAction>
<Field ID="{3246929A-5ECA-4E1E-BC8F-4ED878F3A33A}"
Name="SPFxSliderImage"
DisplayName="Slider Image"
Type="Image"
RichText="TRUE"
RichTextMode="FullHtml"
Group="Homepage Slider"/>
<Field ID="{1837EB2A-0A2B-494B-9509-61AEDF7BB2CB}"
Name="SPFxSliderBGImage"
DisplayName="Slider BG Image"
Type="Image"
RichText="TRUE"
RichTextMode="FullHtml"
Group="Homepage Slider"/>
<Field ID="{CEEFD3D4-212F-48D7-AA8F-B9A23A7C0FFC}"
Name="SPFxOrder"
DisplayName="Order"
Type="Number"
Group="Homepage Slider" />
<Field ID="{1F2EEECC-5AB3-4D46-8656-E54FDEA3A08D}"
Name="SPFxDesc"
DisplayName="Description"
Type="Text"
Group="Homepage Slider" />
<Field ID="{683FD699-2404-4E6B-848C-100E8CF8D38E}"
Name="SPFxBtnLeftTxt"
DisplayName="Button Left Text"
Type="Text"
Group="Homepage Slider" />
<Field ID="{E3312F89-8492-4A54-9129-16170D64DD6F}"
Name="SPFxBtnLeftURL"
DisplayName="Button Left URL"
Type="Text"
Group="Homepage Slider" />
<Field ID="{9801966F-7B8F-4214-83CA-35C83D41A04A}"
Name="SPFxBtnRightTxt"
DisplayName="Button Right Text"
Type="Text"
Group="Homepage Slider" />
<Field ID="{1ECB4C39-8E31-491C-8A5C-6701C458518B}"
Name="SPFxBtnRightURL"
DisplayName="Button Right URL"
Type="Text"
Group="Homepage Slider" />
<Field ID="{8A327CB8-578A-433F-9F00-75D92B13825C}"
Name="SPFxSliderExpire"
DisplayName="Expires"
Type="DateTime"
Format="DateOnly"
Group="Homepage Slider" />
<ContentType ID="0x01009FAF6E59182F44F6AABD475FDC8F883A"
Name="Slider"
Group="My Company Content Types"
Description="Sample content type from web part solution">
<FieldRefs>
<FieldRef ID="{3246929A-5ECA-4E1E-BC8F-4ED878F3A33A}" />
<FieldRef ID="{1837EB2A-0A2B-494B-9509-61AEDF7BB2CB}" />
<FieldRef ID="{CEEFD3D4-212F-48D7-AA8F-B9A23A7C0FFC}" />
<FieldRef ID="{1F2EEECC-5AB3-4D46-8656-E54FDEA3A08D}" />
<FieldRef ID="{683FD699-2404-4E6B-848C-100E8CF8D38E}" />
<FieldRef ID="{E3312F89-8492-4A54-9129-16170D64DD6F}" />
<FieldRef ID="{9801966F-7B8F-4214-83CA-35C83D41A04A}" />
<FieldRef ID="{1ECB4C39-8E31-491C-8A5C-6701C458518B}" />
<FieldRef ID="{8A327CB8-578A-433F-9F00-75D92B13825C}" />
</FieldRefs>
</ContentType>
<ListInstance
CustomSchema="schema.xml"
FeatureId="00bfea71-de22-43b2-a848-c05709900100"
Title="My List"
Description="My List for site"
TemplateType="100"
Url="Lists/MyList">
</ListInstance>
</Elements>[/code]

The above template Types are 100 for Custom List.


  1. Create schema.xml with your list columns from the above elements.xml SPFXProject1\SharePoint\assets\schema.xml

[code language=”xml”]<List xmlns:ows="Microsoft SharePoint" Title="Basic List" EnableContentTypes="TRUE" FolderCreation="FALSE" Direction="$Resources:Direction;" Url="Lists/Basic List" BaseType="0" xmlns="http://schemas.microsoft.com/sharepoint/">

<MetaData>
<ContentTypes>
<ContentTypeRef ID="0x01009FAF6E59182F44F6AABD475FDC8F883A" />
</ContentTypes>
<Fields></Fields>
<Views>
<View BaseViewID="1" Type="HTML" WebPartZoneID="Main" DisplayName="$Resources:core,objectiv_schema_mwsidcamlidC24;" DefaultView="TRUE" MobileView="TRUE" MobileDefaultView="TRUE" SetupPath="pages\viewpage.aspx" ImageUrl="/_layouts/images/generic.png" Url="AllItems.aspx">
<XslLink Default="TRUE">main.xsl</XslLink>
<RowLimit Paged="TRUE">30</RowLimit>
<Toolbar Type="Standard" />
<ViewFields>
<FieldRef Name="LinkTitle"></FieldRef>
<FieldRef Name="SPFxSliderImage"></FieldRef>
<FieldRef Name="SPFxSliderBGImage"></FieldRef>
<FieldRef Name="SPFxOrder"></FieldRef>
<FieldRef Name="SPFxDesc"></FieldRef>
<FieldRef Name="SPFxBtnLeftTxt"></FieldRef>
<FieldRef Name="SPFxBtnLeftURL"></FieldRef>
<FieldRef Name="SPFxBtnRightTxt"></FieldRef>
<FieldRef Name="SPFxBtnRightURL"></FieldRef>
<FieldRef Name="SPFxSliderExpire"></FieldRef>
</ViewFields>
<Query>
<OrderBy>
<FieldRef Name="ID" />
</OrderBy>
</Query>
</View>
</Views>
<Forms>
<Form Type="DisplayForm" Url="DispForm.aspx" SetupPath="pages\form.aspx" WebPartZoneID="Main" />
<Form Type="EditForm" Url="EditForm.aspx" SetupPath="pages\form.aspx" WebPartZoneID="Main" />
<Form Type="NewForm" Url="NewForm.aspx" SetupPath="pages\form.aspx" WebPartZoneID="Main" />
</Forms>
</MetaData></List>

[/code]

  1. Add import statements to your SPFXProject1\src\webparts\mywebpartname\MySliderWebPart.ts code in Visual Studio so we can reference the above jQuery and Bootstrap code:

[code language=”javascript”]import * as jQuery from ‘jquery’;
import * as bootstrap from ‘bootstrap’;[/code]

  1. Import IWebPartContext from the @microsoft/sp-webpart-base so we can get the users locale from their browser session:

[code language=”javascript”]import {
BaseClientSideWebPart,
IPropertyPaneConfiguration,
PropertyPaneTextField,
IWebPartContext
} from ‘@microsoft/sp-webpart-base’;
import { SPComponentLoader } from ‘@microsoft/sp-loader’;[/code]

  1. Import intersection from lodash so we can compare where two arrays intersect easily and the Graph API. Note, the day after I wrote this web part, MS released a new Graph API for SPFx. See link in comment to do it the newer way (recommended):

[code language=”javascript”]// GraphHttpClient is in preview and will be depricated soon. Use new method https://docs.microsoft.com/en-us/sharepoint/dev/spfx/use-msgraph
import { SPHttpClient, SPHttpClientResponse, GraphHttpClient, GraphHttpClientResponse } from ‘@microsoft/sp-http’;
import { escape, intersection } from ‘@microsoft/sp-lodash-subset’;[/code]

  1. Now we can jump into setting up the data structures:

[code language=”javascript”]

// All of the list data we get back from SharePoint, REST API response format

export interface ISlides {
value: ISlide[];
}

// Each item in the list from REST API response
export interface ISlide {
ID: number;
Title: string;
SPFxDesc: string;
SPFxBtnLeftTxt: string;
SPFxBtnLeftURL: string;
SPFxBtnRightTxt: string;
SPFxBtnRightURL: string;
SPFxSliderExpire: Date;
SPFxOrder: number;
Office: string;
Language: string;
Region: string[];
}

// Each item in the list’s Publishing HTML Image, since its an extended property we need a second rest call
export interface ISlideItem {
SPFxSliderImage: string;
SPFxSliderBGImage: string;
}

export interface IItemGuid {
value: string;
}

// each actual list item data
export interface slides {
ID: number;
Title: string;
UrlSlideImg: string;
UrlSlideBGImg: string;
SPFxDesc: string;
SPFxBtnLeftTxt: string;
SPFxBtnLeftURL: string;
SPFxBtnRightTxt: string;
SPFxBtnRightURL: string;
SPFxSliderExpire: Date;
SPFxOrder: number;
Office: string;
Language: string;
Region: string[];
}

export interface IUserProfile {
Office: Array<string>;
OfficeString: string;
Locale: string;
Language: string;
Region: string;
CountryCode: string;
}

// User profile info from Graph API
export interface IUserProfileResponse {
[property: string]: string;
}[/code]

  1. On the export statement, load your jQuery from CDN. These lines give some warnings during the gulp bundle/package process. Let me know if you know how I can fix them, but this way works.

[code language=”javascript”]

private _slides: slides[] = [];
public constructor(context: IWebPartContext) {
super();
// FIX LATER- redundant to load jquery twice, but this will load bootstrap JS and CSS. Fix this and top jQuery import
SPComponentLoader.loadCss(‘https://maxcdn.bootstrapcdn.com/font-awesome/4.6.3/css/font-awesome.min.css’);
SPComponentLoader.loadCss(‘https://maxcdn.bootstrapcdn.com/bootstrap/3.3.7/css/bootstrap.min.css’);

SPComponentLoader.loadScript(‘https://cdnjs.cloudflare.com/ajax/libs/jquery/3.1.1/jquery.min.js’, { globalExportsName: ‘jQuery’ }).then((jQuery: any): void => {
SPComponentLoader.loadScript(‘https://cdnjs.cloudflare.com/ajax/libs/twitter-bootstrap/3.3.7/js/bootstrap.min.js’, { globalExportsName: ‘jQuery’ }).then((): void => {});
});

}

[/code]

  1. Now create your REST API call methods (Replace Some List with your SharePoint list name)

[code language=”javascript”]
private _getCurrentUserProfile(): Promise<IUserProfileResponse> {
// Query user properties from office graph API
// Tutorial: https://docs.microsoft.com/en-us/sharepoint/dev/spfx/call-microsoft-graph-using-graphhttpclient
// Graph API properties https://github.com/microsoftgraph/microsoft-graph-docs/blob/master/api-reference/v1.0/api/user_list.md#user-content-example-2-users-request-using-select
let promise: Promise<IUserProfileResponse> = new Promise<IUserProfileResponse>((resolve, reject) => {
// Call the Rest API for current user, get AAD properties.
this.context.graphHttpClient.get("v1.0/me?$select=displayName, officeLocation, preferredLanguage, givenName, country", GraphHttpClient.configurations.v1)
.then((response: GraphHttpClientResponse) => {
//console.log("response.json(): " + response.json());
resolve(response.json());
}).catch((error: any) => {
reject(error);
});

return promise;
});
return promise;

}

private _getSlides(): Promise<ISlides> {
return this.context.spHttpClient.get(`${this.context.pageContext.web.absoluteUrl}/_api/web/lists/getByTitle(‘My List’)/items?select=Title,SPFxDesc,SPFxBtnLeftURL,SPFxBtnLeftTxt,SPFxBtnRightURL,SPFxBtnRightTxt,SPFxSliderExpire,SPFxOrder,Office,Language,Region&$orderBy=SPFxOrder asc`,
SPHttpClient.configurations.v1)
.then((response: SPHttpClientResponse) => {
return response.json();
});
}

private _getImage(id: number): Promise<ISlideItem> {
return this.context.spHttpClient.get(`${this.context.pageContext.web.absoluteUrl}/_api/web/lists/getByTitle(‘My List’)/items(‘${id}’)/FieldValuesAsHtml`,
SPHttpClient.configurations.v1)
.then((response: SPHttpClientResponse) => {
return response.json();
});
}

//private _getImageUrl(url: string): Promise<string> {
// return this.context.spHttpClient.get(`${this.context.pageContext.web.absoluteUrl}/_api/web/GetFileByServerRelativeUrl(‘${this.context.pageContext.web.serverRelativeUrl}${url}’)/ListItemAllFields/ServerRelatveUrl`,
// SPHttpClient.configurations.v1)
// .then((response: SPHttpClientResponse) => {
// return response.json();
// })
// .then((item: IItemGuid) => {
// return item.value;
// });
//}

private _itemCarouselIndicators(index: number): string {
if (index == 0) {
return `<li data-target="#myCarousel" data-slide-to="${index}" class="active" style="background-color:#d7d7d7"></li>`;
}
else {
return `<li data-target="#myCarousel" data-slide-to="${index}" class=""></li>`;
}
}

private _userProfile(aadquery: IUserProfileResponse) {
let userProfile: IUserProfile = { Office: [""], CountryCode: "", Language: "", Locale: "", OfficeString: "", Region: "" };
//console.log(userProfile);
// Store result for each property
// console.log("Graph API current user: " + result.displayName + result.officeLocation + result.preferredLanguage + result.givenName + result.country);

// 1. Office (Office)
userProfile.OfficeString = aadquery.officeLocation;
if (!userProfile.OfficeString) {
userProfile.OfficeString = "Los Angeles";
}
//console.log("Office: " + me._userprofile.OfficeString);
userProfile.Office = userProfile.OfficeString.split(",");
console.log("Users Office:" + userProfile.Office);

// 2. Locale (preferredLanguage) – OLD WAY from AAD, not good.
//userProfile.Locale = aadquery.preferredLanguage;
//if (!userProfile.Locale) {
// userProfile.Locale = "en-US";
//}
//console.log("Users Locale: " + me._userprofile.Locale);

// 3. Country Code (country)
userProfile.CountryCode = aadquery.country;
if (!userProfile.CountryCode) {
userProfile.CountryCode = "US";
}
//console.log("Users Country: " + me._userprofile.CountryCode);

// Final formatting of data

// Select current users Lanaguage (spelled out)
// from en-US, just keep the language. We use Country from AAD to determine Country/Region, not locale
let userLang: string = this.context.pageContext.cultureInfo.currentUICultureName;

userLang = userLang.substring(0, 2);

switch (userLang) {
case "en":
userProfile.Language = "English";
break;
case "es":
userProfile.Language = "Spanish";
break;
default:
userProfile.Language = "English";
}
console.log("Users Language: " + userProfile.Language);

// Select current users Region
// Define all US and CA regions, default any other country to Latin America
// Phase 2 or so, make this read from a SP lookup list.
switch (userProfile.CountryCode) {
// USA
case "US":
userProfile.Region = "USA";
break;

// United Kingdom
case "GB":
userProfile.Region = "United Kingdom";
break;

// Mexico (not really needed since default is Latin America)
case "MX":
userProfile.Region = "Latin America";
break;

// Latin America – Default anyone not US or GB to Latin America for now, since thats the 3rd region and is currently the only region with multiple countries (cases)
default:
userProfile.Region = "Latin America";
}
console.log("Users Region: " + userProfile.Region);

return userProfile;
}
private _itemSlideWrapper(item: slides, index: number): string {
// if the buttons are empty, dont display them
let leftButtonHTML: string = "";
let rightButtonHTML: string = "";
let SPFxBtnLeftTxt = item.SPFxBtnLeftTxt ? item.SPFxBtnLeftTxt : ”;
let SPFxBtnRightTxt = item.SPFxBtnRightTxt ? item.SPFxBtnRightTxt : ”;
if (SPFxBtnLeftTxt.length > 0) {
leftButtonHTML = `<a href="${item.SPFxBtnLeftURL ? item.SPFxBtnLeftURL : ‘#’}" style= "margin-right: 20px;" target= "_blank" > <div class="slider-button ${styles.sliderButton}" > ${SPFxBtnLeftTxt} </div></a>`;
}
if (SPFxBtnRightTxt.length > 0) {
rightButtonHTML = `<a href="${item.SPFxBtnRightURL ? item.SPFxBtnRightURL : ‘#’}"><div class="slider-button ${styles.sliderButton}" target="_blank"> ${SPFxBtnRightTxt} </div></a>`;
}
//check if slide is the first (active) or not
let activeFlag: string = "";
if (index == 0) {
activeFlag = "active";
}
//return slide HTML
return `
<div class="${styles.item} item ${activeFlag}" style="background-image: url(${item.UrlSlideBGImg ? item.UrlSlideBGImg : ”})">
<div class="row">
<div class="col col-xs-12 col-sm-6 col-md-6 carousel-image ${styles.carouselImage}">
<img src="${item.UrlSlideImg ? item.UrlSlideImg : ”}" alt="${item.Title ? item.Title : ”}">
</div>
<div class="col col-xs-12 col-sm-6 col-md-6 carousel-text ${styles.carouselText}">
<h1>${item.Title ? item.Title : ”}</h1>
<p>${item.SPFxDesc ? item.SPFxDesc : ”}</p>
<div class="slider-buttons ${styles.sliderButtons}">
${leftButtonHTML}
${rightButtonHTML}
</div>
</div>
</div>
</div>`;
}
[/code]

  1. Finally, the big puppy, the render() method

[code language=”javascript”]
public render(): void {

// only render this once
if (!this.renderedOnce) {
var me = this;
// Get users profile object
this._getCurrentUserProfile()
.then((_userprofileresponse: IUserProfileResponse) => {
//console.log("userprofileresponse: ");
//console.log(_userprofileresponse);

// format the users profile to compare to news
let userProfile: IUserProfile = this._userProfile(_userprofileresponse);

//console.log("userProfile: " + userProfile);

//Go get the slider. Compare to users profile object and determine to display it or not

this._getSlides()
.then((response: ISlides): void => {
// get slider images
response.value.forEach((slide: ISlide): void => {
this._getImage(slide.ID)
.then((data: ISlideItem): void => {
//Fix these image queries to be failsafe if nothing comes back for each slide image
//Slider Image
// get the image out of the FieldValuesAsHtml
let divSliderImg = document.createElement(‘div’);
divSliderImg.innerHTML = data.SPFxSliderImage;
let imgSlider: HTMLImageElement = divSliderImg.firstChild as HTMLImageElement;
// need to do string split inorder to make the url relative
const imgSliderUrl: string = imgSlider.src.split(this.context.pageContext.web.serverRelativeUrl)[1];
//Slider BG Image
// get the image out of the FieldValuesAsHtml
let divSliderBGImg = document.createElement(‘div’);
divSliderBGImg.innerHTML = data.SPFxSliderBGImage;
let imgSliderBG: HTMLImageElement = divSliderBGImg.firstChild as HTMLImageElement;
// need to do string split inorder to make the url relative
const imgSliderBGUrl: string = imgSliderBG.src.split(this.context.pageContext.web.serverRelativeUrl)[1];
//Continue to store data from query for each slide
const item: slides = {
ID: slide.ID,
Title: slide.Title,
UrlSlideImg: `${this.context.pageContext.web.absoluteUrl}/_layouts/15/getpreview.ashx?resolution=2&path=${this.context.pageContext.web.serverRelativeUrl}${imgSliderUrl}&clientType=modernWebPart`,
UrlSlideBGImg: `${this.context.pageContext.web.absoluteUrl}/_layouts/15/getpreview.ashx?resolution=2&path=${this.context.pageContext.web.serverRelativeUrl}${imgSliderBGUrl}&clientType=modernWebPart`,
SPFxDesc: slide.SPFxDesc,
SPFxBtnLeftTxt: slide.SPFxBtnLeftTxt,
SPFxBtnLeftURL: slide.SPFxBtnLeftURL,
SPFxBtnRightTxt: slide.SPFxBtnRightTxt,
SPFxBtnRightURL: slide.SPFxBtnRightURL,
SPFxSliderExpire: slide.SPFxSliderExpire,
SPFxOrder: slide.SPFxOrder,
Language: slide.Language,
Region: slide.Region,
Office: slide.Office

};
console.log("Slide ID:" + item.ID);
let slideOfficeString: string = item.Office + ”;

let slideOffice: Array<string> = slideOfficeString.split(","); //["Los Angeles", "Value 1", "Value 2"];
console.log("Slide Office" + slideOffice);
let userOffice: Array<string> = userProfile.Office; //["Los Angeles", "Value 1"];

let slideLanguage: string = item.Language; //"English";
let userLanguage: string = userProfile.Language; //should this support multiple?;
console.log("Slide Language:" + slideLanguage);

let slideRegion: Array<string> = item.Region; //["USA", "United Kingdom", "Latin America"];
let userRegion: string = userProfile.Region;
console.log("Slide Region:" + slideRegion);

// reset each news items flag for users filter

let flag1: boolean = false;
let flag2: boolean = false;
let flag3: boolean = false;

// compare each user variable to slide item column

// see if users Office is in the slider item
// make case upper
for (let i = 0; i < slideOffice.length; i++) {
slideOffice[i] = slideOffice[i].toUpperCase();
}
for (let i = 0; i < userOffice.length; i++) {
userOffice[i] = userOffice[i].toUpperCase();
}
let resultcompare: Array<string> = intersection(userOffice, slideOffice);
if (resultcompare.length > 0) {
flag1 = true;
}

// see if users language is in the slider item
if (slideLanguage.toUpperCase() === userLanguage.toUpperCase()) {
flag2 = true;
}

//See if users region is in the slider item
// FIX- This should be list driven from the region/country list and UPS.
for (let i = 0; i < slideRegion.length; i++) {
slideRegion[i] = slideRegion[i].toUpperCase();
}
if (slideRegion.indexOf(userRegion.toUpperCase()) > -1) {
flag3 = true;
}

console.log("Compare Result- Office: " + flag1);
console.log("Compare Result- Language: " + flag2);
console.log("Compare Result- Region: " + flag3);

// if all 3 filters match, show the news item to the user

if (flag1 && flag2 && flag3) {
// Print IT! Append the item to the News object to be pushed to the DOM!

this._slides.push(item);
//console.log("Print the slider item!");
}
else {
console.log("Skipping Slide " + item.ID + ". There are " + this._slides.length + " slides that have been added.");
}

})
.then((): void => {
this.domElement.innerHTML = `
<div class="carousel-container">
<div style="height: 15px; width: 100%; background: #333333;"></div>

<div id="myCarousel" class="carousel slide ${styles.carousel}" data-ride="carousel">
<!– Indicators –>
<ol class="${styles.carouselIndicators} carousel-indicators"></ol>
<!– Wrapper For Slides –>
<div class="${styles.carouselInner} carousel-inner" role="listbox"></div>
<!– Side Controls –>
<a class="${styles.carouselControl} carousel-control left" href="#myCarousel" data-slide="prev"><span class="glyphicon ${styles.glyphiconChevronLeft} glyphicon glyphicon-chevron-left"></span></a>
<a class="${styles.carouselControl} carousel-control right" href= "#myCarousel" data-slide="next" > <span class="glyphicon ${styles.glyphiconChevronRight} glyphicon glyphicon-chevron-right"></span></a>
</div>
</div>`;

// add news items to domElement
if (this._slides.length > 0) {

//Quick fix for edit mode saving not doubling query to slides
jQuery(‘.carousel-indicators’).empty();
var today = new Date();

// Sort by date again
var sortResults: slides[] = this._slides.sort(function compare(a, b) {
if (a.SPFxOrder > b.SPFxOrder) {
return 1;
}
if (a.SPFxOrder < b.SPFxOrder) {
return -1;
}
return 0;
});
sortResults.forEach((item: slides, index: number): void => {
if (index <= 3 && item.SPFxSliderExpire <= today) {

jQuery(‘.carousel-indicators’, this.domElement).append(this._itemCarouselIndicators(index));
jQuery(‘.carousel-inner’, this.domElement).append(this._itemSlideWrapper(item, index));
console.log("Slide "+index + " ID: " + item.ID + " appended to DOM.");
}
else {
console.log("Skipping Slide " + index + " ID: " + item.ID + " Expires: " + item.SPFxSliderExpire + " " + item.SPFxOrder + " Total Slides in list:" + this._slides.length + " and today’s date is: " + today);
}
});
}
else {
// no slide items case here
}
// initialize the slider
jQuery(‘#myCarousel’).carousel(‘pause’);

});
});
});
});
}
}
[/code]

  1. Add the SASS (I removed some of the colors so it might not be perfect):

[code language=”css”]
$white: #fff;
$black: #000;
$blue: blue;

@import url(‘https://fonts.googleapis.com/css?family=Open+Sans:300,400,600’);

@mixin transition() {
-webkit-transition: 0.5s;
-moz-transition: 0.5s;
-ms-transition: 0.5s;
-o-transition: 0.5s;
transition: 0.5s;
}

.carousel {
background-color: #3279c3;
font-weight: 100;

.item {
min-height: 400px; /* Prevent carousel from being distorted if for some reason image doesn’t load */
background-repeat: no-repeat;
background-size: 45%;

img {
margin: 0 auto; /* Align slide image horizontally center */
}
}

.carouselInner {
.carouselImage {
text-align: center;
}

img {
width: 100%;
max-height: 400px;
max-width: 500px;
padding: 10px;
}

.col {
@media screen and (max-width: 767px) {
text-align: center;
}
}

.carouselText {
max-width: 510px;
color: $white;
font-size: 14px;
font-weight: 300;
line-height: 25px;
letter-spacing: 1px;
padding: 0 30px;

@media screen and (max-width: 767px) {
text-align: center;
max-width: 100%;
}

h1 {
font-size: 28px;
font-weight: 100;

@media screen and (max-width: 767px) {
font-size: 48px;
font-weight: 300;
}
}

p {
margin-bottom: 30px;
color: $white;

@media screen and (max-width: 767px) {
font-size: 12px;
line-height: 18px;
}
}

.sliderButtons {
display: flex;

a {
background: $white;
border: 0;
border-radius: 4px;
font-family: ‘Segoe UI’, Arial, sans-serif;
font-size: 14px;
font-weight: 400;
margin-bottom: 20px;
text-align: center;
text-decoration: none;
text-transform: none;
width: 50%;

@media screen and (max-width: 767px) {
min-width: 100%;
}

&:hover {
background-color: #394a4f;
border: 0;
text-decoration: none;
}
}

.sliderButton {
border: 0;
border-radius: 4px;
color: $blue;
display: block;
font-size: 14px;
font-weight: 400;
letter-spacing: normal;
padding: 6px 10px;
text-align: center;
text-transform: none;

&:hover {
background-color: #394a4f;
border: 0;
color: $white;
}
}
}
}
}

.carouselIndicators {
/*position: relative;
display: inline-block;
width: 100%;
margin-left: 0;
left: 0;
@media screen and (max-width: 767px) {
margin-top: 50px;*/
bottom: 6px;

li {
background: $white;
width: 10px;
height: 10px;
margin: 0 8px;
border: none;
}

li {
.active {
background: #c0c0c0 !important;
border: none;
width: 10px;
height: 10px;
}
}
}

@media screen and (max-width: 767px) {
.carouselIndicators {
display: none;
}
}

.carouselControl .glyphiconChevronLeft, .carouselControl .glyphiconChevronRight, .carouselControl .iconNext, .carouselControl .iconPrev {
width: 40px;
height: 40px;
margin-top: -10px;
font-size: 40px;

@media screen and (max-width: 767px) {
display: none;
}
}
}

[/code]

  1. Now we are ready to build and deploy! Run these node.js commands to package. Then install your app package file and assets. (I deploy mine to CDN, see the SPFX Web Part CDN tutorial on the MS website https://docs.microsoft.com/en-us/sharepoint/dev/spfx/web-parts/get-started/hosting-webpart-from-office-365-cdn ):

[code language=”powershell”]gulp bundle –ship
gulp package-solution –ship[/code]

  1. Add the app to your site
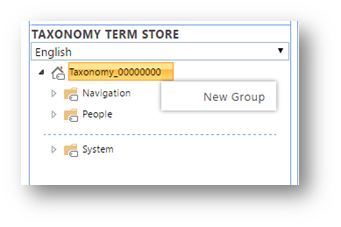
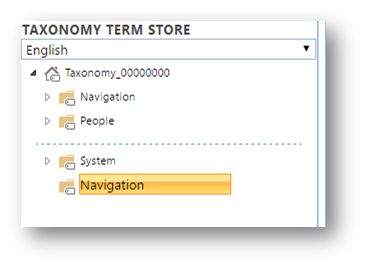
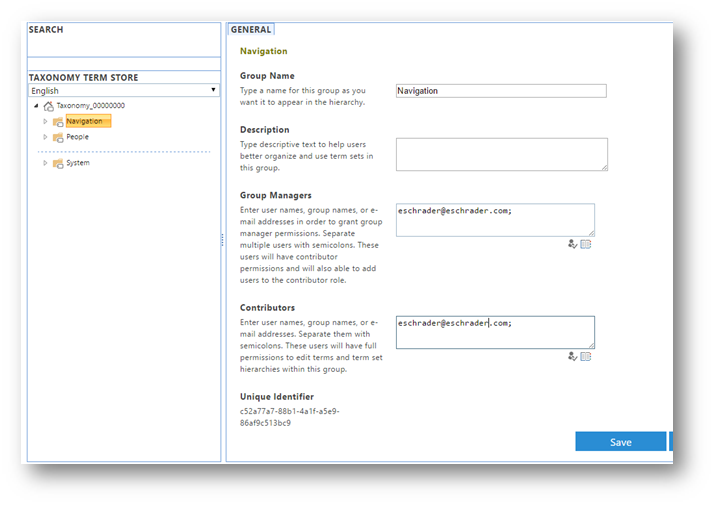
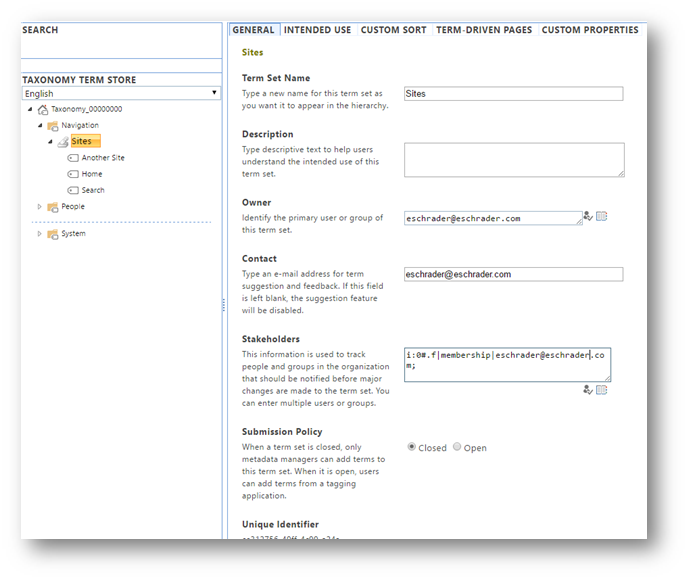
  2. On the new My List that is created, add the Language site column (OOTB).
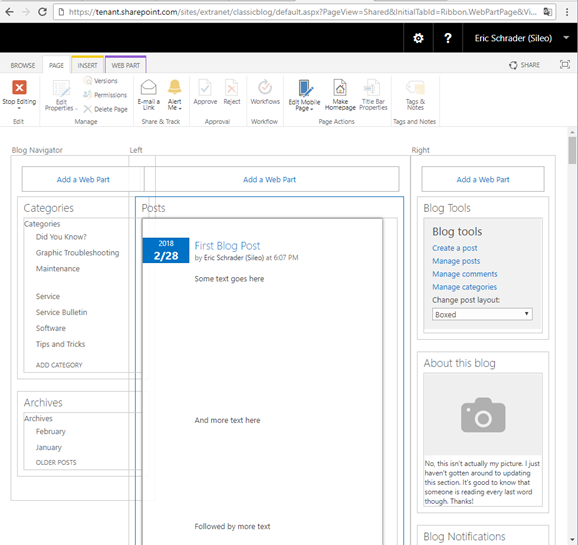
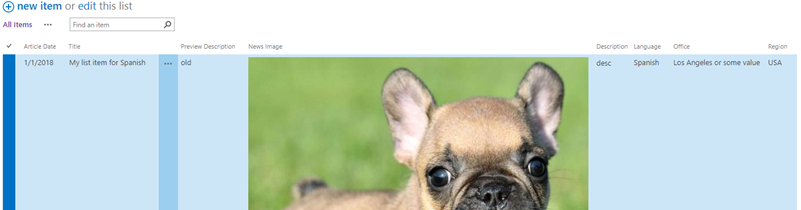
  3. Add some list data to your My List and tag data. (below is a similar list I added the site columns to, its not the same for the slider since this list was for news. That’s all I had for sample data sorry)

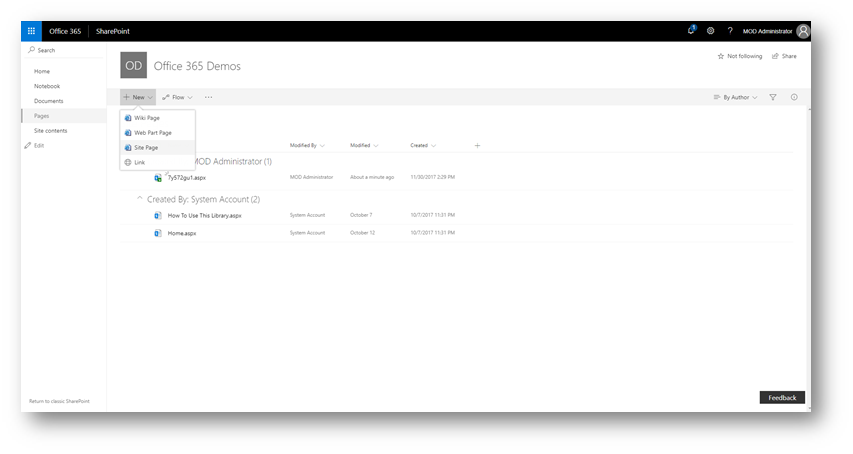
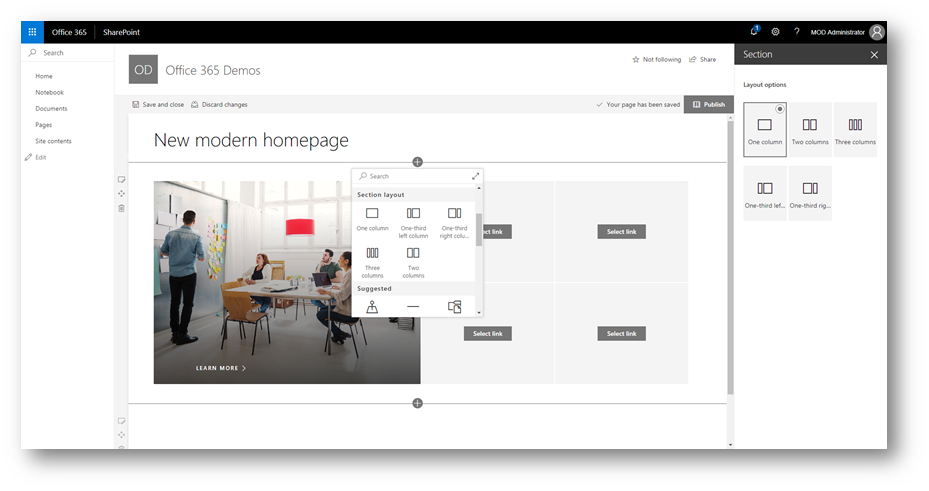
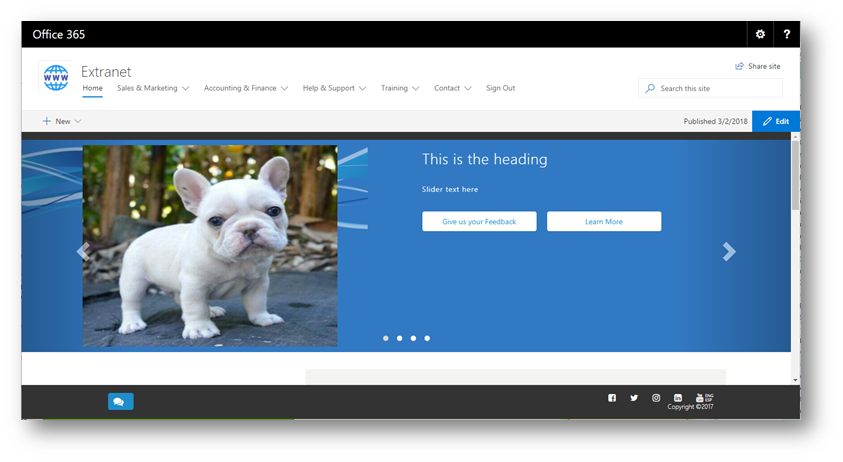
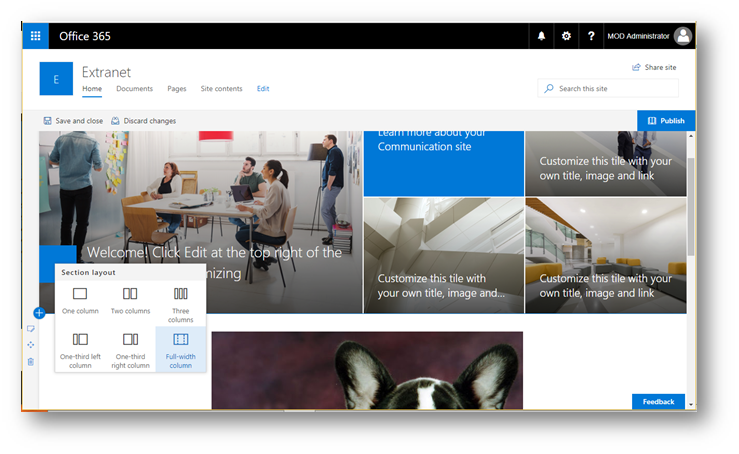
  1. Add the web part to your modern page:

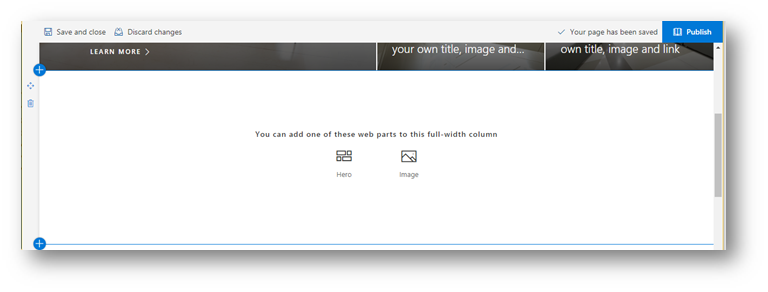
  1. It will appear here, if not, ctrl+f5 or check for build errors:

  1. View the web part:

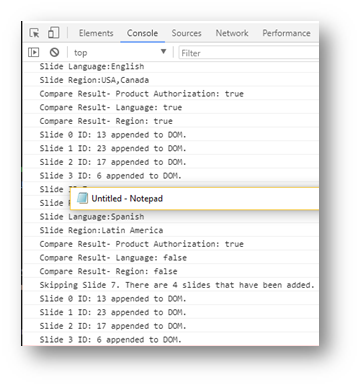
  1. Use F12 Chrome to debug web part

Please comment below any enhancements to the code, or big areas I may have messed up on when sanitizing the data.

Thanks!

SharePoint Online Communication site – How to share with external users

I had an issue where when I tried to share my SharePoint Online Communication Site with an external user, I received an error:

Your organization’s policies don’t allow you to share with these users. Go to External Sharing in the Office 365 admin center to enable it.

But when I went to my O365 tenant, sharing was enabled:

Allow users to invite and share with authenticated external users
Allow sharing to authenticated external users and using anonymous access links

The issue is that sharing is disabled on the site, so we need to use PowerShell to fix this.

Solution

As a SPO tenant admin, open PowerShell and do Connect-SPOService, then enter your tenant-admin.sharepoint.com URL. Supply your global admin credentials.

Then run get-sposite with your site.sharepoint.com URL, but pipe (|) the results to format-list (fl) with the property attribute looking for shar (for sharing)


Connect-SPOService

Url: https://tenant-admin.sharepoint.com

Get-SPOSite https://tenant.sharepoint.com/sites/Extranet | fl -prop *shar*

DisableSharingForNonOwnersStatus :

SharingCapability : Disabled

SiteDefinedSharingCapability : Disabled

DisableCompanyWideSharingLinks : NotDisabled

SharingDomainRestrictionMode : None

SharingAllowedDomainList :

SharingBlockedDomainList :


So set the sharing to 1 (ExtenlaUserSharingOnly)

set-SPOSite https://tenant.sharepoint.com/sites/Extranet –SharingCapability 1

Refresh the page you want to share and now the external user invite is allowed.

Done! Now you are able to share a modern SharePoint Online site with guest users. A better approach I use is to create a group and share with external users, that way security and content are isolated from employee content.

SharePoint Online blog site- How to edit the homepage

Problem

After about a week of troubleshooting the classic SharePoint Online blog subsite template (BLOG#0), I was FINALLY able to figure out why I could not edit the homepage.

Solution:

There is a site feature called “Site Pages” that needs to be activated. Once activated, you can edit the blog homepage (assuming you have permissions).

Figure 1- Activate the Site Pages feature on your Blog Site in SharePoint Online. Now you can edit the blog homepage!

Figure 2- SharePoint Online Blog Site Edit button fixed

BAM!

Figure 3- The SharePoint Online Classic Blog template is now editable for the homepage. The About this blog image can be removed.

I was lucky to run across this when troubleshooting why a modern SPFx extension would not show on a classic homepage.

Hope this helps!

Similar issues:

SharePoint Online- Enable New Modern experience on root site collection

UPDATE 9/27/2019- Microsoft this month is releasing a way to “Swap” sites. So create a new modern site collection, then swap it with the root. Invoke-SPOSiteSwap https://docs.microsoft.com/en-us/powershell/module/sharepoint-online/invoke-spositeswap?view=sharepoint-ps#description

If the target is the root site at https://tenant-name.sharepoint.com, then the following preparation activities should be performed prior to performing the swap:

  1. Any Featured links defined in SharePoint Start Page at https://tenant-name.sharepoint.com/_layouts/15/sharepoint.aspx will not be displayed after performing the swap. If required, the Featured links should be documented so they can be manually recreated after the swap.
  2. Functionality such as external sharing and application interfaces are dependent on the policies and permissions defined at the root site. Review the source site to ensure that it has the required policies and permissions as per the existing root site. This includes external sharing settings as well as site permissions.

UPDATE 1/30/2019- Still waiting for the below MS Ignite command. While we wait we can try Jeff Jone’s approach of forcing creation of a modern communication site using the classic site wizard with a client side developer trick: https://www.spjeff.com/2018/12/31/video-create-modern-communication-for-root-site-in-tenant/

UPDATE 9/27/2018- At #MsIgnite, Microsoft just announced a way to convert the root site into a modern communication site using PowerShell!
https://twitter.com/jeffteper/status/1045159986291200000?s=20

Enable-CommSite -url https://yourtenant.sharepoint.com $username [email protected] $password puppies123

Note: this might be the tenant admin url? https://yourtenant-admin.sharepoint.com

This new PS command is not yet publicly available. We just demo’ed it at this session in Ignite. (link: https://myignite.techcommunity.microsoft.com/sessions/65744) myignite.techcommunity.microsoft.com/sessions/65744. We hope to start rolling this out to customers by the end of 2018. Thank you for the enthusiasm and interest.

My old post-

I really enjoy the new Modern experience of SharePoint Online communication sites; however, this requires creating a new SharePoint Online site collection at /sites/new site for the path. The client requested to have the root site branded with the Modern experience. However, while I was able to get the page to appear as the modern experience, I could not match it to the new modern communication sites template 100%. Please post any comments if you have any suggestions to convert the root site to match the communication site look and feel.

SharePoint Online Admin center settings

In the SharePoint Online Admin Center, make sure these settings are all default:

SharePoint Lists and Libraries experience New experience (auto detect)

SharePoint Online root site settings

Next, navigate to your root site, yourcompany.sharepoint.com.

Note how the Modern Experiences is only enabled on lists and libraries by default now days:

To create your first modern page, go to your Pages library. From here, you can create a new “Site Page” which contains all of the new modern page experiences:

Now you can add modern web parts, edit layouts, etc.:

Once finished, publish the page.

Setting modern page as homepage

Go to the pages library, then set the new modern page you published as the homepage by clicking “Make homepage”:

Removing left Quick Launch navigation, attempting to match a classic site to a modern communication site (fail)

The page is now modern, but the quick launch is showing. Modern communication sites do not have this.

This is not easy, unless you want to cheat with CSS. But my goal is to replicate the OOTB new Modern communication site experience on classic pages.

I compared the Site Features between a Classic site and a New Modern Communication Site:

The classic site has the following Site Features activated:

Classic Feature Status
Getting Started Active
Mobile Browser View Active
SharePoint Server Enterprise Site features Active
SharePoint Server Publishing Active
SharePoint Server Standard Site features Active
Site Feed Active
Site Notebook Active
Team Collaboration Lists Active
Wiki Page Home Page Active

Maybe some of these features are the culprit, but nothing stood out.

When I compared the navigation, I found that the Communication sites use Current navigation across the top.

I thought this can be set by swapping the masterpage from “Seattle” to “Oslo” on the Classic site, but it did not affect the modern page I created on the classic site. Crazy.

I also noticed there is no Full Width web part on the modern experience:

So as close as you can get it OOTB is:

Update- how to add a full width web part

If you want to add full width content, you can insert a full-width layout/section to your modern page:

Once you add the full width section, you can add a Hero or Image web part. I dont like these, so I created a custom SPFx jQuery Bootstrap carousel and found a hack to allow the custom web part to appear in this special full width region:

SPFx web part full width hack:
https://blog.velingeorgiev.com/how-add-spfx-webpart-full-width-column

Then, I can add custom HTML/CSS/jQuery to the full width region.

I sometimes copy the home.aspx over and over for subpages so I don’t get the big ugly image banner like I would get OOTB on subpages.

Here is an example of something our team has worked very hard on. I have 1 SPFx web part for the carousel (full width hack) and a SPFx extension for the footer. I sanitized it a lot and excluded a lot of the other web parts due to the data:

SPFx SharePoint full width web part carousel slider

Closing thoughts

If anyone knows how to move the left Quick Launch to under the Site title to match the Communication site template, let me know. Also post any comments about other differences you find between the Modern page on a classic site vs the new Modern communication sites (aside from the O365 group).

SharePoint Server Trail period reinstall fix

Today, I was hit with a SharePoint error on a developers VM when I tried to create a new Site Collection in Central Admin:

Sorry, something went wrong

The trial period for this product has expired.

When I tried to view a teamsite homepage, I received this error:

Sorry, something went wrong

The “SiteFeedWebPart” Web Part appears to be causing a problem. Object reference not set to an instance of an object.

Web Parts Maintenance Page: If you have permission, you can use this page to temporarily close Web Parts or remove personal settings. For more information, contact your site administrator.

Obviously, things were not looking good for me.

I tried rebooting, IIS resets, PSConfig, dismounting my content DB and creating a new one, all with no luck.

I thought perhaps it was because I reset my service account passwords (back to the same password due to a time crunch recently) and maybe that was causing the service accounts to have issues, but I didn’t think that was the problem.

Credit to other bloggers

Luckily, I found a few blogs that reminded me I used a SharePoint Trial media to install these developer VMs. AAH HA! But, I cringed thinking I would have to dismount my farm db, reinstall my binaries, and face any challenges from that potential nightmare process. I WAS ABLE TO SOLVE IT!

First, this blog post showed me where to upgrade the SharePoint product key. I went on MSDN, got my key, and updated my version. They key I had previously was giving an error, so try a few different versions of your keys. https://blog.devoworx.net/2017/02/25/extend-sharepoint-trial-period/

Second, this blog post had me run PSCONFIG with a better flag to reset security, http://alstechtips.blogspot.com/2014/01/error-trial-period-for-this-product-has.html

How to fix these errors

First, go to Central Admin > Upgrade and Migration > Convert Farm license type.

Enter your SharePoint Server 2013 product key from MSDN. In my case, I used SharePoint Server 2013 with Service Pack 1- Enterprise key from MSDN.

Note: If you try downgrading Enterprise to Standard, you get this error, so use an Enterprise Key:

This product key cannot be used to convert SharePoint Server Trial with Enterprise Client Access License to SharePoint Server with Enterprise Client Access License.

Once it takes, you will get a success message:

Part 2-

Now that the key is set, you need to run PSConfig, but with a parameter.

Launch command prompt (or PowerShell) as administrator, change your directory to where PSCONFIG.exe is located, mine is in “C:\Program Files\Common Files\microsoft shared\Web Server Extensions\15\BIN”

Run the following command:

.\psconfig -cmd secureresources

It takes about 10 minutes or so.

Finally, kick off an IISReset:

DONE! Now you can create a site collection in Central Admin:

You SharePoint farm is no longer in trial.

Please post any comments below.

SharePoint Server- Renewing SSL certificates quickly

A week ago, my wildcard SSL certificate expired on GoDaddy. It was automatically purchased, but I still had to validate my domain and download a new IIS CER certificate request file.

My old post from a few years ago has some good info on certs, the file types, etc. https://eschrader.com/2014/09/23/sharepoint-2013-iis7-nlb-ssl-certificates-and-godaddy/

This is a quick guide.

The only issue I have with this quick renewal is that I could not export the certs as a PFX, but I was able to get them installed on the server in IIS by completing a CSR

Here are the steps:

GoDaddy automatically renews SSL certificate

GoDaddy has renewed your SSL certificate, but you have to verify your domain using a TXT record they give you (@ is the host field).

Once you verify, you can download the certificate. Note, this is a CER which is a certificate request that has to be completed in IIS.

Download the certificate for IIS

Copy and extract the zip to the server

I chose to delete my old certificates from my computers Personal certificate store.

Once removed, I go into IIS and go to Server Certificated under the machine:

Once in Server Certificates in IIS, click on Complete Certificate Request:

Change the file type to *.* (All files) and find your CER file you copied over:

Enter your certificates friendly name (mine is a wildcard, so I use *.mydomain.com):

Next, go to your SharePoint IIS web apps that use this host header (could be more than one) and edit the bindings and select the new certificate. If you see multiple, this is why I deleted them in my step above. If you get an error saying change this will leave behind an old certificate of the same name, just double check the other web applications in IIS to make sure they are set correctly. Updating one should update them all, but I always check each site in IIS.

That’s it! The certificate is update.

The bad thing is I have to repeat the IIS complete CSR steps on each machine. I would rather export the first one and import PFX certificate files to my other machines, but hey, this is how I got it to work.

Leave any comments below, thanks!

SharePoint Online global navigation across site collections, with highlighting and security trimming

One common request when working with SharePoint sites is having a consistent navigation across multiple site collections. If you are using a Publishing Portal site template, you can use the Managed Navigation for your Global Navigation (or top navigation). This also supports drop downs. I did a quick test and it appears to support highlighting of the current element, which is nice considering the URLs are hard coded rather than dynamically added.

As for security, MS indicates the term store navigation supports security trimming as follows: “Note that if users don’t have access to the physical .aspx page (read permissions at least), the link won’t appear in menus even if these options are checked. By this way you can also control links displayed to users according to permissions. It follows the same behavior as the default SharePoint navigation menus.”

The drawback: You have to create a term set in each site collections Managed Navigation, pin EACH of your parent term navigation items (but it includes child terms at least). Its a lot of work, but the only way without custom code. Other options I have seen discussed are using Search web parts or CSOM, etc. Possibly 3rd party solutions. This does not work on new modern team sites (at least at the time of writing this), I get “access denied” when trying to enable Managed Navigation, even after turning on Publishing for the site/web.

Managed Navigation:

Under the target site collection(s), configure your navigation from Site Settings

Ensure Managed Navigation is checked under Global Navigation:

Uncheck:

Next, rather than creating a new term set from the site collection, do it in SharePoint Admin Center.

Go to the Admin tile:

Go to SharePoint under Admin Centers:

Select Term Store on left navigation:

Add your organizational tenant email to Term Store Administrators, save and reload the page.

Then, select the root term store for your O365 tenant, and select New Group:

Type in the orange input box, call it Navigation or something unique:

Select your new term group, and add yourself as a Group Manager and Contributor:

Create new Term Set under the group:

I just called mine Sites, but this is the actual element you will be selecting for your navigation. All child terms will appear in the actual navigation menu.

Then, select the sites element and add yourself as Owner, Contact and Stakeholder and SAVE:

Go to the Intended Use tab at the top, and enable “Use this Term Set for Site Navigation”:

Note: I also see faceted navigation, which IF the product catalog is now possible in SharePoint Online I will do another post soon, as I have been waiting years for this. I remember the roadblock was something with search managed properties…

Then under your term set, add your terms by selecting Create Term:

Go to Navigation tab and add your custom link:

You can create sub terms under terms as well to enable a drop-down navigation.

You can re-order terms in a group by selecting the group and going to Custom Sort:

Now just repeat the first step of selecting Managed Navigation and the Term Group on each of your site collections you want to inherit this navigation.

Update: Selecting this term set is limited to 1 per site collection. So the workaround acording to MS is to “Pin” each of your primary terms (with children) to the new site collections term set. https://support.microsoft.com/en-us/help/3144166/implement-global-navigation-across-multiple-site-collections-through-managed-navigation-in-sharepoint-server-2013 see steps 5-7 One note, it doesn’t seem to preserve custom sorting from the parent term set.

Uncheck:

Done!

Note: if you see any errors (such as Error loading navigation: The Managed Navigation term set is improperly attached to the site), switch the navigation to Structural on BOTH Global and Current, SAVE the changes, then change it back to Managed (and uncheck Add new pages to navigation automatically and Create friendly URLs for new pages automatically) and the error should go away.

Uncheck:

Using Visual Studio Team Services build tasks for Linux over SSH

We use Visual Studio Team Services for source code on a LAMP stack Azure VM. When deploying via VS TS and copying the files over SSH through VS TS, I had a few challenges to automate the build/deployment process. Here is how I set things up.

  1. Check your files into source control (PHP files, web assets, etc.)
    1. I manually configured the deployment of 4 environment VMs for Dev, INT, STG, PRD using 4 instances of Azure Ubuntu Linux VMs.
    2. I manually deployed machine specific content, such as config files to the server. I later filter these files out of the deployment if they are in the web root. For security, I keep these files outside of the web root.
  2. Create Build definition (one for each environment, DEV, INT, STG, PRD)
    1. Use an Empty Process
      1. Under Get Sources, say This Project and chose the repository.
      2. Add a task to Copy files securely over SSH
      3. On the SSH endpoint, click the gear to configure your endpoints:
      4. Add SSH endpoints with your key file and IP, etc.
      5. Select your endpoint and apply chose your web root from your project under Source Folder. Also, under Contents, apply any filters: (below, ** is everything, then we filter out files/folders using !**/)

        I use the following filter examples:
        **
        !**/old_code/*
        !**/old/file.txt

    2. I added two SSH commands to set permissions before/after the copy
    3. You can choose a Shell Script and provide environment specific variables, such as a user.
    4. I have my resetperms.sh script in Source Control as well. This uses the same user as VS uses to overwrite files, then after the deployment, I use a second script to set my special permissions. The second script I will not post since it is specific to my application, and for security reasons. $1 is the argument I pass in for the user, who I set as owner recursively for all web files during deployment.
    #!/bin/bash
    # Reset permissions before TFS deployment
    echo “Reset permissions before TFS deployment”
    if [ “$1” != “” ]; then
    echo “Ready, Positional parameter 1 contains user $1”
    echo “Resetting permissions to $1 for TFS deployment”
        sudo chown -R “$1″:”$1” /var/www/html
    else
    echo “Fail, Positional parameter 1 is empty. Please pass in the environments user”
    fi
    1. One important note, on Windows when I created the script as resetperms.sh in NotePad++, you have to go to Edit -> EOL Conversion (thanks to this article http://stackoverflow.com/questions/8195839/choose-newline-character-in-notepad )
    2. Otherwise, you will get the following error:

      Build
      ./resetperms.sh: line 2: $’\r’: command not found
      ./resetperms.sh: line 10: syntax error: unexpected end of file
      Command failed with errors on remote machine.

That’s it, then save and queue a new build!

Much easier than copying files via FTP. Now I can click a button and update my application in each environment. Next steps are to automate the testing, release process.

More on SSH with Visual Studio Team Services https://www.visualstudio.com/en-us/docs/build/steps/deploy/ssh

Note: you can also have a build definition trigger the release definition to copy the files over SSH, etc. This is the way the Azure Portal sets up Continuous Delivery for Web Apps.


SharePoint 2010 Content Deployment Job failed. The remote upload web request failed. The remote server returned an error: (404) Not Found.

Summary

My farm content deployment jobs had been working, but all of a sudden stopped one day. The end fix was to edit a Central Admin web.config file upload size on the target WFE servers.

Issue

I was seeing the following errors in my ULS logs after 23 minutes of packing up just under 1gb of content from QA to PRD:

  • ContentDeploymentJob.ExecuteJob(): Failed ExecuteJob() with JobInfo: Name: ‘QA to Prod Job’, Id:’5db43c5d-1c3b-41cd-ac0a-495a48acb175′, JobType:’ServerToServer’, Description:”. Exception: ‘System.Net.WebException: The remote server returned an error: (404) Not Found.
  • Failed to transfer files to destination server for Content Deployment job ‘QA to Prod Job’. Exception was: ‘System.Net.WebException: The remote server returned an error: (404) Not Found.

In central admin, I was receiving this error after 23 minutes of running the job:

  • Content deployment job ‘QA to Prod Job’ failed.The remote upload Web request failed.

Resolution

Thanks to this article, I figured out the issue was the max upload size of the Central Admin web config on the target server WFE’s: https://social.msdn.microsoft.com/Forums/sharepoint/en-US/1d4aca49-40c1-414e-980e-150b148caf10/content-deployment-problems?forum=sharepointgeneralprevious

This is what finally worked for me, On the target WFE(s) modified web.config same as above:

  1. On target WFE(s), Edit the web.config file located in C:\Program Files\Common Files\Microsoft Shared\Web Server Extensions\14\TEMPLATE\ADMIN\Content Deployment

    <httpRuntime maxRequestLength=”307200” />

    <requestLimits maxAllowedContentLength=”314572800” />

    1. old values (for backup purposes)

      <httpRuntime maxRequestLength=”102400″ />

      <requestLimits maxAllowedContentLength=”104857600″ />

  2. On target WFE(s), perform an IISreset
  3. Launch the CDP job again and it should run.

Azure Linux Ubuntu disk space full

I noticed our dev team had some issues with our disk space on an Azure VM saying the disk was full. I saw something in Linux called dev/sba1 that was taking up all my space and my disk was full. Why was my Linux storage space low?

Our website is only 5-6GB in size, so I knew something was wrong. Our VM in Azure is a DS12v2 with 56GB ram and 128GB SSD.

We are running the Ubuntu 14 OS image from Azure and are using it as an Apache web host.

When I ran a “df” (Disk Filesystem) command to check the free space, one of the volumes was huge and at 97%

$ sudo df -h

Filesystem Size Used Avail Use% Mounted on

udev 28G 12K 28G 1% /dev

tmpfs 5.6G 432K 5.6G 1% /run

/dev/sda1 29G 27G 1.1G 97% /

none 4.0K 0 4.0K 0% /sys/fs/cgroup

none 5.0M 0 5.0M 0% /run/lock

none 28G 0 28G 0% /run/shm

none 100M 0 100M 0% /run/user

none 64K 0 64K 0% /etc/network/interfaces.dynamic.d

/dev/sdb1 111G 60M 105G 1% /mnt

Run a sudo df -h (h stands for human readable)

I am still not 100% clear on this, but some of these above results are different disk partitions that are mounted via symbolic names, similar to how a disk in Windows can be partitioned into C, D drives, etc.

The Azure VM had one OS VHD assigned to it, which should be 128GB.

So, I focused in on the /dev/sda1 filesystem. I had no clue what this was at first, but after looking into it, it might be my VHD mounted to my VM’s primary root drive (/). (Please correct me if I am wrong). In “sda1“, The “sd” stands for SCSI device (which is now any attached device, could be USB, SATA, IDE, etc.), the “a” stands for the attached device order (a is first, b is the second device, etc.) and the “1” indicates the partition on that device (think of a hard drive partitioned into 1, 2, 3 different partitions.) (thanks to this article for the explanation http://superuser.com/questions/558156/what-does-dev-sda-for-linux-mean)

For me, I only have one sd device and one partition, so I assume that’s my Azure VM OS VHD that should have been 128GB. But why was it only 29GB?

WELL! All Linux OS vm partitions come as 30GB allocated.

How do I get all my GB’s? Add a second drive for my data? No, just resize the primary partition.

I read this article (https://blogs.msdn.microsoft.com/cloud_solution_architect/2016/05/24/step-by-step-how-to-resize-a-linux-vm-os-disk-in-azure-arm/) about resizing an Azure VHD and thought “ooh God, I am going to scrap my entire OS partitions data if this goes wrong or if I get stuck in these steps…” but after reading the top, UBUNTU automatically resizes the Linux partition on boot! YES! All I have to do is reboot! But, I just rebooted and that didn’t resize the partition….

The Problem: When browsing the Azure portal, I noticed my VM disk size was blank, and where I could select 128/256 or 512GB, none were selected. So, I thought “maybe Azure doesn’t automatically define a default OS disk size of 128GB since machine sizes can go up or down dynamically.”

These machines will have 128GB OS disks allocated to them, so I wanted to set them to the full 128GB (I can go up in size, but not down).

Problem: my OS disk size is not selected, so Ubuntu cannot automatically resize the partition (I think the VHD is dynamically allocated at this point)

Solution: How to add more space in the Azure Portal easily with a Linux Ubuntu VM

  1. Turn off the VM
  2. Select the disk size for the OS disk (I used 128GB)
  3. Turn it on.

BAM! You now have more space.

Run the “df -h” command again after the VM comes back online and see a 126GB of space at the root! Done!

$ sudo df -h

Filesystem Size Used Avail Use% Mounted on

udev 28G 12K 28G 1% /dev

tmpfs 5.6G 416K 5.6G 1% /run

/dev/sda1 126G 5.8G 116G 5% /

none 4.0K 0 4.0K 0% /sys/fs/cgroup

none 5.0M 0 5.0M 0% /run/lock

none 28G 0 28G 0% /run/shm

none 100M 0 100M 0% /run/user

none 64K 0 64K 0% /etc/network/interfaces.dynamic.d

/dev/sdb1 111G 60M 105G 1% /mnt

If you don’t have Ubuntu, you have more steps to do to resize the Linux OS partition. I haven’t done it, but this seems like a good place to start: https://blogs.msdn.microsoft.com/cloud_solution_architect/2016/05/24/step-by-step-how-to-resize-a-linux-vm-os-disk-in-azure-arm/

Please leave any comments if you know more about the df command results, the sda1, Azure VM OS disk sizes, Linux partitions, etc. I am always learning.

References that helped me get here:

Search Result preview images in SharePoint Online

SharePoint search results OOTB do not display image previews until you hover. We wanted to have a baseball card type approach to display certain items.

Here is an unfinished example of the results displayed as cards with image previews and the OOTB hover panel:

  1. Make sure the site is a publishing portal and publishing features are enabled at the site collection and site level. In order to get the Search Display templates to display the *.html files in the masterpage gallery, some of these features have to be on. Otherwise you just have *.JS files which can limit you. Just ask me under comments if you have any questions.
  2. Modify your Search display template for result items:
    1. /_catalogs/masterpage/Forms/Display%20Templates.aspx
    2. I modified Item_CommonItem_Body.html.
  3. Edit Item_CommonItem_Body.html properties and add the following property:
    1. ServerRedirectedPreviewURL
    2. (properties are separated by a comma, and surrounded by single quotes. So the exact text I added to the end was ,’ ServerRedirectedPreviewURL’ (but replace my blog posts fancy quotes)
  4. Edit the Item_CommonItem_Body.html file (I open with Explorer and edit the file in notepad++)
    1. Verify the property was added:

    2. Next, add a JavaScript tag to store the Preview Image URL as a web safe string:

      imageurlpreview = $htmlEncode(ctx.CurrentItem.ServerRedirectedPreviewURL)

    3. Now, let’s add in our custom HTML. This is kinda “hacky” since I am using this site for a proof of concept and I don’t care if these customizations exist everywhere in my test site collection. Ask me below in comments if you want to know how to copy this file and isolate the results to use this custom template using result types or a custom search results page.
        1. I scrolled down to the first HTML div I found, “ms-srch-item-body”. Right above this, I added my custom Baseball Card HTML. Then I moved the rest of this stuff in except for the closing div tag.
        2. The main thing was this line to add the new JavaScript for the image:

          <img src=”_#= imageurlpreview =#_” alt=”Preview” />

          Here is my baseball card HTML (including the preview image)

          [code language=”html” highlight=”7,30″]
          <div class="cbs-PictureCardsContainer">
          <div class="cbs-PictureCardsImageContainer">
          <a title="Title here" class="cbs-pictureImgLink" href="#">
          <div class="cbs-PictureCardsImage">
          <img src="_#= imageurlpreview =#_" alt="Preview" /></div>
          <div class="sts-cardtype sts-cardtypeidea">
          Type</div>
          </a></div>
          <div title="" class="cbs-pictureCardsCategory ms-noWrap">
          Category</div>
          <div class="cbs-PictureCardsDataContainer">
          <a title="Title here" class="cbs-PictureCardsLine1Link" href="#">
          <div class="cbs-PictureCardsTitle ms-noWrap">
          Pic title</div>
          </a>

          Move all of the OOTB stuff here, starting with the div ms-srch-item-body
          <div title="" class="cbs-PictureCardsDesc">
          Description of image</div>
          </div>
          </div>
          [/code]

        3. Now Save the display template HTML file and publish ONLY the HTML file from the browser (the JS file gets automatically updated instantly):

      Add the baseball card CSS to your result page and you should be good. Again, the element selector (ms-srch-item) for floating these elements is a bit hokey, I could have modified the Control_SearchResults and individual Item templates but this is just a POC.

      [code language=”css” highlight=”2″]
      /* Cards */
      .ms-srch-item {
      width:240px;
      display:inline;
      float:left;
      margin:11px;
      border: 1px solid #DDD;
      clear:none;
      }
      .cbs-PictureCardsImageContainer{
      height:240px;
      border-top-left-radius: 9px;
      border-top-right-radius: 9px;
      width:240px;

      }
      .cbs-PictureCardsImage {
      height:240px;
      overflow:hidden;
      width:240px;

      }
      .cbs-noImageContainer-ContentWrapperLarge {
      display:none;
      }
      .cbs-PictureCardsDataContainer {
      padding: 8px 22px 0px 22px;
      background-color: #f8f8f8;
      color: #212121;
      }
      .cbs-PictureCardsDataContainer a, .cbs-PictureCardsDataContainer a:active, .cbs-PictureCardsDataContainer a:hover, .cbs-PictureCardsDataContainer a:visited {
      color: #212121;
      }
      .cbs-pictureCardsCategory {
      background-color:#666;
      color: #FFF;
      font-weight: bold;
      font-size: 12px;
      padding: 8px 22px 8px 22px;
      border-top:1px solid #FFF;
      }
      .cbs-PictureCardsTitle {
      font-weight: bold;
      }
      .cbs-PictureCardsDesc {
      height: 75px;
      overflow:hidden;

      }

      .sts-cardtype {
      position:relative;
      top:-18px;
      left:120px;
      text-align:center;
      height: 18px;
      width: 120px;
      color:#000;
      font-weight:bold;
      }

      .sts-cardtypeidea {
      background-color:#a8da69;

      }

      .cbs-PictureCardsIconSection {
      float:left;
      margin-top:8px;
      margin-bottom:8px;
      }
      [/code]

    4. Check in and publish your custom result page (the custom ASPX page with all of your search refiners, result web part, search box, above CSS, etc.) and you should be good.