SharePoint Server Trail period reinstall fix

Today, I was hit with a SharePoint error on a developers VM when I tried to create a new Site Collection in Central Admin:

Sorry, something went wrong

The trial period for this product has expired.

When I tried to view a teamsite homepage, I received this error:

Sorry, something went wrong

The “SiteFeedWebPart” Web Part appears to be causing a problem. Object reference not set to an instance of an object.

Web Parts Maintenance Page: If you have permission, you can use this page to temporarily close Web Parts or remove personal settings. For more information, contact your site administrator.

Obviously, things were not looking good for me.

I tried rebooting, IIS resets, PSConfig, dismounting my content DB and creating a new one, all with no luck.

I thought perhaps it was because I reset my service account passwords (back to the same password due to a time crunch recently) and maybe that was causing the service accounts to have issues, but I didn’t think that was the problem.

Credit to other bloggers

Luckily, I found a few blogs that reminded me I used a SharePoint Trial media to install these developer VMs. AAH HA! But, I cringed thinking I would have to dismount my farm db, reinstall my binaries, and face any challenges from that potential nightmare process. I WAS ABLE TO SOLVE IT!

First, this blog post showed me where to upgrade the SharePoint product key. I went on MSDN, got my key, and updated my version. They key I had previously was giving an error, so try a few different versions of your keys. https://blog.devoworx.net/2017/02/25/extend-sharepoint-trial-period/

Second, this blog post had me run PSCONFIG with a better flag to reset security, http://alstechtips.blogspot.com/2014/01/error-trial-period-for-this-product-has.html

How to fix these errors

First, go to Central Admin > Upgrade and Migration > Convert Farm license type.

Enter your SharePoint Server 2013 product key from MSDN. In my case, I used SharePoint Server 2013 with Service Pack 1- Enterprise key from MSDN.

Note: If you try downgrading Enterprise to Standard, you get this error, so use an Enterprise Key:

This product key cannot be used to convert SharePoint Server Trial with Enterprise Client Access License to SharePoint Server with Enterprise Client Access License.

Once it takes, you will get a success message:

Part 2-

Now that the key is set, you need to run PSConfig, but with a parameter.

Launch command prompt (or PowerShell) as administrator, change your directory to where PSCONFIG.exe is located, mine is in “C:\Program Files\Common Files\microsoft shared\Web Server Extensions\15\BIN”

Run the following command:

.\psconfig -cmd secureresources

It takes about 10 minutes or so.

Finally, kick off an IISReset:

DONE! Now you can create a site collection in Central Admin:

You SharePoint farm is no longer in trial.

Please post any comments below.

SharePoint Server- Renewing SSL certificates quickly

A week ago, my wildcard SSL certificate expired on GoDaddy. It was automatically purchased, but I still had to validate my domain and download a new IIS CER certificate request file.

My old post from a few years ago has some good info on certs, the file types, etc. https://eschrader.com/2014/09/23/sharepoint-2013-iis7-nlb-ssl-certificates-and-godaddy/

This is a quick guide.

The only issue I have with this quick renewal is that I could not export the certs as a PFX, but I was able to get them installed on the server in IIS by completing a CSR

Here are the steps:

GoDaddy automatically renews SSL certificate

GoDaddy has renewed your SSL certificate, but you have to verify your domain using a TXT record they give you (@ is the host field).

Once you verify, you can download the certificate. Note, this is a CER which is a certificate request that has to be completed in IIS.

Download the certificate for IIS

Copy and extract the zip to the server

I chose to delete my old certificates from my computers Personal certificate store.

Once removed, I go into IIS and go to Server Certificated under the machine:

Once in Server Certificates in IIS, click on Complete Certificate Request:

Change the file type to *.* (All files) and find your CER file you copied over:

Enter your certificates friendly name (mine is a wildcard, so I use *.mydomain.com):

Next, go to your SharePoint IIS web apps that use this host header (could be more than one) and edit the bindings and select the new certificate. If you see multiple, this is why I deleted them in my step above. If you get an error saying change this will leave behind an old certificate of the same name, just double check the other web applications in IIS to make sure they are set correctly. Updating one should update them all, but I always check each site in IIS.

That’s it! The certificate is update.

The bad thing is I have to repeat the IIS complete CSR steps on each machine. I would rather export the first one and import PFX certificate files to my other machines, but hey, this is how I got it to work.

Leave any comments below, thanks!

SharePoint 2013 Newsfeed – We’re still collecting the latest news error

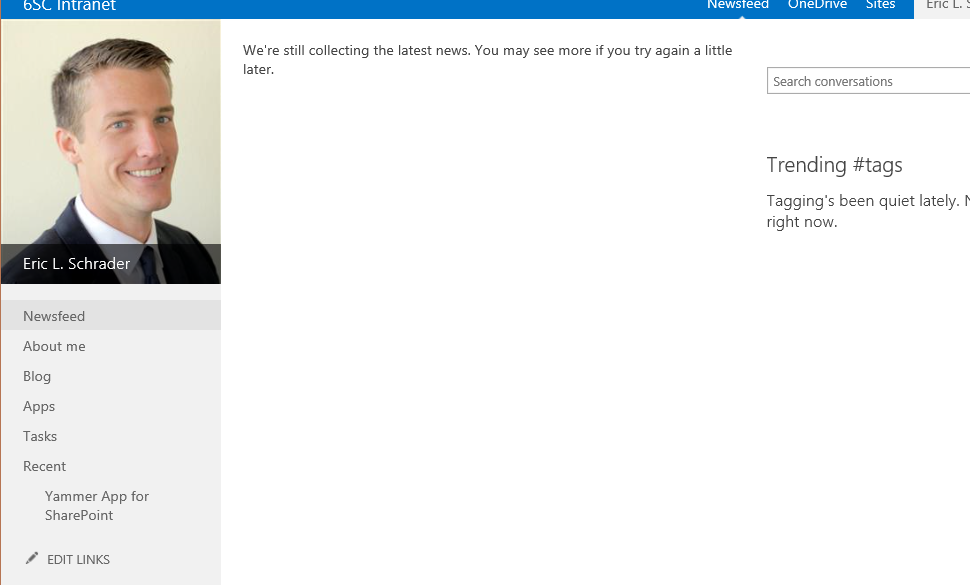
If you are a SharePoint admin or use, you have probably seen this error message on your SharePoint 2013 MySite Newsfeed:

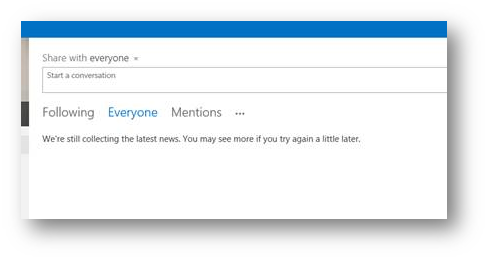
“We’re still collecting the latest news. You may see more if you try again a little later.”

sharepoint 2013 mysite company newsfeed error -Were still collecting the latest news

Hopefully this article will help explain a few common scenarios I have ran into, and how to resolve any errors. Please post if you have any tips or suggestions, as I am always looking for thoughts from the community on this.

This article will address:

  • Common reasons for newsfeed data not displaying
  • What is distributed cache?
  • Distributed cache configuration
  • Shutdown/Reboot WFE procedure for maintenance so you don’t lose your cache
  • Repopulating cache (if server stopped unexpectedly)
  • References

Common reasons for newsfeed data not displaying

  1. Someone rebooted all your Distributed Cache servers at the same time
    1. Check the task manager uptime to see how long the servers with distributed cache have been running, or if they were rebooted unexpectedly
    2. Fix: Repopulate cache using PowerShell, or maybe wait a long time for new news
    3. Prevent it from happening again: Shut down one server at a time, stopping the cache first, rebooting, and then starting the cache again.
  2. “Everyone” is empty because it only keeps company conversations for 14 days by default.
    1. Fix: Increase the retention time, or encourage people to post to the company newsfeed (not site newsfeeds). See this article for more information on what appears in site newsfeeds vs company newsfeeds. https://support.office.com/en-za/article/What-items-appear-in-your-newsfeed-bd3d9268-0408-4ad4-bc51-2e4ec5406e16#__toc327280723
  3. Distributed cache is not configured right
    1. Fix: Configure it right J this one is so simple, yet so difficult I find. See configuration below.

What is distributed cache?

Distributed cache is a framework Microsoft uses to quickly host social information in SharePoint within the SP servers ram. This can be enabled on one or many SP servers in your farm.

Official definition can be found on this poster, https://www.microsoft.com/en-us/download/details.aspx?id=35557

What uses distributed cache?

Pretty much anything social, but some of the social data comes from content databases and user profile databases. Company newsfeed posts are stored in distributed cache.

  • Newsfeeds
  • Authentication
  • OneNote client access
  • Security Trimming
  • Page load performance

Distributed cache configuration

Note: Run any scripts/commands logged in as the SPFarm account, and be sure to run SharePoint Management Shell as administrator if you have UAC enabled (like a good administrator)

Caution: configuration deletes the cache, so you will need to repopulate the cache after configuring it.

Determine servers to host the distributed cache service

Usually the WFE servers, not servers running search or excel. AutoSPInstaller has a limit of 4 servers, but typically it does not configure distributed cache correctly.

Configuring Distributed Cache

There is a good article here on these commands, https://technet.microsoft.com/en-us/library/JJ219613.aspx and probably better than this article I am writing. But it’s very long so I wrote this article to get Admins 90%-100% of the way there.

Here is how I have been configuring distributed cache. Thanks Jon for the help!

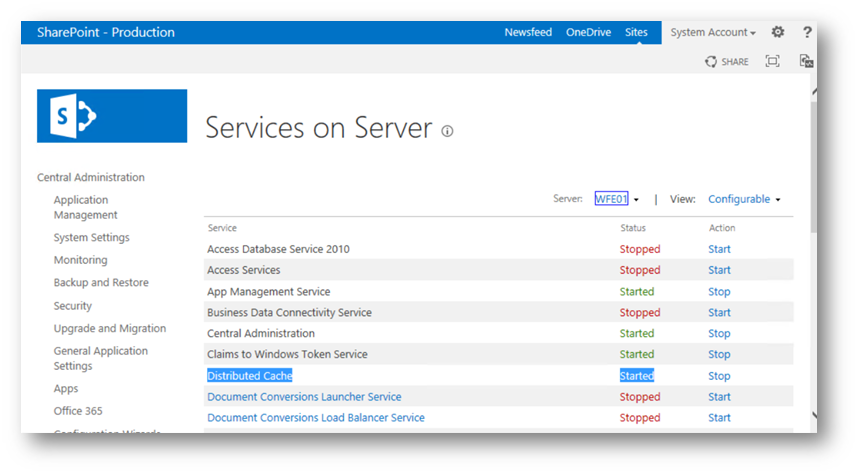
  1. Use Central Admin or PowerShell to start/stop the SharePoint Distributed Cache service on the desired servers in your farm (usually WFE’s).
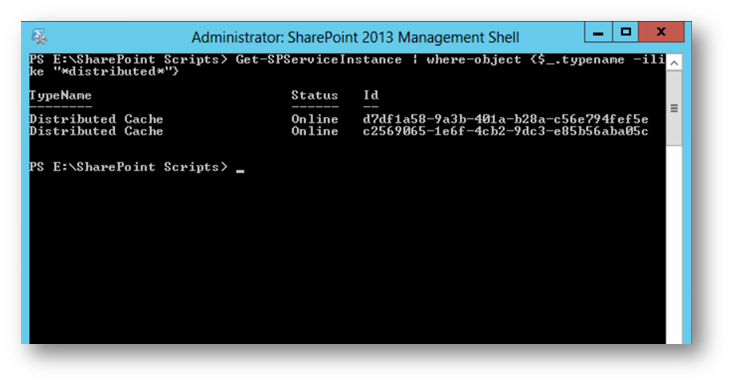
    1. Or you can use PowerShell to get/start-spserviceinstance of Distributed Cache on the desired servers. I like to use PowerShell to see what servers are running Distributed Cache within my farm:
      1. Get-SPServiceInstance | where-object {$_.typename -ilike “*distributed*”}
  2. Verify Cache service is running on desired servers:
    1. Use-CacheCluster
      1. Note, this command doesn’t configure the server, but just connects the current PowerShell session to manage the cache cluster it’s joined for the PowerShell management session. It’s actually an alias command for Connect-AFCacheClusterConfiguration.
    2. Get-CacheHost
    3. You should see each server running distributed cache listed above. If not, there might be more work to configure the cache cluster I may have missed in this post. Let me know!
  3. Get current configuration
    1. Get-AFCacheHostConfiguration -ComputerName wfe01 -CachePort “22233”
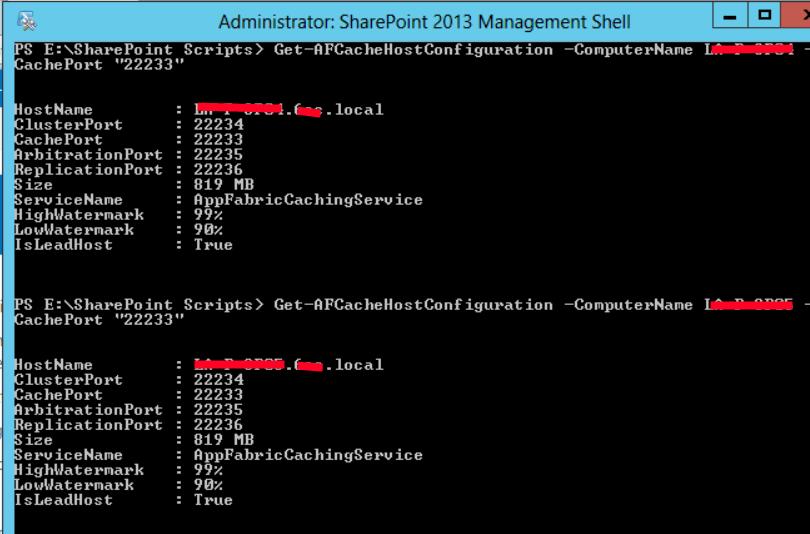
    2. The Cache Size can be updated, see guide here https://technet.microsoft.com/en-us/library/JJ219613.aspx#memory . For 16GB of ram on our WFE servers, we go with 819MB (~5% of 16GB). Note, changing this requires the distributed cache service to be stopped on the computer you are changing it on. Update-SPDistributedCacheSize -CacheSizeInMB 819
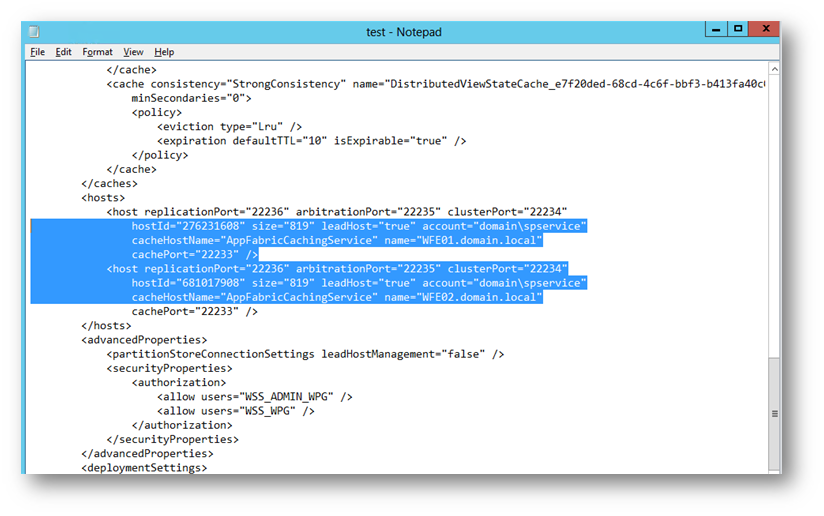
  4. Export config, verify service account for distributed cache, as well as servers.
    1. Export-CacheClusterConfig -Path C:\test.xml
      1. Check max cache size (default is 5% -, no more than 4GB – size depends on services on the server)
      2. Check servers – ensure only WFE (or desired servers are in the cluster)
      3. Check service account – ensure all servers use the same service account (spservice)
      4. Check ports
  5. Warning: After configuration is complete do not ever run Add-SPDistributedCacheServiceInstance or Remove-SPDistributedCacheServiceInstance. It reconfigures the cluster (and usually incorrectly)

Shutdown/Reboot WFE procedure

If you have to do reboots on the WFE for Windows Updates, etc., you might be expecting to lose your Newsfeed cache. Here is the proper procedure to retain the cache.

Summary: shutdown the cache one server at a time, reboot that server, add the server back into the cache cluster. Repeat on next server.

  1. Verify Cache service is running on desired servers (more than one server too is key):
    1. Use-CacheCluster
    2. Get-CacheHost
  2. Reboot SQL Server first if needed. Get this out of the way.
    1. Wait for SQL Server to come back online
  3. Reboot WFE1
    1. Perform these commands on WFE1
    2. Verify Cache service is running on desired servers (more than one server too is key):
      1. Use-CacheCluster
      2. Get-CacheHost
    3. Run Stop-spdistributedcacheserviceinstance -graceful
    4. Verify Cache service is stopped on WFE1. Ensure it is stopped before proceeding:
      1. Get-CacheHost
    5. Reboot WFE1
    6. Verify Cache service is running on WFE1:
      1. Use-CacheCluster
      2. Get-CacheHost
      3. If not, go to Central Admin Services on Server and start Distributed Cache service on WFE1, or use PowerShell.
  4. Reboot WFE2
    1. (Repeat above Step #3, but replace WFE1 with WFE2)
  5. Verify it is running
    1. Verify Cache service is running on desired servers (more than one server too is key):
      1. Use-CacheCluster
      2. Get-CacheHost

Repopulating cache (if server stopped unexpectedly)

Replace URL with your mysite URL. This script will populate each user’s cache using Update-SPRepopulateMicroblogFeedCache and the entire user profile newsfeed cache using Update-SPRepopulateMicroblogLMTCache. I am not sure if I stole this script from anywhere, but part of it is from various user profile scripts adapted to fix the users feed cache.

Note: Run any scripts/commands logged in as the SPFarm account, and be sure to run SharePoint Management Shell as administrator if you have UAC enabled (like a good administrator). Otherwise you will get a .ctor error that will drive you crazy.

Download the script from here: http://pastebin.com/K9yR2pEk

$proxy
= Get-SPServiceApplicationProxy | ? {$_.Name -ilike
“User Profile Service Application*”}

Update-SPRepopulateMicroblogLMTCache -ProfileServiceApplicationProxy $proxy

[System.Reflection.Assembly]::LoadWithPartialName(“Microsoft.Office.Server”)

[System.Reflection.Assembly]::LoadWithPartialName(“Microsoft.Office.Server.UserProfiles”)

$url
=
http://mysiteurl.domain.com

$contextWeb
=
New-Object
Microsoft.SharePoint.SPSite($url);

$ServerContext
= [Microsoft.Office.Server.ServerContext]::GetContext($contextWeb);

$UserProfileManager
=
New-Object
Microsoft.Office.Server.UserProfiles.UserProfileManager($ServerContext);

$Profiles
=
$UserProfileManager.GetEnumerator();

foreach ($oUser
in
$Profiles ) {


if ($oUser.item(“SPS-PersonalSiteCapabilities”).Value -eq 14 ){


$personalurl
=
$url
+
$oUser.item(“personalspace”).Value


Write-Host
$oUser.item(“AccountName”).Value

Update-SPRepopulateMicroblogFeedCache -ProfileServiceApplicationProxy $proxy -accountname $oUser.item(“AccountName”).Value


#-siteurl $personalurl

}

}

$contextWeb.Dispose()

After running the script on each WFE where distributed cache runs, wait 15 minutes for the Newsfeed data to populate.

Then test newsfeed.

References

http://consulting.risualblogs.com/blog/2014/04/01/export-impor-distributed-cache-configuration-in-sharepoint-2013/

http://sharepoint.stackexchange.com/questions/125798/userprofileapplicationnotavailableexception-logging-userprofileapplicationpro

http://netwovenblogs.com/2014/03/11/the-newsfeed-is-not-working-on-mysite-in-sharepoint-2013/

SharePoint 2013, IIS7, NLB, SSL certificates and GoDaddy Renewal Steps

Overview:

SSL certificates with SharePoint 2013 web applications expire, and when that does, you have to generate a new SSL Certificate. In this post, I will go over how to renew you SharePoint 2013 SSL HTTPS website with GoDaddy, even including multi-server Web Front End (WFE’s) topologies. If you use wildcard certificates on you SharePoint websites, there are a few gotchas when renewing. The process is similar for most certificate types, but wildcards and SharePoint are this blog posts focus. These steps are also similar if you are adding a SSL certificate to your website for the first time (once your SharePoint farm, web applications, and site collections have been configured to use HTTPS, etc.).

Here is an overview of the steps involved with the certificate renew process:

  1. Request a new certificate request from the machine running IIS/SharePoint (Pick a WFE)
  2. Go to GoDaddy and rekey your certificate, entering your certificate request text from step 1
  3. Complete the certificate request in IIS on WFE
  4. Update WFE bindings to use SSL cert
  5. Export certificate from WFE to WFE2 (PFX with personal information, create a password)
  6. Import the PFX on WFE2 IIS
  7. Update WFE2 bindings to use SSL cert

Common issues:

First, this is my experience. Comment below any corrections or other helpful information.

  • When adding the cert to IIS and refreshing, it disappears!
    • Your certificate request is expired. Generate a new one and try again.
    • You are following GoDaddys guide, which does not work. Follow my post below.
    • The cert might already exist and need to be deleted in the Certificate Manager on the server.
  • CER, CRT, PFX- what is the difference? Why do I have to select *.* if I need a specific type? Who designed this stuff…
    • CER is a request
    • CRT is a certificate without private information
    • PFX is a certificate package with private information (exported from CRT paired on the first server, the PFX is imported to the second server).
  • How do I complete a request on WFE2 if it was already completed from WFE1?
    • Export the working cert from Server 1 as a PFX file with a password, then import it on server 2 in IIS. Do not use cert manager on server 2.

Steps to renew your Existing wildcard SSL Certificate:

  1. Verify your certificate is expired by navigating to your SharePoint site. If you get an HTTPS trust warning, it’s expired or has issues that this blog post will address.
  2. Go to WFE1 IIS 7 on your SharePoint box
    1. Go to Server Certificates in IIS

    2. Remove any old certificates that contain the URL for your SharePoint site that we are renewing

    3. On the top right in IIS, go to “Create Certificate Request”

    4. Enter your information. Common name is the wildcard URL. The rest, do not use abbreviations. See this post for more info: https://support.godaddy.com/help/article/4800/generating-iis-7-csrs-certificate-signing-requests

    5. Select “4096” for the bit length

    6. Select a location/filename for the text file that is about to be generated

    7. We will be copying the contents of this file to GoDaddy to rekey our wildcard SSL certificate in the next step.
  3. Now that we have our server “key” information waiting in the text file, we can now go to GoDaddy and pair this server information to that of our SSL certificate.
    1. Go to Go Daddy Certificate Manager (Manage SSL Certificates > Manage Certificates)

    2. Select “Re-Key” on the top navigation
    3. Paste your text file contents from the IIS text file to this GoDaddy window:

    4. Select “Re-Key”
    5. Click “Manage Certificates” From the top navigation, then select “Certificates” folder on the left navigation.
    6. Select the bottom SSL certificate (the most recent version)
    7. Select “Download” icon from the navigation.

    8. Select IIS7, the “Download”

    9. Save this zip to your WFE server where you created the IIS certificate request.
    10. Extract to C:\Temp and proceed carefully to the next steps in this post.
  4. On WFE1 in IIS where you created the certificate request, open IIS 7 and follow these steps to use the certificate you downloaded from GoDaddy.
    1. Remove any old expired wildcard certificates from the WFE1 servers “Certificate Manager”, check Personal > Certificates and the Intermediate > Certificates locations

    2. COMMON GOTCHA: Do not install the cert, do it using IIS.
    3. Go back to “Server Manager” in IIS 7, select “Complete Certificate Request” on the right navigation

    4. Enter the information for the Certificate request as follows:

    5. COMMON GOTCHA: Select *.* when browsing for the CRT file from the GoDaddy zip

    6. Friendly name must be the wildcard URL of the domain.
    7. Click OK.
    8. Refresh the Server Manager to verify the certificate “stays”. If it disappears, you either have:
      1. A certificate in your Personal Certificate store with the same friendly name
      2. An expired or old Certificate Request you generated and downloaded, or you downloaded an older certificate from GoDaddy. Repeat these steps and it will work (it should).
  5. Set the IIS binding of the new certificate to your SharePoint 443 SSL HTTPS website in IIS:
    1. Go to IIS 7 > Sites > select the SharePoint site that uses the wildcard cert.
    2. Select “Bindings” on the right with the website selected.


    3. Select “Edit” and select the new SSL certificate

    4. Select OK. On WFE2, you will get an error here trying to use an exported PFX file, follow the next steps to fix WFE2.
    5. Verify the site loads on WFE1 if you can control your DNS/NLB routing.
  6. If you have additional WFE servers, you need to export this new verified SSL certificate to IIS. Here is how.
    1. From WFE1, Go to “Server Certificates”, right click the wildcard cert and select “Export”

    2. Pick a location for the new PFX file, then enter a secure password.

    3. Click OK
    4. Copy the PFX file to WFE2 through Explorer or any other method.
    5. On WFE2, go to IIS 7 > “Server Certificates” and select “Import”


    6. Browse to the PFX file copied over from WFE1, enter your password and select OK.
    7. Refresh “Server Certificates” to verify it is still available.
    8. Repeat the import process in IIS on other WFE servers.
  7. Now that the certificate is available on the other WFE’s in IIS, we need to update the bindings. Same process as the first WFE.
    1. (Copied and pasted from WFE1 steps, but perform these on the WFE2 and additional servers once the certificate is imported)
    2. Go to IIS 7 > Sites > select the SharePoint site that uses the wildcard cert.
    3. Select “Bindings” on the right with the website selected.


    4. Select “Edit” and select the new SSL certificate

    5. Select OK.
    6. Verify the site loads on WFE2 if you can control your DNS/NLB routing.

That’s it! I believe most of what’s above is best practices. I would also remove temporary certificate files, such as PFX, CSR files, etc. left around during the process for added security.