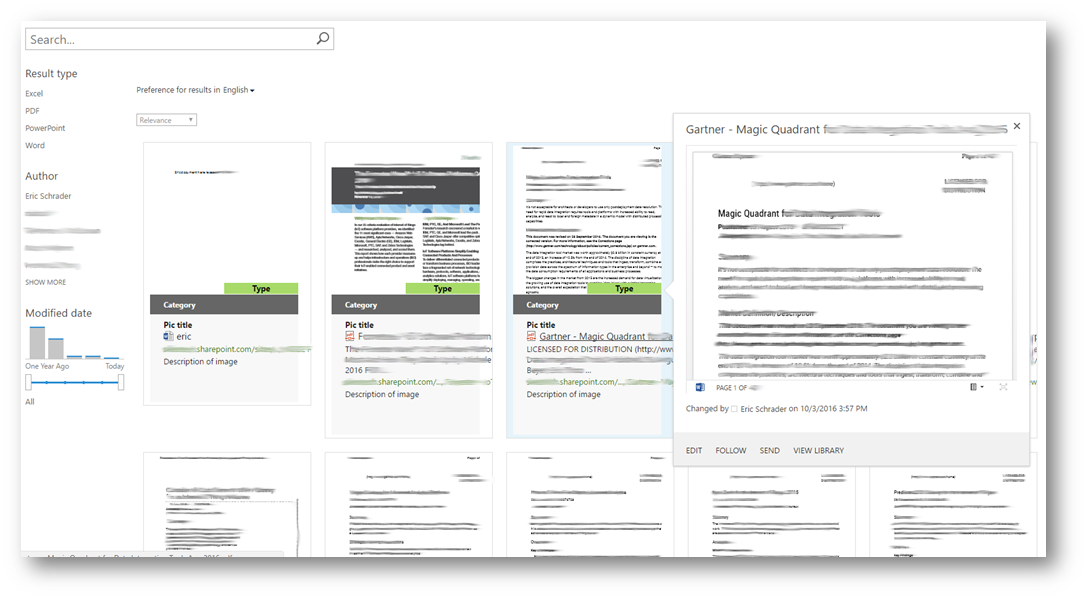
SharePoint search results OOTB do not display image previews until you hover. We wanted to have a baseball card type approach to display certain items.
Here is an unfinished example of the results displayed as cards with image previews and the OOTB hover panel:
- Make sure the site is a publishing portal and publishing features are enabled at the site collection and site level. In order to get the Search Display templates to display the *.html files in the masterpage gallery, some of these features have to be on. Otherwise you just have *.JS files which can limit you. Just ask me under comments if you have any questions.
-
Modify your Search display template for result items:
- /_catalogs/masterpage/Forms/Display%20Templates.aspx
- I modified Item_CommonItem_Body.html.
-
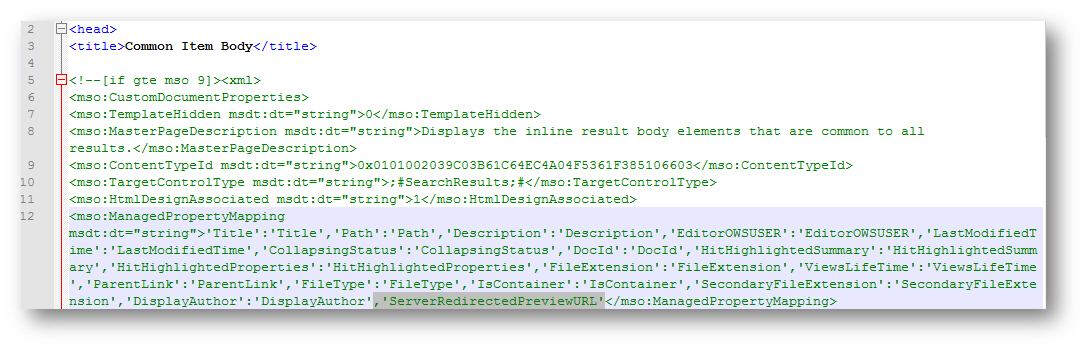
Edit Item_CommonItem_Body.html properties and add the following property:
- ServerRedirectedPreviewURL
- (properties are separated by a comma, and surrounded by single quotes. So the exact text I added to the end was ,’ ServerRedirectedPreviewURL’ (but replace my blog posts fancy quotes)
-
Edit the Item_CommonItem_Body.html file (I open with Explorer and edit the file in notepad++)
-
Verify the property was added:
-
Next, add a JavaScript tag to store the Preview Image URL as a web safe string:
imageurlpreview = $htmlEncode(ctx.CurrentItem.ServerRedirectedPreviewURL)

-
Now, let’s add in our custom HTML. This is kinda “hacky” since I am using this site for a proof of concept and I don’t care if these customizations exist everywhere in my test site collection. Ask me below in comments if you want to know how to copy this file and isolate the results to use this custom template using result types or a custom search results page.
-
- I scrolled down to the first HTML div I found, “ms-srch-item-body”. Right above this, I added my custom Baseball Card HTML. Then I moved the rest of this stuff in except for the closing div tag.
-
The main thing was this line to add the new JavaScript for the image:
<img src=”_#= imageurlpreview =#_” alt=”Preview” />
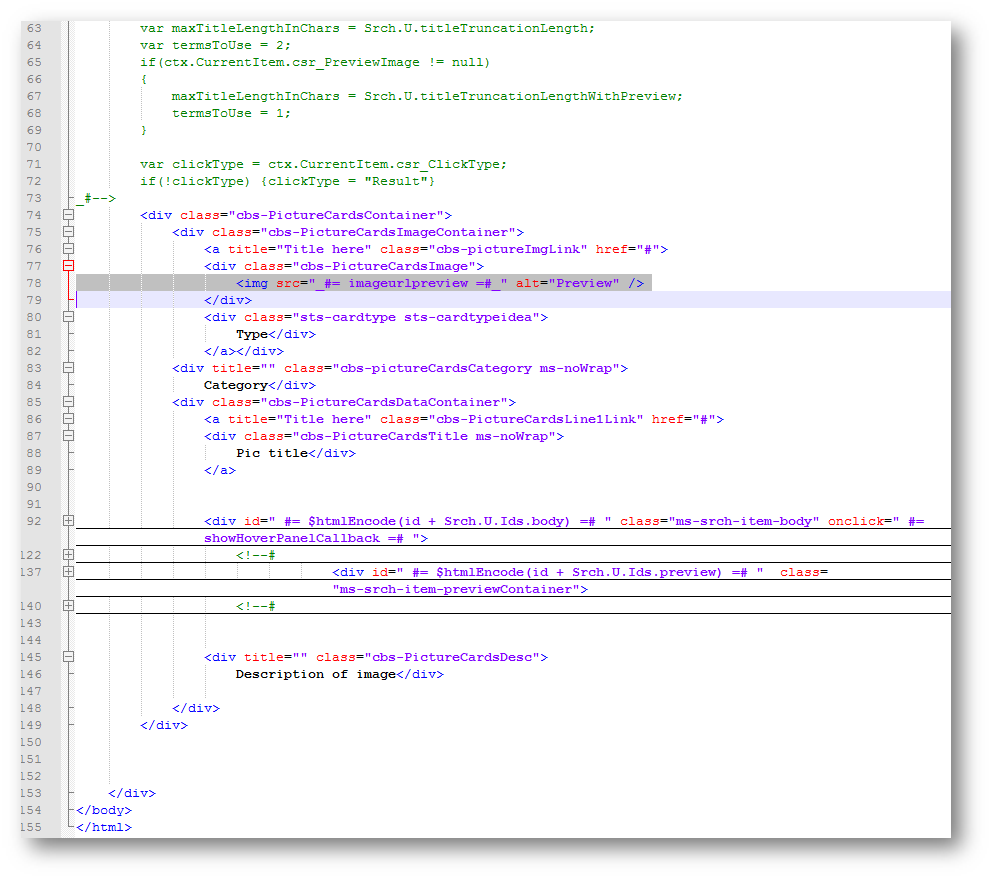
Here is my baseball card HTML (including the preview image)
[code language=”html” highlight=”7,30″]
<div class="cbs-PictureCardsContainer">
<div class="cbs-PictureCardsImageContainer">
<a title="Title here" class="cbs-pictureImgLink" href="#">
<div class="cbs-PictureCardsImage">
<img src="_#= imageurlpreview =#_" alt="Preview" /></div>
<div class="sts-cardtype sts-cardtypeidea">
Type</div>
</a></div>
<div title="" class="cbs-pictureCardsCategory ms-noWrap">
Category</div>
<div class="cbs-PictureCardsDataContainer">
<a title="Title here" class="cbs-PictureCardsLine1Link" href="#">
<div class="cbs-PictureCardsTitle ms-noWrap">
Pic title</div>
</a>Move all of the OOTB stuff here, starting with the div ms-srch-item-body
<div title="" class="cbs-PictureCardsDesc">
Description of image</div>
</div>
</div>
[/code] -
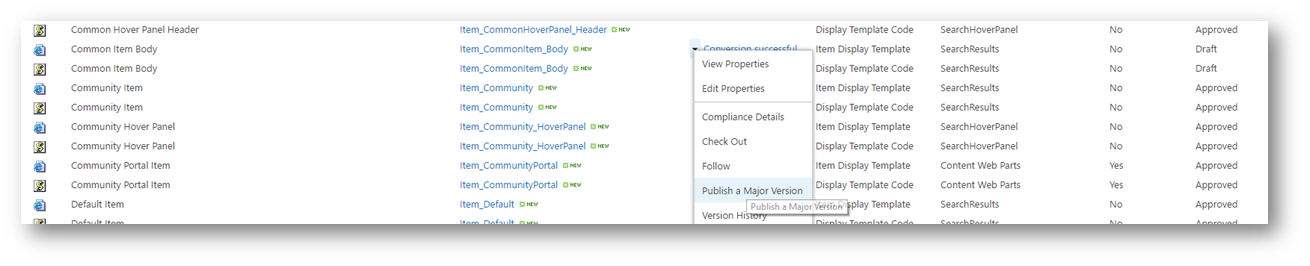
Now Save the display template HTML file and publish ONLY the HTML file from the browser (the JS file gets automatically updated instantly):
Add the baseball card CSS to your result page and you should be good. Again, the element selector (ms-srch-item) for floating these elements is a bit hokey, I could have modified the Control_SearchResults and individual Item templates but this is just a POC.[code language=”css” highlight=”2″]
/* Cards */
.ms-srch-item {
width:240px;
display:inline;
float:left;
margin:11px;
border: 1px solid #DDD;
clear:none;
}
.cbs-PictureCardsImageContainer{
height:240px;
border-top-left-radius: 9px;
border-top-right-radius: 9px;
width:240px;}
.cbs-PictureCardsImage {
height:240px;
overflow:hidden;
width:240px;}
.cbs-noImageContainer-ContentWrapperLarge {
display:none;
}
.cbs-PictureCardsDataContainer {
padding: 8px 22px 0px 22px;
background-color: #f8f8f8;
color: #212121;
}
.cbs-PictureCardsDataContainer a, .cbs-PictureCardsDataContainer a:active, .cbs-PictureCardsDataContainer a:hover, .cbs-PictureCardsDataContainer a:visited {
color: #212121;
}
.cbs-pictureCardsCategory {
background-color:#666;
color: #FFF;
font-weight: bold;
font-size: 12px;
padding: 8px 22px 8px 22px;
border-top:1px solid #FFF;
}
.cbs-PictureCardsTitle {
font-weight: bold;
}
.cbs-PictureCardsDesc {
height: 75px;
overflow:hidden;}
.sts-cardtype {
position:relative;
top:-18px;
left:120px;
text-align:center;
height: 18px;
width: 120px;
color:#000;
font-weight:bold;
}.sts-cardtypeidea {
background-color:#a8da69;}
.cbs-PictureCardsIconSection {
float:left;
margin-top:8px;
margin-bottom:8px;
}
[/code] -
-
Check in and publish your custom result page (the custom ASPX page with all of your search refiners, result web part, search box, above CSS, etc.) and you should be good.
-
Also, shout out to this article for the previewurl property. Thats what I based this article off of. https://blogs.msdn.microsoft.com/murads/2012/10/11/utilizing-web-apps-2010-to-get-powerpoint-search-document-previews-of-sharepoint-2010-content-in-sharepoint-2013-search/