SPO rename tenant from MSIgnite- Start-SPOSiteRename

During the 2021 MS Ignite conference, Microsoft announced the ability to rename your default SharePoint Online Office 365 tenant URL. There are quite a few limitations (such as you have to delete the desired name if you have it in another tenant and wait 3 days, sizing limitations, you can only rename a site once every 6 months, any previously deleted sites cannot be restored, and a few others listed here: https://docs.microsoft.com/en-us/sharepoint/change-your-sharepoint-domain-name )

Start-SPOSiteRename is the command AFTER you have added the new URL to the admin portal. You can schedule it a day ahead or further in the future.

Once complete, your old URL will redirect to the new URL. However, I am not sure how long they will honor that redirect, but I assume as long as you have it listed under your tenants URLs it should redirect.

List View Threshold with On-Premises Environments Troubleshooting- Resolved

Our team has been working on converting legacy SharePoint applications written in server side code to client side code on a newer version of SharePoint. The old environment lifted the List View Threshold to a non-default range, which the new environment did not have/support. Our goal was to have these applications respect the list view threshold. However, in our Dev/INT environments, we could not figure out why we were not seeing the list view threshold. Turns out, the list view threshold is NOT enforced if you are a LOCAL ADMINISTRATOR on the WFE server.

local admins

Any user in the local administrators group will not have the list view threshold enforced. When we used test user accounts, they were getting the threshold error as expected since they were not a developer’s user account in the local admins group. Simly remove the user from local administrators and they will get the threshold error immediately if it shows for regular users.

Threshold Tips

  1. Index Columns
    1. Up to 20 per list
    2. Do this before you get 5,000 items in your list, or you cannot dynamically change them (unless you are in SPO, I hear they are raising it to 20,000 and allowing you to set indexes when you have items above that, but we will see once its out if its not already)
    3. Index anything you want to filter, group or sort by, including OOTB columns such as Created/Modified, etc.
  2. Remove or Fix your existing Sorting/Filter/Grouping on views
    1. The rule we follow is: Remove all filters. Add your first indexed filter that should return LESS than 5,000 items, or the view wont work. Have over 5,000 items? well, sorry, but find another filter (or use the All Items view, read on)
    2. Your second and subsequent filters can further narrow down from 5,000 by using AND to join filters, but beware of OR since it immediately negates your first filter, giving you the threshold if that column is not indexed and returns less than 5,000 items. We have also noticed swapping the order in complex filters seems to magically work and we cannot explain it. So if you have 2 filters then an OR and 2 more filters, try reversing the order of the last #3 and #4 columns if you get the threshold error.
  3. All Items view is your friend
    1. Ever wonder why OOTB All items shows fine? Well its because if you leave it without Fitlers/Sorting/Grouping it will work and can query over 5,000 items (with paging of course). Microsoft left this view for some magic. And if you ask MS Support, they wont explain it other than share the magic.
  4. 5,000 folder limit
    1. This one is our most recent issue, you cannot return more than 5,000 folders in any view, including All Items view. To fix this, apply some type of query to return less than 5,000 folders, OR disable showing items in folders (Show the items without folders and it will work).


So, if you watch out for who you have in local administrators, and follow these 4 rules, you can probably get your views to work (somewhat). However, if you are that person who needs more than 5,000 items on your query returned, try exporting the magical All Items view to Excel or design a custom export solution, or use a 3rd party tool such as Power BI or Tableau to query the list.

Remote Desktop Connection Manager (RDCMan) on HD/high resolution displays too small- Fixed

I recently upgraded to a larger 15″ screen laptop with a HD display (3840×2160). The issue was Remote Desktop Connection Manager. I tried changing the Scaling size to 200% in each session, but then the fonts would be cut off, “scaling change the size of all items” by clicking “Let me choose one scaling level for all my displays”. The real answered turned out to be to use a registry trick, see below for the real solution.

While this “worked”, it was unusable for a lot of OOTB dialog boxes where they showed up as blank:

scaling change the size of all items.jpg

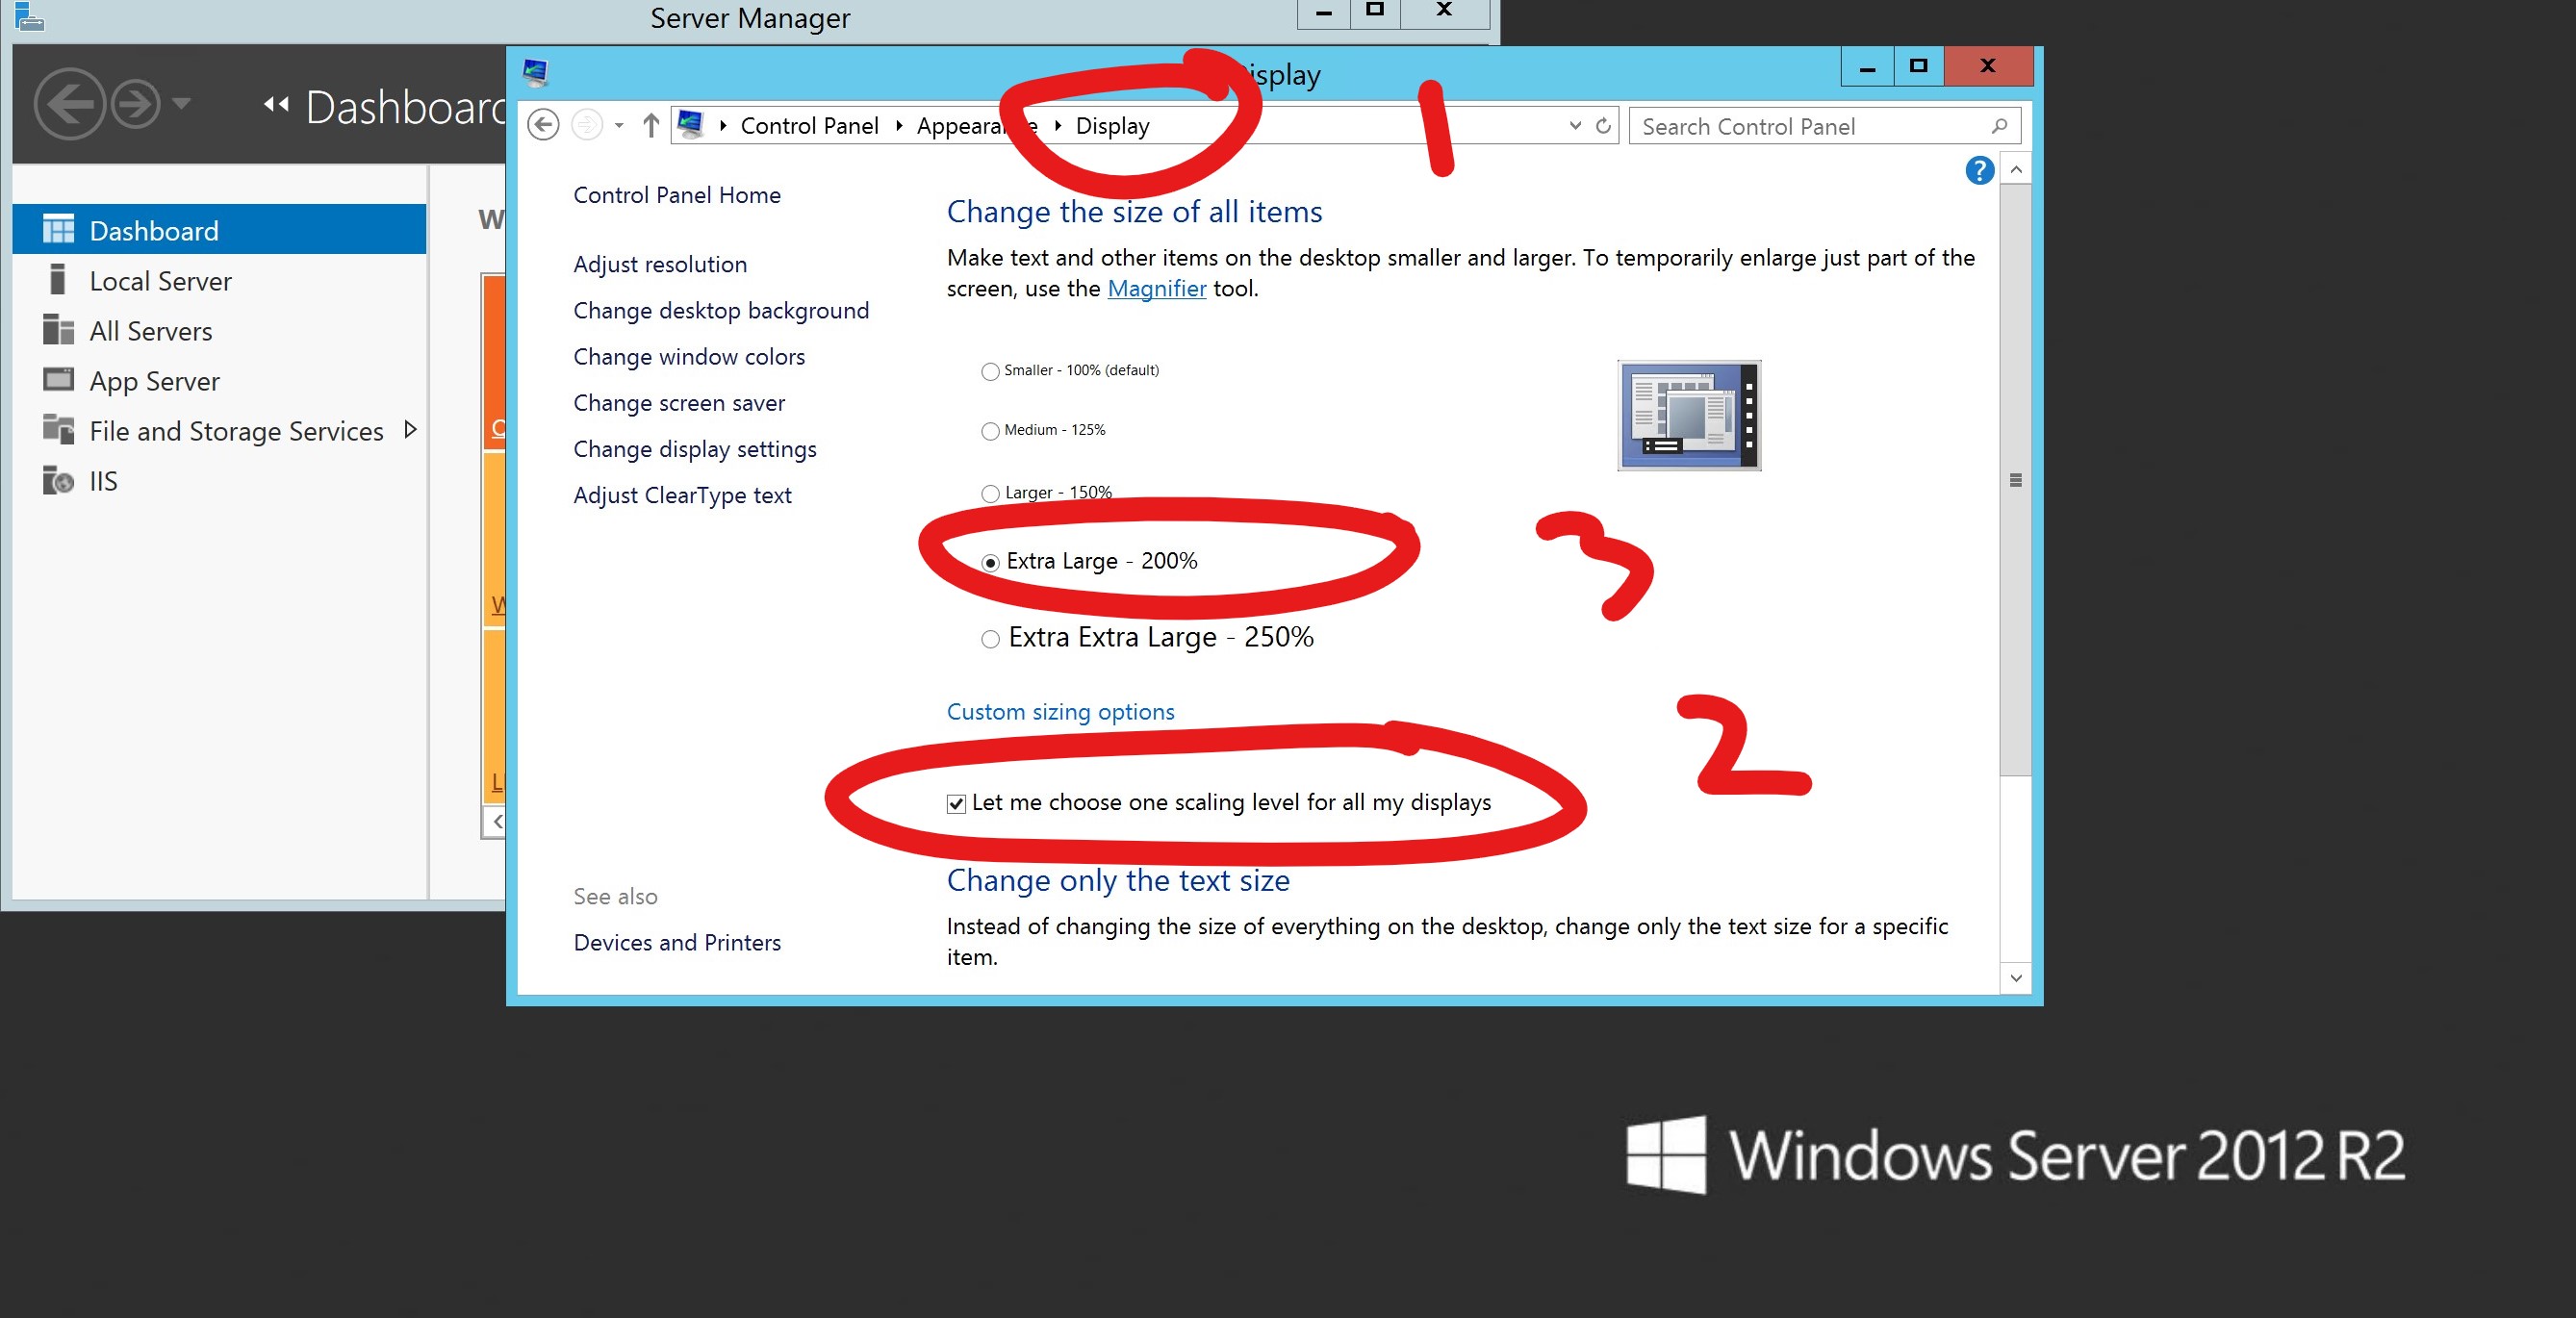
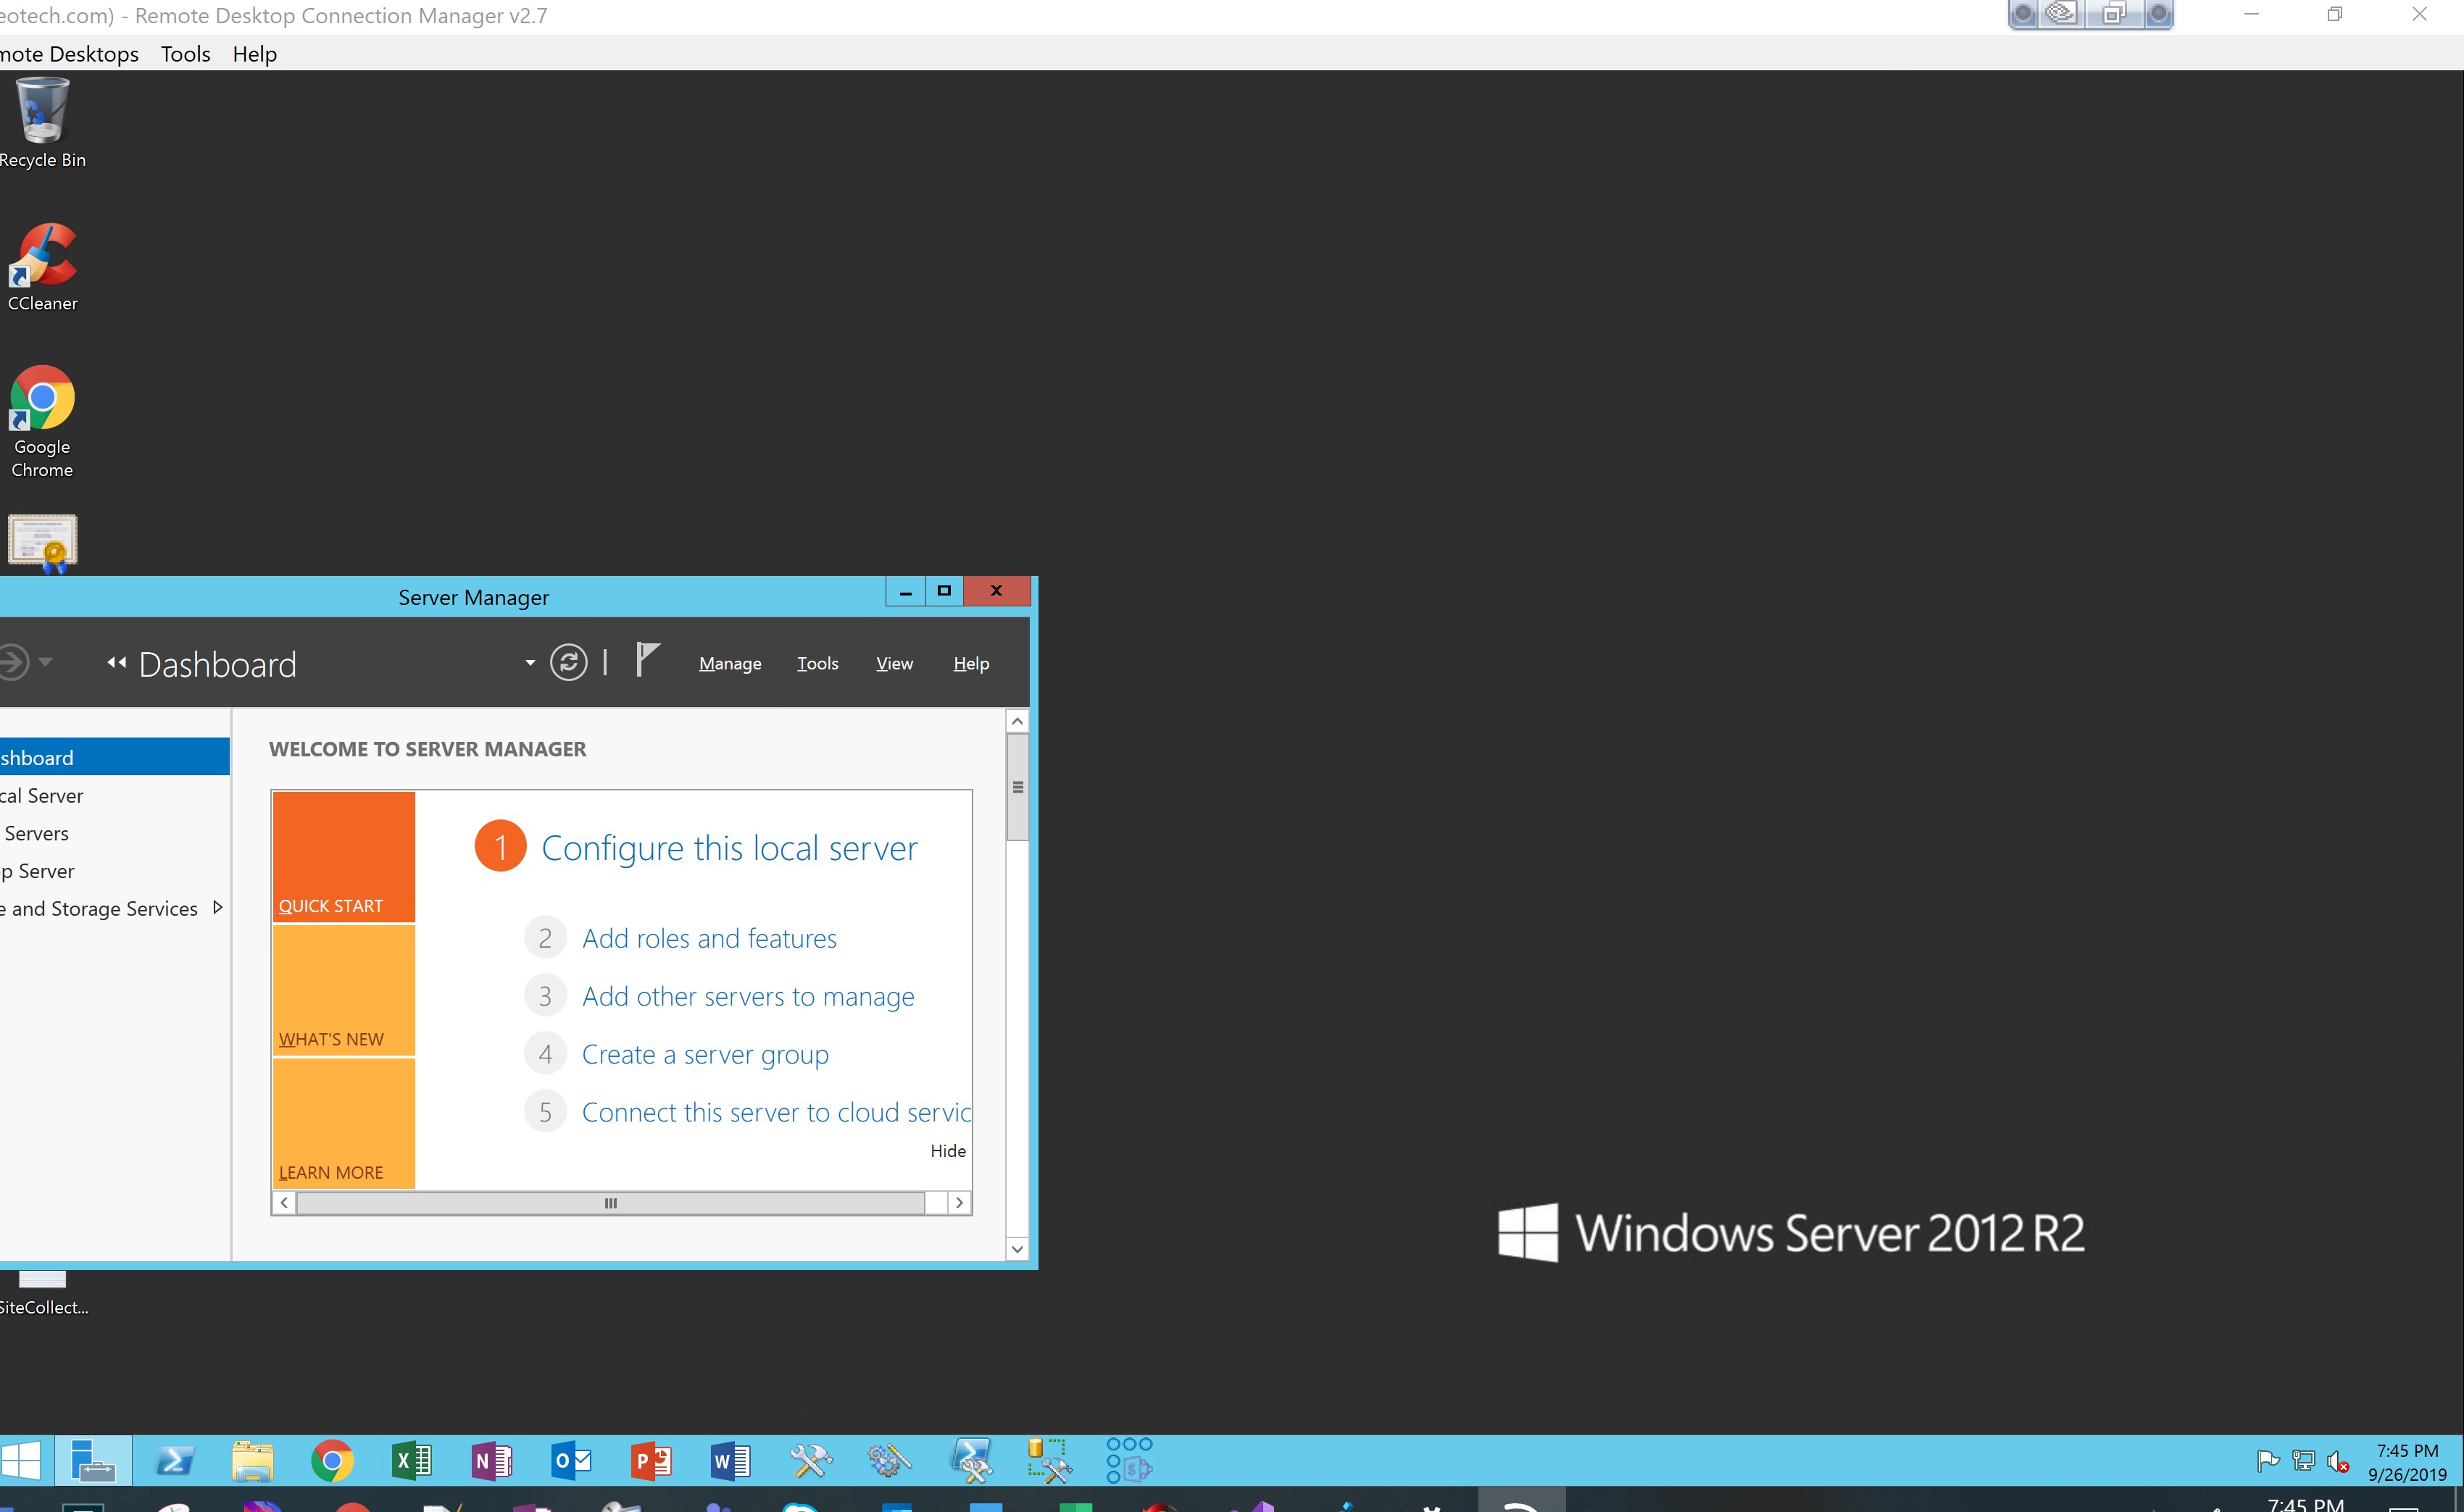
While this worked, every computer I connect to I have to change this, log off, and log back in. AND if I visit from a regular desktop resolution later my fonts will be like big land in Mario Brothers. I also noticed a lot of the Windows band messages are cut off and some UI’s dont even display anything (SQL Management Studio browse for a file for instance) which made it unusable.

The Real Solution was found here, https://www.blackforce.co.uk/2016/04/18/remote-desktop-rdp-resolution-on-a-surface-book I found thanks to this forum post

Basically, you make a registry change to make applications look for a special configuration file called a “manifest”. Then you just drop a special downloaded config file called a manifest file where RDCMan.exe is, C:\Program Files (x86)\Microsoft\Remote Desktop Connection Manager and call it RDCMan.exe.manifest. Download this manifest file from the above blog post after updating your registry to look for the file.

Now my remote desktop connection manager scales the session to something usable (this is almost my full laptop screen size, and I can read everything!):

manifest scaled session.jpg

Try it out, its the only solution I could find that works for my laptop RDCMan without messing up each VM I connect to.

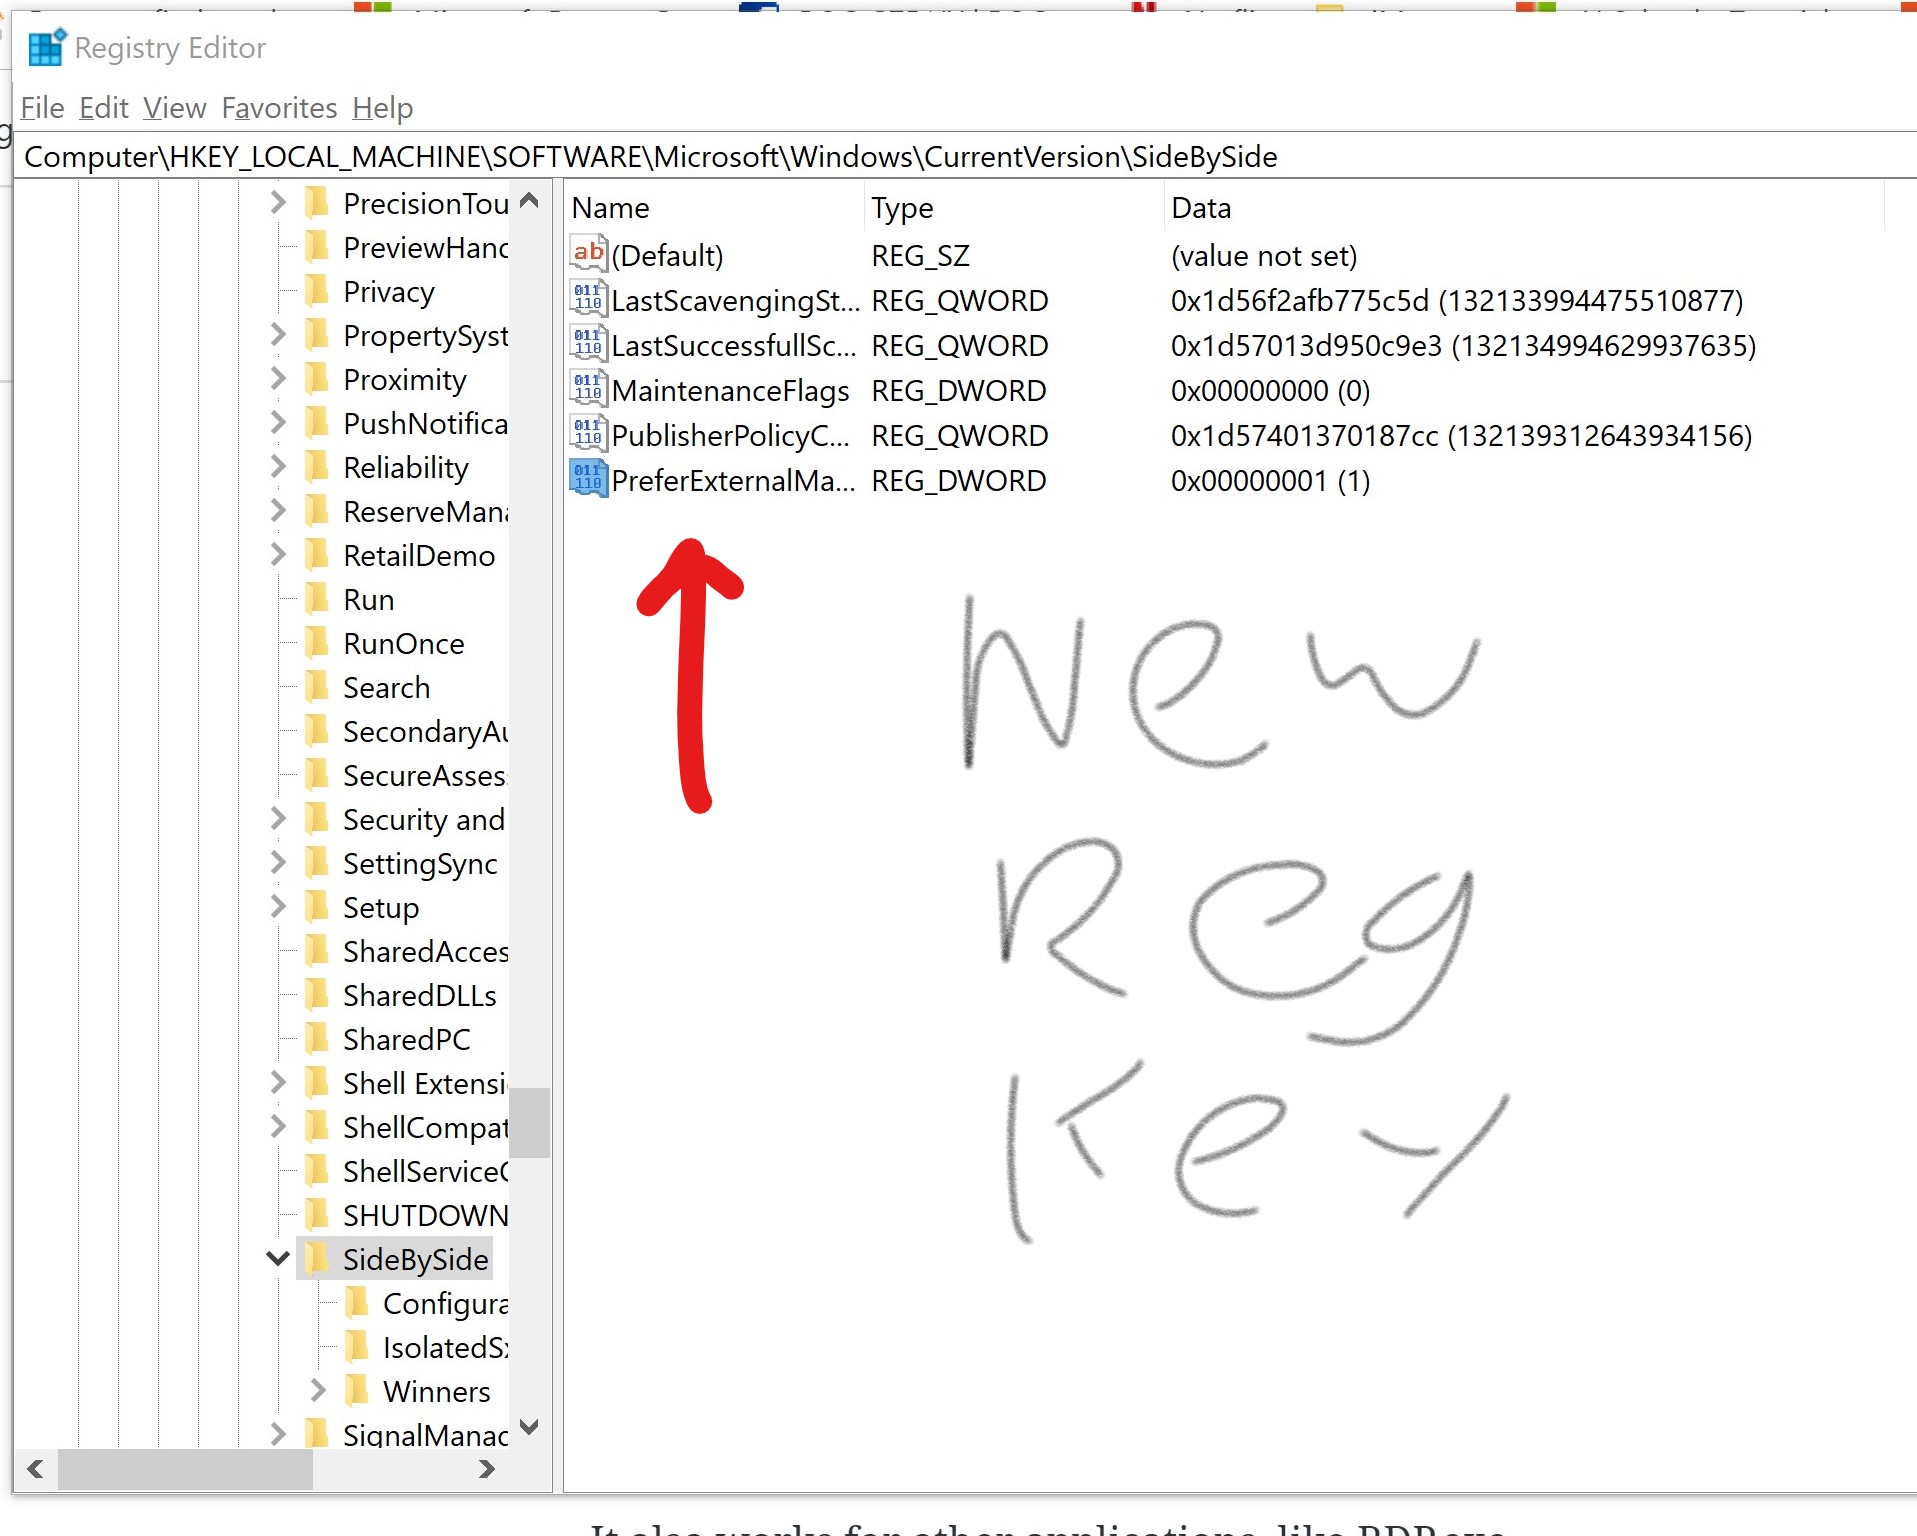
  1. Add new registry key to:
    1. Computer\HKEY_LOCAL_MACHINE\SOFTWARE\Microsoft\Windows\CurrentVersion\SideBySide
    2. new registry key.jpg
  2. Add special file with RDCMan.exe called RDCMan.exe.manifest
    1. rdcman.exe.manifest
    2. The file contents: Pastebin here https://pastebin.com/WvJcFcrn
  3. Thats it! Now just launch your app as normal. This works with any EXE, just slap in the same .exe.manifest file next to it once you made your global registry fix so the OS looks for this file each time. Major credit to the above blogger for finding this.

It also works for other applications, like RDP.exe.