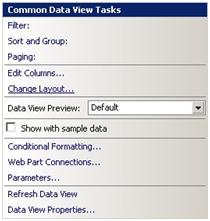
Ever wonder how SharePoint 2010 uses CoreV4.css and Themes together to style your site? In this blog post, I hope to grab this bull by the horns and make empower you to decode this large file and create your own themes.
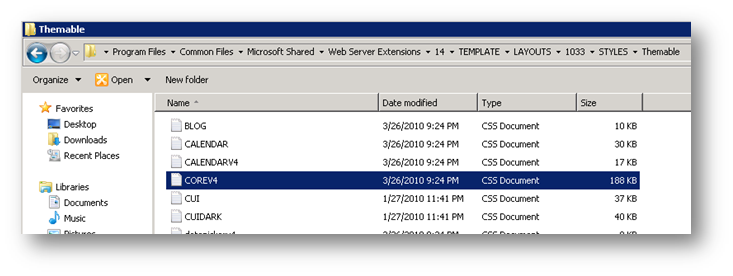
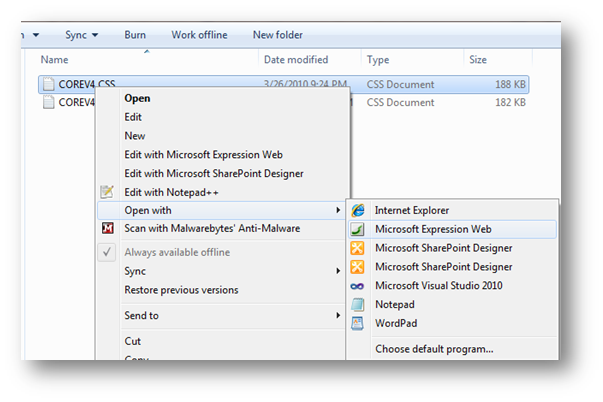
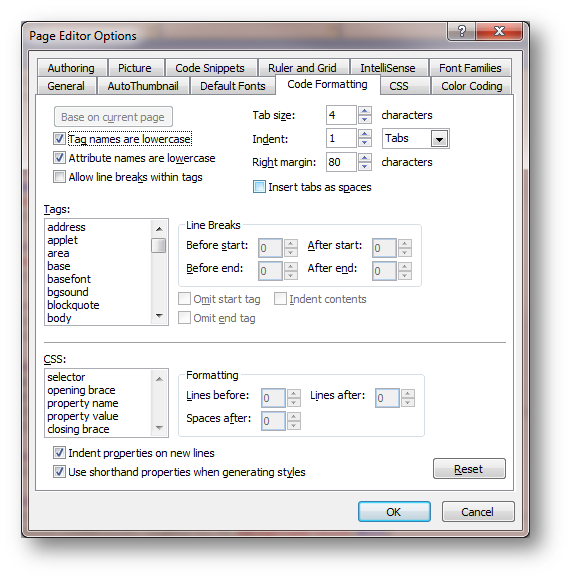
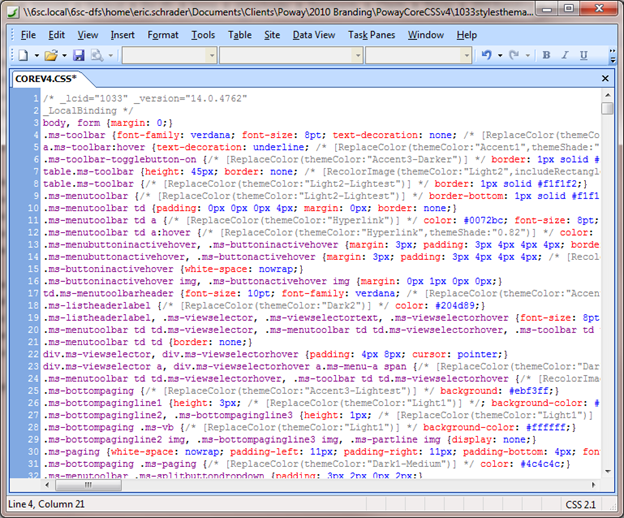
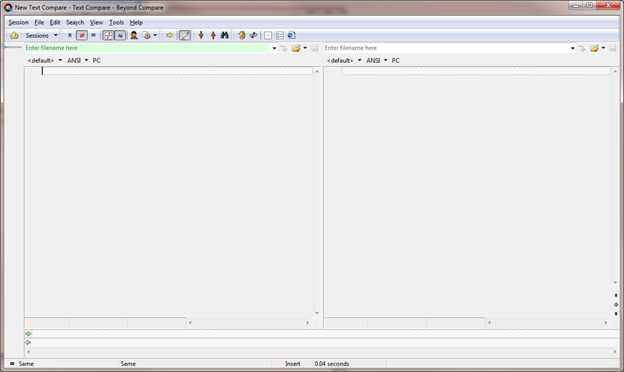
Basically, I took CoreV4.css located in C:\Program Files\Common Files\Microsoft Shared\Web Server Extensions\14\TEMPLATE\LAYOUTS\1033\STYLES\Themable and copied it locally, then attached it to my SharePoint page. 
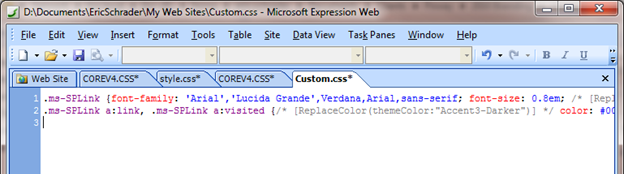
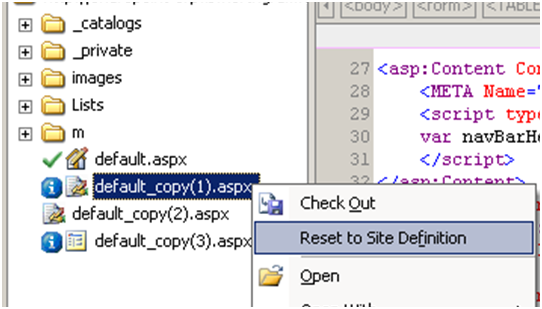
Figure 1- Copy the original CoreV4 from the backend to a local temporary drive to modify. Lcoation: C:\Program Files\Common Files\Microsoft Shared\Web Server Extensions\14\TEMPLATE\LAYOUTS\1033\STYLES\Themable
Save the copy to your SharePoint site in the Style Library or where you desire.
Open V4.master and add your CSS reference:
Find in V4.master at top:
<SharePoint:CssLink runat=”server” Version=”4″/>
<SharePoint:Theme runat=”server”/>
Add the following AFTER the above tags:
<!–custom add themes and css –>
<SharePoint:CssRegistration runat=”server” name=”<% $SPUrl:~sitecollection/Style Library/ClientName/CSS/style1.css %>” After=”corev4.css”/>
<SharePoint:CssRegistration name=”/Style Library/en-us/Themable/style.css” After=”corev4.css” runat=”server”/>
Change your paths to match. I have two tags, the first is for CSS, and the second is for Themable CSS files using themable comments.
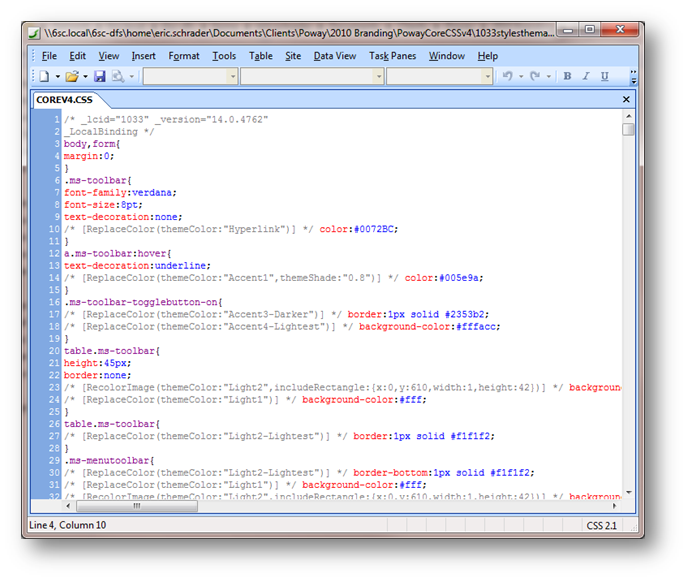
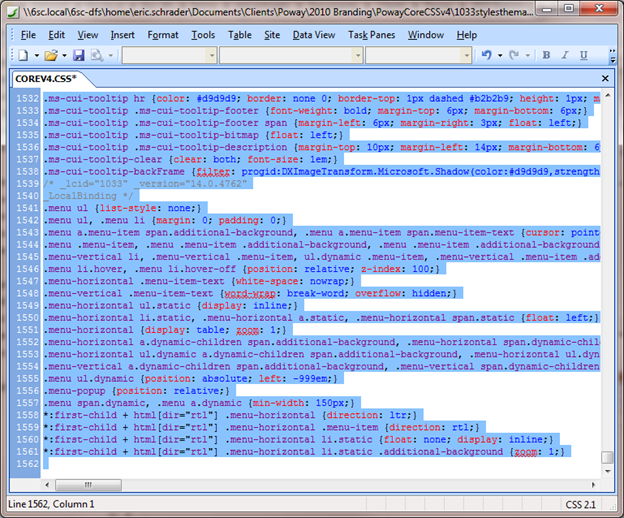
Once your file (copy of Corev4.css named Style or Style1.css) is in place, we can begin modifying it.
Themes:
Themes in SharePoint 2010 are pretty tough. There are about 60 permutations, and you can only define about 10 of those colors.
Heres the table:
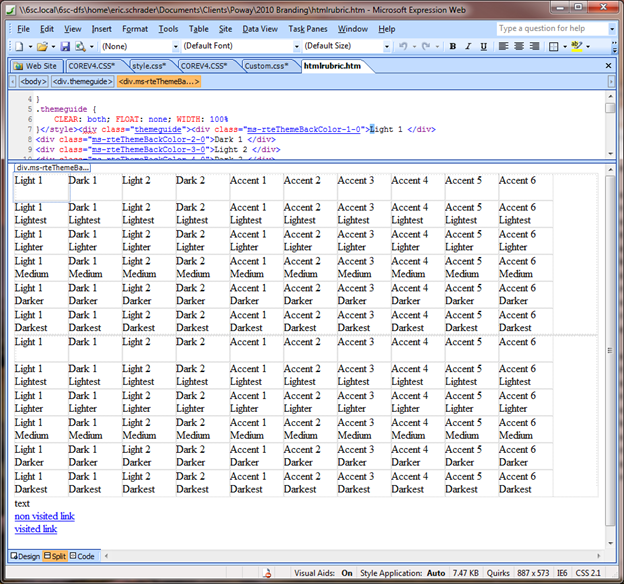
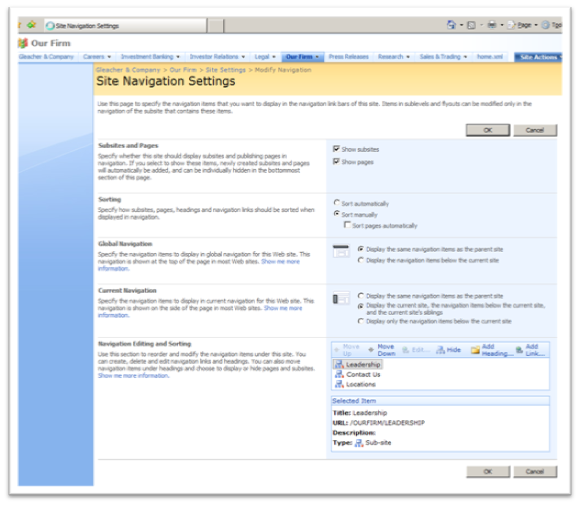
Figure 2- You have seen this grid before from the Site Settings > Look and Feel > Themes page. The OOTB one has colors applied to each square. This image maps to the Themes page so you get an idea of what each color is called.
The colors you can define in themes are:
- Dark 1
- Light 2
- Dark 2
- Accent 1
- Accent 2
- Accent 3
- Accent 4
- Accent 5
- Accent 6
- non visited link
- visited link
The rest are generated from those that you define. This includes gradient images (they use transparent PNG overlays, big plus in my book) and a lot of other images used in SharePoint.
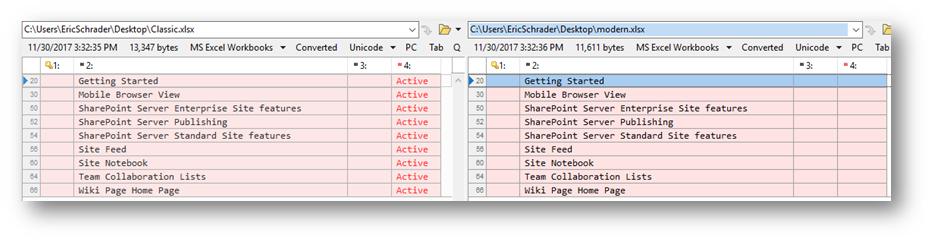
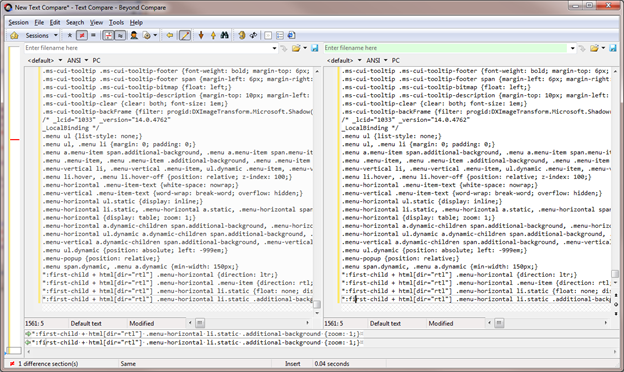
I put together an Excel of OOTB CoreV4.css
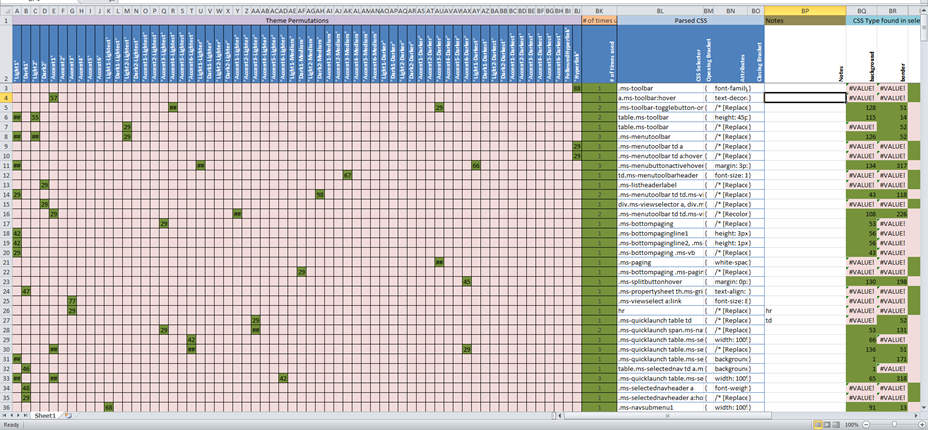
This Excel shows all the Theme Permutations, what CSS selector in CoreV4.css uses that Theme permutation, the CSS Selector and code itself, and a guide to whether it’s a Background attribute, Color attribute, or Border attribute defined in that selector.
Download from blog: https://eschrader.com/wp-content/uploads/2011/08/corev4-styles-calculated-no-errors_blog-export.xlsx
This is not used to modify the code (but it could be, just copy the PARSED CSS columns and paste it to a CSS file), but more as a guide to how CoreV4.css works.
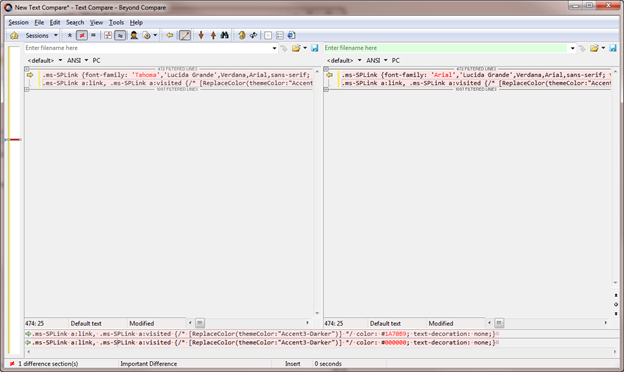
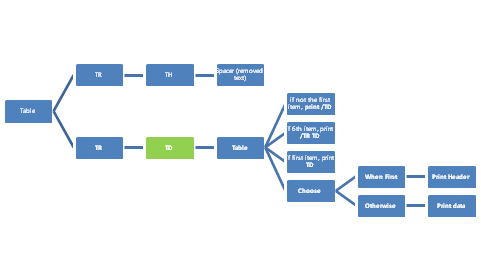
The Green shows a match, eg. Which theme color matches to what CoreV4.css selector, and even a possible attribute. If its red, that theme or attribute was not a match in that selector. So if a theme permutation is red, then that theme color is not in that CSS tag. Pretty handy to get an idea whats in this file.
The numbers inside the green are just what position the theme permutation is found, eg. Hyperlink = 88 green just means that the word Hyperlink is found in that particular CSS selector at character 88. They can be ignored, but my Excel skills are lacking in that department 🙂
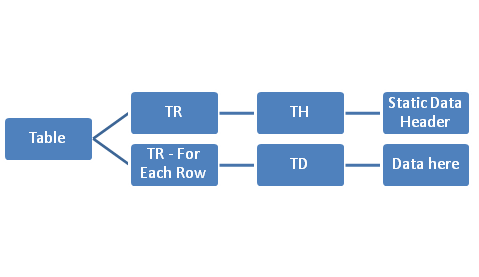
Each row is a selector from CoreV4.css.
Each of the first 60 columns is a theme permutation, and each cell that is green is a match of that theme permutation in that selectors CSS attributes value.
The column after that, I totalled how many theme permutations in that row are for that selector (some have up to I think 5 theme permutations in a single selector!)
Then the next few columns are the CSS selector, bracket, attributes/values, then closing CSS bracket. This can be copied and pasted into a CSS file if you want, just like CoreV4.css. NOTE: I may have mis-formatted some of the CoreV4.css, so just let me know if you find a typo/bad replacement and I will recheck it). Note also that I parsed out all themable selectors only for this Excel. My rule to parse was any selector with a comment in the attributes section. CoreV4.css is not the only file, SharePoint has a few more, but this is the big momma of CSS files.
The next columns are some rough CSS attibutes, Background (image or Color), Color (for fonts, etc), and Border (color, size, width, etc)
Thats pretty much the Excel. Just a visual display of this bad boy. Notice how line 469 of my Excel has 0 number of times for a theme found. This is because they did not replace a token in their CSS, /* [ReplaceColor(V4_THEMING_COLOR_DAR2)] */;color: #3b4f65; So I figure if this Excel can catch this, it must be pretty useful.
This gives you an idea for how much themes are used in SharePoint, and how you can modify pretty much everything using your own theme.
I ended up breaking out CoreV4.css into to parts:
- Uses themable CSS comments
- Does not use themable CSS comments
The themable CSS I moved to a file in the Style Library/en-us/themable directory.
The Non-themable CSS I keep just in the Style Library a few folders down.
When a theme is applied, my themable CSS is applied. When my Non-themable CSS is modified, the changes are reflected instantly on the site.
This allows me to make changes to normal CSS without have to re-apply my theme to the entire site for my changes to show.
Here is a recent project I did, here is the Themable CSS: (must have file checked in, published, and apply another theme, then the theme for the changes to be seen, its pretty crazy… Good luck, once you get it, its easy)
My Themable CSS: (Style Library\en-us\Themable\Style.css)
.pageTitle {
/* [ReplaceColor(themeColor:”Accent2″)] */ color: #8A2A1C;
/* [ReplaceColor(themeColor:”Accent1″)] */ border-bottom: 1px #343434 dashed;
}
.bottomFooter, .bottomFooter a, .bottomFooter a:active, .bottomFooter a:hover, .bottomFooter a:visited {
/* [ReplaceColor(themeColor:”Accent6″)] */ color: #FFFFFF;
}
.rightsidefixed {
/* [ReplaceColor(themeColor:”Accent5″)] */ background-color:#e5dbc2
}
.s4-toplinks a.dynamic, .s4-toplinks a.dynamic:active, .s4-toplinks a.dynamic:hover, .s4-toplinks a.dynamic:link, .s4-toplinks a.dynamic:visited {
/* [ReplaceColor(themeColor:”Accent2″)] */ color: #8A2A1C;
}
.ms-navitem A {
/* [ReplaceColor(themeColor:”Accent6″)] */ color: #FFFFFF !important;
}
#s4-mainarea {
/* [ReplaceColor(themeColor:”Light2″)] */ border: 6px #EDE8E2 solid;
/* [ReplaceColor(themeColor:”Light2″)] */ background-color: #EDE8E2;
}
.containerBackground {
/* [ReplaceColor(themeColor:”Light2″)] */ background-color: #EDE8E2;
}
body #s4-workspace {
/* [ReplaceColor(themeColor:”Accent2″)] */ background-color: #8A281C;
}
body .s4-toplinks {
/* [RecolorImage(themeColor:”Accent2″)] */ background: url(“/_layouts/images/selbg.png”) repeat-x left top;
/* [ReplaceColor(themeColor:”Accent2″)] */ background-color: #f6f6f6;
/* [ReplaceColor(themeColor:”Light2″)] */ border: 5px solid #ede8e2;
}
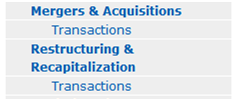
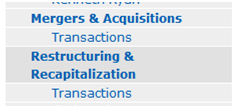
.s4-tn li.static > .menu-item, .s4-tn li.static > .menu-item:active, .s4-tn li.static > .menu-item:hover, .s4-tn li.static > .menu-item:link, .s4-tn li.static > .menu-item:visited {
/* [ReplaceColor(themeColor:”Light1″)] */ color: #3b4f65;
}
.s4-toplinks .s4-tn a.selected, .s4-toplinks .s4-tn a.selected:active, .s4-toplinks .s4-tn a.selected:hover, .s4-toplinks .s4-tn a.selected:link, .s4-toplinks .s4-tn a.selected:visited {
/* [ReplaceColor(themeColor:”Light2″)] */ border-color: #91cdf2;
/* [RecolorImage(themeColor:”Light2″)] */ background: url(“/_layouts/images/selbg.png”) repeat-x left top;
/* [ReplaceColor(themeColor:”Light2″)] */ background-color: #ccebff;
/* [ReplaceColor(themeColor:”Accent2″)] */ color: #003759;
}
#s4-leftpanel, #s4-leftpanel a, #s4-leftpanel a:active, #s4-leftpanel a:hover, #s4-leftpanel a:link, #s4-leftpanel a:visited, #s4-leftpanel .ms-vb {
/* [ReplaceColor(themeColor:”Light1″)] */ color:#FFFFFF
}
#s4-leftpanel #DatePickerDiv, #s4-leftpanel #DatePickerDiv a, #s4-leftpanel #DatePickerDiv a:active, #s4-leftpanel #DatePickerDiv a:hover, #s4-leftpanel #DatePickerDiv a:link, #s4-leftpanel #DatePickerDiv a:visited, #s4-leftpanel #DatePickerDiv .ms-vb {
/* [ReplaceColor(themeColor:”Dark1″)] */ color:#343434
}
body #s4-leftpanel {
/* [ReplaceColor(themeColor:”Accent3″)] */ background-color: #567F1A;
/* [ReplaceColor(themeColor:”Light1″)] */ color:#FFFFFF
}
body #s4-leftpanel-content {
/* [ReplaceColor(themeColor:”Light2-Lightest”)] */ border: 1px solid #dbddde;
}
.s4-ql ul.root > li > .menu-item, .s4-qlheader, .s4-qlheader:visited {
/* [ReplaceColor(themeColor:”Light1″)] */ color: #FFFFFF;
}
.s4-ql ul.root ul > li > a {
/* [ReplaceColor(themeColor:”Light1″)] */ color: #FFFFFF;
}
.s4-ql ul.root ul > li > a:hover {
/* [ReplaceColor(themeColor:”Light1″)] */ color: #FFFFFF;
}
.s4-ql a.selected {
/* [ReplaceColor(themeColor:”Accent4″)] */ background-color: #345208;
/* [ReplaceColor(themeColor:”Light2-Lighter”)] */ border-top-color: #c6e5f8 !important;
/* [ReplaceColor(themeColor:”Light2″)] */ color: #FFFFFF !important;
}
.s4-specialNavLinkList a {
display: block;
padding: 3px 4px 3px 10px;
}
.s4-specialNavLinkList a {
/* [ReplaceColor(themeColor:”Light2″)] */ color: #3b4f65;
}
.ms-rteStyle-ContentHeader {
-ms-name:”Content Header”;
/* [ReplaceColor(themeColor:”Accent2″)] */ background-color: #841019;
/* [ReplaceColor(themeColor:”Light1″)] */ color: #FFFFFF;
font-size:10pt;
font-weight:bold;
padding:4px 4px 5px 5px;
border-top:5px #EDE8E2 solid;
margin:0px;
border-bottom:5px #FFFFFF solid;
}
.ms-rteStyle-ContentBackground {
-ms-name:”Content Background”;
background-color:#fff;
margin:0px;
padding:6px 10px;
}
.ms-WPHeader {
/* [ReplaceColor(themeColor:”Accent2″)] */ background-color: #841019;
/* [ReplaceColor(themeColor:”Light1″)] */ color: #FFFFFF;
}
.ms-WPTitle, .ms-WPTitle a, .ms-WPTitle a:active, .ms-WPTitle a:hover, .ms-WPTitle a:link, .ms-WPTitle a:visited {
/* [ReplaceColor(themeColor:”Light1″)] */ color: #FFFFFF;
}
.s4-wpActive .ms-WPTitle, .s4-wpActive .ms-WPTitle a {
/* [ReplaceColor(themeColor:”Light1″)] */ color: #FFFFFF;
}
My recent adjacent Style1.css file (Style Library\ClientName\CSS\Style1.css)
/*shell- under construction*/
body #s4-bodyContainer {
margin: 0 3%;
min-width: 935px;
/*no height in ie7, ie8, for firefox set height to 100%*/
}
body #s4-titlerow {
border-left: 13px transparent solid;
}
/*modal shell – after shell*/
.ms-dialog body #s4-bodyContainer {
margin: 0;/*remove red background margin from popup*/
min-width: inherit;
}
.ms-dialog #s4-mainarea {
border: 0px transparent solid; /* remove borders around content of popup*/
}
.ms-dialog .bottomFooter {
display:none /* hide footer*/
}
/*shell*/
div.s4-pr {
border-right: 0px transparent none;
}
/*BG Logos*/
#s4-workspace > div {
background-image: url(‘../Images/bg_gradient.png’);
background-repeat: repeat-y;
background-position: -20px top;
}
#s4-workspace {
background-image: url(‘../Images/PowayBuilding.png’);
background-repeat: no-repeat;
background-position: -20px top;
background-attachment: scroll;
}
/*Header styling*/
.ms-siteactionsmenu > SPAN > SPAN > A {
color:#FFFFFF
}
.s4-titletext {
padding-bottom: 0px;
}
.s4-titletext {
vertical-align: bottom;
}
table.s4-wpTopTable {
margin-right: 4px;
}
.s4-help {
margin-left: 4px;
}
/* Top Nav */
.s4-title {
overflow: visible;
}
body #s4-topheader2 {
border: 0px transparent none;
}
.s4-tn LI.dynamic > .menu-item:visited {
font-weight: bold;
}
.s4-tn LI.dynamic > .menu-item:hover {
font-weight: bold;
}
.s4-tn LI.dynamic > .menu-item:active {
font-weight: bold;
}
.s4-tn LI.dynamic > .menu-item:link {
font-weight: bold;
}
.s4-tn LI.dynamic > .menu-item {
font-weight: bold;
}
.s4-tn ul.dynamic {
padding: 5px;
border-bottom: 1px #CFAEA4 solid;
}
.s4-tn a:visited {
font-weight: bold;
}
.s4-tn a:link {
font-weight: bold;
}
.s4-tn a:hover {
font-weight: bold;
}
.s4-tn a:active {
font-weight: bold;
}
.s4-tn a {
font-weight: bold;
}
.menu-horizontal {
padding: 0px;
border: 0px;
margin: 0px;
border-spacing: 0px;
}
body .s4-toplinks {
border-bottom: 0px solid transparent;
}
.s4-toplinks .s4-tn a.selected, .s4-toplinks .s4-tn a.selected:active, .s4-toplinks .s4-tn a.selected:hover, .s4-toplinks .s4-tn a.selected:link, .s4-toplinks .s4-tn a.selected:visited {
padding: 4px 10px 6px 10px;
margin: 0px 10px;
border: 0;
}
/*breadcrumbs*/
.s4-title H1 A, .s4-title H2 A {
display: inline;
}
.breadcrumbs {
min-height: inherit;
min-height: 10px;
}
.breadcrumbs h2 {
font-size: 10px;
text-decoration: none;
padding-bottom: 1px;
}
.breadcrumbs a:link {
font-size: 10px;
text-decoration: none;
padding-bottom: 1px;
}
.breadcrumbs a:visited {
font-size: 10px;
text-decoration: none;
padding-bottom: 1px;
}
.breadcrumbs a:hover {
font-size: 10px;
text-decoration: none;
padding-bottom: 1px;
}
.breadcrumbs a:active {
font-size: 10px;
text-decoration: none;
padding-bottom: 1px;
}
.breadcrumbs a {
font-size: 10px;
text-decoration: none;
padding-bottom: 1px;
}
.breadcrumbs {
font-size: 10px;
text-decoration: none;
padding-bottom: 1px;
}
/*Left nav */
.ms-quicklaunchouter {
width:100% /* Fixes minimum width in quick launch */
}
.leftnavtop, .ms-quicklaunchouter {
float: left;
}
body #s4-leftpanel {
width: 170px; /* make sure you set the margin-left on MSO_ContentTable to this number*/
}
/*left navigation indent first level */
#s4-leftpanel-content ul.root > li.static > a.static {
border-bottom: 1px solid #ffffff;
font-weight: bold;
}
/* left navigation indent second level*/
#s4-leftpanel-content ul.root > li.static > ul.static {
padding-left: 20px;
margin-left: -10px;
}
/* left navigation indent third level */
#s4-leftpanel-content ul.root > li.static > ul.static > li.static > ul.static {
padding-left: 20px;
margin-left: -10px;
/* left navigation indent fourth level*/
}
#s4-leftpanel-content ul.root > li.static > ul.static > li.static > ul.static > li.static > ul.static {
padding-left: 30px;
margin-left: -10px;
}
.s4-ql UL.root UL {
margin: 0px;
}
.ms-quickLaunch {
padding: 0px;
}
body #s4-leftpanel-content {
padding: 0px 0px 5px;
background-color: transparent;
border-top-width: 0px;
border-right-width: 0px;
border-bottom-width: 0px;
border-left-width: 0px;
}
.s4-ql ul.root > li > .menu-item, .s4-qlheader, .s4-qlheader:visited {
font-size: 1.2em;
margin: 0px;
padding: 3px 4px 3px 10px;
border-width: 1px 0px;
border-style: solid;
border-color: transparent;
word-wrap: break-word;
overflow-x: hidden;
}
.s4-ql ul.root ul > li > a {
padding: 3px 4px 4px 10px;
border-width: 1px 0px;
border-style: solid;
border-color: transparent;
overflow-x: hidden;
display: block;
zoom: 1;
}
.s4-ql ul.root ul > li > a:hover {
text-decoration: underline;
}
.s4-ql a.selected {
background: url(“/_layouts/images/selbg.png”) repeat-x left top;
border-width: 0px !important;
padding-left: 9px !important;
}
/*content styling*/
#MSO_ContentTable {
margin-left: 175px; /* Set s4-leftpanel width to equal or less than this*/;
background-color: #EDE8E2; /*sets main area background color */
}
.contentCenterRegion {
vertical-align: top;
}
ul.ms-rteStyle-ContentBackground, ol.ms-rteStyle-ContentBackground {
list-style-position: inside; /*fix for rtf bullet points being to far to the left, also ordered lists */
}
.rightsidefixed {
width: 250px; /* sets right layout zone width*/;
vertical-align: top;
}
div.s4-title {
background: transparent;
background-color: transparent;
}
.ms-WPHeader {
border-bottom: 5px #FFFFFF solid;
}
.ms-WPHeader TD {
border-bottom: transparent 0px none !important;
border-right: transparent 0px none !important;
border-top: transparent 0px none !important;
border-left: transparent 0px none !important;
}
.s4-wpTopTable, .s4-wpActive, .ms-settingsframe {
background-color: #FFFFFF; /*make web part backgrounds white, even in edit mode*/;
}
.ms-rte-wpbox {
margin-bottom: 8px; /*add spacing below each webpart*/
}
.floatleft {
float: left;
}
.floatright {
float: right;
}
.pageTitle {
font-size: 20px;
font-weight: bold;
margin: 0px;
padding: 0px;
width: 80%;
padding-top: 0px;
margin-left: 10px;
letter-spacing: 1px;
}
.ms-WPTitle {
font-weight: bold;
}
/* Style right side web parts */
.rightSide #MSOZoneCell_WebPartWPQ20 {
background-color: #fff;
border: 5px #EDE8E2 solid;
}
.rightSide #MSOZoneCell_WebPartWPQ19 {
background-color: #fff;
border: 5px #EDE8E2 solid;
}
.rightSide #MSOZoneCell_WebPartWPQ18 {
background-color: #fff;
border: 5px #EDE8E2 solid;
}
.rightSide #MSOZoneCell_WebPartWPQ17 {
background-color: #fff;
border: 5px #EDE8E2 solid;
}
.rightSide #MSOZoneCell_WebPartWPQ16 {
background-color: #fff;
border: 5px #EDE8E2 solid;
}
.rightSide #MSOZoneCell_WebPartWPQ15 {
background-color: #fff;
border: 5px #EDE8E2 solid;
}
.rightSide #MSOZoneCell_WebPartWPQ14 {
background-color: #fff;
border: 5px #EDE8E2 solid;
}
.rightSide #MSOZoneCell_WebPartWPQ13 {
background-color: #fff;
border: 5px #EDE8E2 solid;
}
.rightSide #MSOZoneCell_WebPartWPQ12 {
background-color: #fff;
border: 5px #EDE8E2 solid;
}
.rightSide #MSOZoneCell_WebPartWPQ11 {
background-color: #fff;
border: 5px #EDE8E2 solid;
}
.rightSide #MSOZoneCell_WebPartWPQ10 {
background-color: #fff;
border: 5px #EDE8E2 solid;
}
.rightSide #MSOZoneCell_WebPartWPQ9 {
background-color: #fff;
border: 5px #EDE8E2 solid;
}
.rightSide #MSOZoneCell_WebPartWPQ8 {
background-color: #fff;
border: 5px #EDE8E2 solid;
}
.rightSide #MSOZoneCell_WebPartWPQ7 {
background-color: #fff;
border: 5px #EDE8E2 solid;
}
.rightSide #MSOZoneCell_WebPartWPQ6 {
background-color: #fff;
border: 5px #EDE8E2 solid;
}
.rightSide #MSOZoneCell_WebPartWPQ5 {
background-color: #fff;
border: 5px #EDE8E2 solid;
}
.rightSide #MSOZoneCell_WebPartWPQ4 {
background-color: #fff;
border: 5px #EDE8E2 solid;
}
.rightSide #MSOZoneCell_WebPartWPQ3 {
background-color: #fff;
border: 5px #EDE8E2 solid;
}
.rightSide #MSOZoneCell_WebPartWPQ2 {
background-color: #fff;
border: 5px #EDE8E2 solid;
}
.rightSide #MSOZoneCell_WebPartWPQ1 {
background-color: #fff;
border: 5px #EDE8E2 solid;
}
.rightSide .ms-WPBody {
padding: 10px;
}
/*News Webpart*/
.NewsArea {
padding: 5px;
}
.NewsDate {
padding-bottom: 5px;
}
/*user presence icon*/
.ms-imnlink img {
border: 0px;
}
/*user description*/
div.description {
padding-left: 17px;
}
/*footer styling*/
.bottomFooter {
min-height: 44px;
padding-top: 16px;
padding-left: 4px;
padding-right: 4px;
clear: both;
}
.footerlinks {
word-spacing: 4px;
padding-bottom: 4px;
line-height: 14px;
}
That’s it, let me know if you have questions and I can get more detail/instructions on any part.
For more on how to work with CoreV4.css and create your own CSS, see my other blog post from today.