I have been searching for a way to rapidly create standalone Developer SharePoint 2013 standalone VM’s joined to a central domain for our in-house developers. Our team has created 60+ SharePoint VMs on Azure and continue to create about 10 per month. We are beginning to treat our VMs needing hours of repair like cattle, and no longer like the family dog if they have issues or “get terminally ill”, VM’s are replaced with a brand new shiny cow within 4 hoursJ
The process of manually creating VMs was not fun, taking over a day per VM in the beginning on average. I did not want to use Sysprep, since I would have to maintain multiple VM Images at a single point in time. For some, this might be the best way to go.
My solution was to create a lightweight PowerShell set of scripts that create the VM in Azure, install the applications, and keep everything consistent. I can create 4+ VMs at one time, all under ~4 hours total. This is a process that scales somewhat, to meet our needs. Perfect.
Alternatives to this manual PowerShell process I went through:
- Sysprep would save a ton of steps, but is not as easy to update OS patches, etc. as newer software comes out
- AzureRM– Azure Resource Manager is a lot easier. However, these topologies seem somewhat isolated and all of our existing VMs and didn’t work well with what we had in place for our network/VPN, etc.
- Azure SharePoint QuickStart templates/images- These were preconfigured and had various OS settings changed. Similar to the above Azure RM solution issues we ran into.
Assumptions:
- You have an Azure subscription all set up, with a virtual network/DNS/Subnet (we have a site-to-site VPN)
- You have domain controller with all of the SharePoint service accounts created for Least Privileges security installation
- You have installed the latest version of Azure PowerShell installed, rebooted after installing it, and performed the Add-AzureAccount command
- You have used AutoSPInstaller before
What you need:
-
The following information from Azure
- Subscription ID
-
Virtual Network info
- Resource Group
-
The following pre-existing VMs:
-
Silent install for software (one-time prep, then save the folder on the Fileshare VM)
Configure PowerShell variables for the new standalone developer SharePoint VM
#VM Name will be ASP13D08
#IP will be 192.168.1.87
#Cloud service Company-Redondo-D08 (each developer has their own cloud service so they can power on VMs without having to wait for the other developers to start at the same time)
#service accounts
#Single SharePoint 2013 developer VM
[code language=”powershell”]$varVMLocation = "A"
$varVMServerType = "SP"
$varVMSPVersion = "13"
$varVMType = "D"
$varVMIntanceNum = "08"
$varVMReduxSuffix = "" # I sometimes append a version letter to the end of the developers VM, if they are getting an additional VM of the same role.
$spsetupname = "svc_spsetup"
$spsetuppasstext = "passw0rdspsetup"
$users = @("svc_spsetup", "svc_spfarm", "eric.schrader", "dev1", "etc");
$varVMStaticIP = "192.168.1.87"
$varStorageAccount = "Company" + $varVMLocation + $varVMType + $varVMIntanceNum #unique
$varStorageAccount = $varStorageAccount.ToLower()
$service = "Company-Redondo-" + $varVMType + $varVMIntanceNum
$instancesize = "Basic_A4"
$subscriptionid = "12345678-12345-123456"
$subscriptionName = "Microsoft Azure Enterprise"
$imageFamily = "Windows Server 2012 R2 Datacenter" #Azure VM Image name, the latest will be used below.
$localadminname = "company.admin" #cant be "administrator", etc.
$localadminPassword = "passw0rdlocaladmin"
$joindomain = "Domain.local"
$domainname = "Domain"
$machineOU = "OU=Azure,OU=Development,OU=Servers,OU=Seattle,DC=Company,DC=local"
$timezone = "Pacific Standard Time"
$domainusername = "svc_spsetup"
$domainpassword = "passw0rdspsetup"
$datadiskGB = 127
$datadiskLUN = 0
$datadiskCACHE = "None"
$vmsubnet = "Subnet-1"
$vmaffinitygroup = "VPN-Linked"[/code]
Create the Azure storage account if it doesn’t exist, the set it as the default for PowerShell
#Get-AzureStorageAccount | ft
#Change varStorageAccount to lowercase
[code language=”powershell”]$lowerStorageAccount = $varStorageAccount.ToLower()
Try{
get-azurestorageaccount -storageaccountname $varStorageAccount -ErrorAction Stop
#if this fails to get it, it will create it below. Need above error action
}
Catch {
#you got an error trying to get it, so create it.
Write-output "creating storage account $varStorageAccount"
New-AzureStorageAccount -StorageAccountName $lowerStorageAccount -Label $lowerStorageAccount -AffinityGroup $vmaffinitygroup
}[/code]
#now that it exists, set it as default.
[code language=”powershell”]Set-AzureSubscription -CurrentStorageAccountName $varStorageAccount -SubscriptionId $subscriptionid
Select-AzureSubscription -SubscriptionId $subscriptionid -Current[/code]
Create the VM using above variables
#try to fix the DNS error in the Comapny DC, WARNING: The specified DNS name is already taken.
#New-AzureService -Label $service -Description $service -AffinityGroup $vmaffinitygroup -ServiceName $service
[code language=”powershell”]</span>New-AzureVMConfig -Name $name -InstanceSize $instancesize -ImageName $image | Add-AzureProvisioningConfig -AdminUserName $localadminname -EnableWinRMHttp -TimeZone $timezone -DisableAutomaticUpdates –Password $localadminPassword -WindowsDomain -JoinDomain $joindomain -Domain $domainname -DomainUserName $domainusername -DomainPassword $domainpassword -MachineObjectOU $machineOU | Add-AzureDataDisk -CreateNew -DiskSizeInGB $datadiskGB -DiskLabel $datadiskname -LUN $datadiskLUN -HostCaching $datadiskCACHE | Set-AzureSubnet –SubnetNames $vmsubnet | Set-AzureStaticVNetIP -IPAddress $varVMStaticIP| New-AzureVM –ServiceName $service -AffinityGroup $vmaffinitygroup[/code]
Configures Secure Remote PowerShell Access to Windows Azure Virtual Machines
Download PS1 file from this blog post to your local computer with Azure PowerShell. https://gallery.technet.microsoft.com/scriptcenter/Configures-Secure-Remote-b137f2fe
#CD to location in PowerShell, for example, your desktop:
[code language=”powershell”]Cd C:\users\eric.schrader\desktop[/code]
#Create WInRM Cert to new VM
[code language=”powershell”].\InstallWinRMCertAzureVM.ps1 -SubscriptionName $subscriptionname -ServiceName $service -Name $name[/code]
Connect to remote session
#Connect via remote powershell as local azure.admin
#uses variables from when the VM was created above
[code language=”powershell”]$passwordsec = convertto-securestring $localadminPassword -asplaintext -force
$user = $name +"\"+ $localadminname
$cred = new-object -typename System.Management.Automation.PSCredential -argumentlist $user,$passwordsec
$uri = Get-AzureWinRMUri -ServiceName $service -Name $name
Enter-PSSession -ConnectionUri $uri -Credential $cred
$env:computername[/code]
#Run variables Again!!!
# IMPORTANT, COPY AND PASTE THE ABOVE VARIABLES SECTION IN AGAIN. This is a new remote session to the new Azure VM.
[code language=”powershell”]$varVMLocation = "A"
$varVMServerType = "SP"
$varVMSPVersion = "13"
$varVMType = "D"
$varVMIntanceNum = "08"
$varVMReduxSuffix = "" # I sometimes append a version letter to the end of the developers VM, if they are getting an additional VM of the same role.
$spsetupname = "svc_spsetup"
$spsetuppasstext = "passw0rdspsetup"
$users = @("svc_spsetup", "svc_spfarm", "eric.schrader", "dev1", "etc");
$varVMStaticIP = "192.168.1.87"
$varStorageAccount = "Company" + $varVMLocation + $varVMType + $varVMIntanceNum #unique
$varStorageAccount = $varStorageAccount.ToLower()
$service = "Company-Redondo-" + $varVMType + $varVMIntanceNum
$instancesize = "Basic_A4"
$subscriptionid = "12345678-12345-123456"
$subscriptionName = "Microsoft Azure Enterprise"
$imageFamily = "Windows Server 2012 R2 Datacenter" #Azure VM Image name, the latest will be used below.
$localadminname = "company.admin" #cant be "administrator", etc.
$localadminPassword = "passw0rdlocaladmin"
$joindomain = "Domain.local"
$domainname = "Domain"
$machineOU = "OU=Azure,OU=Development,OU=Servers,OU=Seattle,DC=Company,DC=local"
$timezone = "Pacific Standard Time"
$domainusername = "svc_spsetup"
$domainpassword = "passw0rdspsetup"
$datadiskGB = 127
$datadiskLUN = 0
$datadiskCACHE = "None"
$vmsubnet = "Subnet-1"
$vmaffinitygroup = "VPN-Linked"[/code]
Set proper storage account in remote session
# Now that you set the variables, set the storage account for the remote session
[code language=”powershell”]Set-AzureSubscription -CurrentStorageAccountName $varStorageAccount -SubscriptionId $subscriptionid
Select-AzureSubscription -SubscriptionId $subscriptionid -Current[/code]
Format F drive for SharePoint/SQL, permission service accounts
#Format F drive
[code language=”powershell”]$labels = @("DATA1","DATA2")
Write-Host "Initializing and formatting raw disks"
$disks = Get-Disk | Where partitionstyle -eq ‘raw’ | sort number
## start at F: because sometimes E: shows up as a CD drive in Azure
$letters = 70..89 | ForEach-Object { ([char]$_) }
$count = 0
foreach($d in $disks) {
$driveLetter = $letters[$count].ToString()
$d |
Initialize-Disk -PartitionStyle MBR -PassThru |
New-Partition -UseMaximumSize -DriveLetter $driveLetter |
Format-Volume -FileSystem NTFS -NewFileSystemLabel $labels[$count] `
-Confirm:$false -Force
$count++
}
GET-WMIOBJECT –query "SELECT * from win32_logicaldisk where DriveType = ‘3’"[/code]
#add developer, and admins/spsetup/spfarm, set in $users variable above
[code language=”powershell”]foreach($user in $users) {
$domainuser= $domainname + "\"+$user
$Group = "Administrators"
$de = [ADSI]"WinNT://$name/$Group,group"
$de.Add("WinNT://$domainname/$user")
Write-Host "Done, $domainuser has been permissioned to this computer."
}
net localgroup administrators[/code]
#create folder and share for apps
[code language=”powershell”]New-Item -Path F:\tools -ItemType directory -Value Tools
New-SMBShare –Name "Tools" –Path "F:\Tools" -ChangeAccess "Everyone"[/code]
Disable UAC (for developers), restart computer, set execution policy, etc.
#Disable UAC
[code language=”powershell”]Set-ItemProperty -Path HKLM:\Software\Microsoft\Windows\CurrentVersion\policies\system -Name EnableLUA -Value 0[/code]
#allow scripts
[code language=”powershell”]Set-executionpolicy unrestricted -force[/code]
#reboot
[code language=”powershell”]Restart-computer[/code]
#wait 5 minutes for reboot
#Reconnect to powershell
(exit, reconnect to remote powershell, re-run vars)
Connect to remote session
#Connect via remote powershell as local azure.admin
#uses variables from when the VM was created above
[code language=”powershell”]$passwordsec = convertto-securestring $localadminPassword -asplaintext -force
$user = $name +"\"+ $localadminname
$cred = new-object -typename System.Management.Automation.PSCredential -argumentlist $user,$passwordsec
$uri = Get-AzureWinRMUri -ServiceName $service -Name $name
Enter-PSSession -ConnectionUri $uri -Credential $cred
$env:computername[/code]
#Run variables Again!!!
# IMPORTANT, COPY AND PASTE THE ABOVE VARIABLES SECTION IN AGAIN. This is a new remote session to the new Azure VM.
[code language=”powershell”]</span>$varVMLocation = "A"
$varVMServerType = "SP"
$varVMSPVersion = "13"
$varVMType = "D"
$varVMIntanceNum = "08"
$varVMReduxSuffix = "" # I sometimes append a version letter to the end of the developers VM, if they are getting an additional VM of the same role.
$spsetupname = "svc_spsetup"
$spsetuppasstext = "passw0rdspsetup"
$users = @("svc_spsetup", "svc_spfarm", "eric.schrader", "dev1", "etc");
$varVMStaticIP = "192.168.1.87"
$varStorageAccount = "Company" + $varVMLocation + $varVMType + $varVMIntanceNum #unique
$varStorageAccount = $varStorageAccount.ToLower()
$service = "Company-Redondo-" + $varVMType + $varVMIntanceNum
$instancesize = "Basic_A4"
$subscriptionid = "12345678-12345-123456"
$subscriptionName = "Microsoft Azure Enterprise"
$imageFamily = "Windows Server 2012 R2 Datacenter" #Azure VM Image name, the latest will be used below.
$localadminname = "company.admin" #cant be "administrator", etc.
$localadminPassword = "passw0rdlocaladmin"
$joindomain = "Domain.local"
$domainname = "Domain"
$machineOU = "OU=Azure,OU=Development,OU=Servers,OU=Seattle,DC=Company,DC=local"
$timezone = "Pacific Standard Time"
$domainusername = "svc_spsetup"
$domainpassword = "passw0rdspsetup"
$datadiskGB = 127
$datadiskLUN = 0
$datadiskCACHE = "None"
$vmsubnet = "Subnet-1"
$vmaffinitygroup = "VPN-Linked"[/code]
Install SQL pre-reqs
#Install .net 3.5 for SQL prereq on SQL server
[code language=”powershell”]Install-WindowsFeature –name NET-Framework-Core[/code]
Now that the VM is ready for software installs, lets copy the software over. Due to the Windows “triple hop” issue of credentials, I cannot remote into the VM then copy from a 3rd remote location to the vm. I will have to RDP manually
RDP to fileshare computer as svc_SPSetup
Run variables on fileshare computers PowerShell
#Run variables Again!!!
# IMPORTANT, COPY AND PASTE THE ABOVE VARIABLES SECTION IN AGAIN. This is a new VM session.
[code language=”powershell”]$varVMLocation = "A"
$varVMServerType = "SP"
$varVMSPVersion = "13"
$varVMType = "D"
$varVMIntanceNum = "08"
$varVMReduxSuffix = "" # I sometimes append a version letter to the end of the developers VM, if they are getting an additional VM of the same role.
$spsetupname = "svc_spsetup"
$spsetuppasstext = "passw0rdspsetup"
$users = @("svc_spsetup", "svc_spfarm", "eric.schrader", "dev1", "etc");
$varVMStaticIP = "192.168.1.87"
$varStorageAccount = "Company" + $varVMLocation + $varVMType + $varVMIntanceNum #unique
$varStorageAccount = $varStorageAccount.ToLower()
$service = "Company-Redondo-" + $varVMType + $varVMIntanceNum
$instancesize = "Basic_A4"
$subscriptionid = "12345678-12345-123456"
$subscriptionName = "Microsoft Azure Enterprise"
$imageFamily = "Windows Server 2012 R2 Datacenter" #Azure VM Image name, the latest will be used below.
$localadminname = "company.admin" #cant be "administrator", etc.
$localadminPassword = "passw0rdlocaladmin"
$joindomain = "Domain.local"
$domainname = "Domain"
$machineOU = "OU=Azure,OU=Development,OU=Servers,OU=Seattle,DC=Company,DC=local"
$timezone = "Pacific Standard Time"
$domainusername = "svc_spsetup"
$domainpassword = "passw0rdspsetup"
$datadiskGB = 127
$datadiskLUN = 0
$datadiskCACHE = "None"
$vmsubnet = "Subnet-1"
$vmaffinitygroup = "VPN-Linked"[/code]
Copy the software
#Run from Fileshare as SPSetup in PowerShell
#re-run variables
#run installers
#Copy applications from local computer S drive on \\fileshare to server F drive
[code language=”powershell”]Copy-Item C:\Fileshare\applications\7zipInstall.msi -Destination <a href="///\\$name\tools">\\$name\tools</a>
Copy-Item C:\Fileshare\applications\ccleaner.exe -Destination <a href="///\\$name\tools">\\$name\tools</a>
Copy-Item C:\Fileshare\applications\fiddler4setup.exe -Destination <a href="///\\$name\tools">\\$name\tools</a>
Copy-Item ‘C:\Fileshare\applications\Firefox Setup Stub 36.0.4.exe’ -Destination <a href="///\\$name\tools">\\$name\tools</a>
Copy-Item C:\Fileshare\applications\iview438_setup.exe -Destination <a href="///\\$name\tools">\\$name\tools</a>
Copy-Item C:\Fileshare\applications\LINQPad4Setup.exe -Destination <a href="///\\$name\tools">\\$name\tools</a>
Copy-Item C:\Fileshare\applications\npp.6.7.5.Installer.exe -Destination <a href="///\\$name\tools">\\$name\tools</a>
Copy-Item C:\Fileshare\applications\paint.net.4.0.5.install.exe -Destination <a href="///\\$name\tools">\\$name\tools</a>
Copy-Item C:\Fileshare\applications\PowerGUI.3.8.0.129.msi -Destination <a href="///\\$name\tools">\\$name\tools</a>
Copy-Item C:\Fileshare\applications\cutepdf-writer.exe -Destination <a href="///\\$name\tools">\\$name\tools</a>
Copy-Item C:\Fileshare\applications\CKS.Dev11.vsix -Destination <a href="///\\$name\tools">\\$name\tools</a>
Copy-Item C:\Fileshare\applications\codecompare.exe -Destination <a href="///\\$name\tools">\\$name\tools</a>[/code]
#copy exes to F:\Tools
[code language=”powershell”]Copy-Item C:\Fileshare\applications\ULSViewer.zip -Destination <a href="///\\$name\tools">\\$name\tools</a>
Copy-Item C:\Fileshare\applications\U2U.SharePoint.CQB2010.zip -Destination <a href="///\\$name\tools">\\$name\tools</a>
Copy-Item C:\Fileshare\applications\CamlDesigner2013\* -Destination <a href="///\\$name\tools">\\$name\tools</a> -Recurse
Copy-Item "C:\Fileshare\Visual Studio 2012\*" -Destination <a href="///\\$name\tools">\\$name\tools</a> -Recurse
Copy-Item "C:\Fileshare\Visual Studio 2015\*" -Destination <a href="///\\$name\tools">\\$name\tools</a> -Recurse
Copy-Item "C:\Fileshare\SharePoint Designer 2013\*" -Destination <a href="///\\$name\tools">\\$name\tools</a> -Recurse[/code]
#copy SQL to SQL server (Copy ISO CONTENTS)
[code language=”powershell”]Copy-Item C:\Fileshare\en_sql_server_2014_enterprise_edition_with_service_pack_1_x64_dvd_6669618\* -Destination <a href="///\\$name\tools">\\$name\tools</a> -Recurse
Copy-Item C:\Fileshare\AutoSPInstallerDev2013\* -Destination <a href="///\\$name\tools">\\$name\tools</a> -Recurse
Copy-Item C:\Fileshare\sql2014configdevint\* -Destination <a href="///\\$name\tools">\\$name\tools</a> -Recurse -force
Copy-Item C:\Fileshare\en_sharepoint_server_2013_with_sp1_x64_dvd_3823428\* -Destination <a href="///\\$name\tools\AutoSPInstaller\SP\2013\SharePoint">\\$name\tools\AutoSPInstaller\SP\2013\SharePoint</a> -Recurse -force
Copy-Item "C:\Fileshare\SharePoint 2013 June 2015 CU" -Destination <a href="///\\$name\tools\AutoSPInstaller\SP\2013\Updates">\\$name\tools\AutoSPInstaller\SP\2013\Updates</a> -Recurse -force[/code]
Close RDP to fileshare and go back to your local computers PowerShell. We are ready to install the software
#re-run variables
#Run variables Again!!!
# IMPORTANT, COPY AND PASTE THE ABOVE VARIABLES SECTION IN AGAIN. This is a new remote session to the new Azure VM.
[code language=”powershell”]$varVMLocation = "A"
$varVMServerType = "SP"
$varVMSPVersion = "13"
$varVMType = "D"
$varVMIntanceNum = "08"
$varVMReduxSuffix = "" # I sometimes append a version letter to the end of the developers VM, if they are getting an additional VM of the same role.
$spsetupname = "svc_spsetup"
$spsetuppasstext = "passw0rdspsetup"
$users = @("svc_spsetup", "svc_spfarm", "eric.schrader", "dev1", "etc");
$varVMStaticIP = "192.168.1.87"
$varStorageAccount = "Company" + $varVMLocation + $varVMType + $varVMIntanceNum #unique
$varStorageAccount = $varStorageAccount.ToLower()
$service = "Company-Redondo-" + $varVMType + $varVMIntanceNum
$instancesize = "Basic_A4"
$subscriptionid = "12345678-12345-123456"
$subscriptionName = "Microsoft Azure Enterprise"
$imageFamily = "Windows Server 2012 R2 Datacenter" #Azure VM Image name, the latest will be used below.
$localadminname = "company.admin" #cant be "administrator", etc.
$localadminPassword = "passw0rdlocaladmin"
$joindomain = "Domain.local"
$domainname = "Domain"
$machineOU = "OU=Azure,OU=Development,OU=Servers,OU=Seattle,DC=Company,DC=local"
$timezone = "Pacific Standard Time"
$domainusername = "svc_spsetup"
$domainpassword = "passw0rdspsetup"
$datadiskGB = 127
$datadiskLUN = 0
$datadiskCACHE = "None"
$vmsubnet = "Subnet-1"
$vmaffinitygroup = "VPN-Linked"[/code]
RDP to Developer VM using svc_SPSetup and install SQL by PowerSHell.
#via SPSetup , possibly have to sign into RDP instead of remote PS. Takes 20 minutes
[code language=”powershell”]start-process F:\tools\sql\Setup.exe -ArgumentList "/q /SkipRules=VSShellInstalledRule RebootRequiredCheck /ConfigurationFile=F:\Tools\ConfigurationFile.ini /ERRORREPORTING=1 /IACCEPTSQLSERVERLICENSETERMS" -Wait[/code]
Close RDP to developer VM once SQL is done.
From local computer, Connect via remote powershell as spsetup. There is code in here to install SQL remotely, but it too has a triple hop credential issue since I use service accounts. I just RDP to the VM and install SQL via PowerShell there.
#uses variables from when the VM was created above
[code language=”powershell”]$passwordsec = convertto-securestring $spsetuppasstext -asplaintext -force
$cred = new-object -typename System.Management.Automation.PSCredential -argumentlist $spsetupname ,$passwordsec
$uri = Get-AzureWinRMUri -ServiceName $service -Name $name
Enter-PSSession -ConnectionUri $uri -Credential $cred
$env:computername[/code]
#FIX – maybe to install SQL remotely
#Invoke-Command -ComputerName $name -Authentication CredSSP -credential $cred -scriptblock {
#F:\tools\sql\Setup.exe -ArgumentList “/q /SkipRules=VSShellInstalledRule RebootRequiredCheck /ConfigurationFile=F:\Tools\ConfigurationFile.ini /ERRORREPORTING=1 /IACCEPTSQLSERVERLICENSETERMS” -Wait
#}
Set SQL max memory to 10GB, set Max Degree of parallelism to 1 (this is a huge script, maybe you can shorten it)
#Set Max degree of parallelism to 1
[code language=”powershell”]## Sets the ‘max degree of parallelism’ value to 1 for the specified SQL server instance
## Port 1433 is used if not specified
## 2012-10-08
## <a href="http://www.pointbeyond.com">www.pointbeyond.com</a>
## NOTE: This function requires at least serveradmin level permissions within SQL server
function SetMaxDegreeOfParallelism()
{
Param(
$server,
$port="1433")
$conn = new-object System.Data.SqlClient.SqlConnection
try
{
$connectionString = "Server="+$server+","+$port+";Database=master;Integrated Security=True;"
$conn.ConnectionString = $connectionString
$conn.Open()
$cmd = new-object System.Data.SqlClient.SqlCommand
$cmd.Connection = $conn
# Ensure advanced options are available
$commandText = "sp_configure ‘show advanced options’, 1;RECONFIGURE WITH OVERRIDE;"
$cmd.CommandText = $commandText
$r = $cmd.ExecuteNonQuery()
# Set the Max Degree of Parallelism value to 1
write-host "Setting ‘max degree of parallelism’ value to 1 for server $server…"
$commandText = "sp_configure ‘max degree of parallelism’, 1;RECONFIGURE WITH OVERRIDE"
$cmd.CommandText = $commandText
$r = $cmd.ExecuteNonQuery()
write-host "Success"
}
catch
{
write-host "An error occurred trying to set the MaxDegreeOfParallelism value to 1 for server $server" -Fore Red
write-host "Ensure that server and port parameters are correct and that the current user has at least serveradmin permissions within SQL" -Fore Red
}
finally
{
$conn.Close()
}
}
# Call the function passing in SQL server name/instance/alias and port number
SetMaxDegreeOfParallelism -server $name -port "1433"[/code]
#Set SQL Max memory – 3GB
[code language=”powershell”]Function Test-SqlSa {
<#
.SYNOPSIS
Ensures sysadmin account access on SQL Server. $server is an SMO server object.
.EXAMPLE
if (!(Test-SQLSA $server)) { throw "Not a sysadmin on $source. Quitting." }
.OUTPUTS
$true if syadmin
$false if not
#>
[CmdletBinding()]
param(
[Parameter(Mandatory = $true)]
[ValidateNotNullOrEmpty()]
[object]$server
)
try {
return ($server.ConnectionContext.FixedServerRoles -match "SysAdmin")
}
catch { return $false }
}
Function Get-ParamSqlCmsGroups {
<#
.SYNOPSIS
Returns System.Management.Automation.RuntimeDefinedParameterDictionary
filled with server groups from specified SQL Server Central Management server name.
.EXAMPLE
Get-ParamSqlCmsGroups sqlserver
#>
[CmdletBinding()]
param(
[Parameter(Mandatory = $true)]
[string]$Server
)
if ([Reflection.Assembly]::LoadWithPartialName("Microsoft.SqlServer.SMO") -eq $null) {return}
if ([Reflection.Assembly]::LoadWithPartialName("Microsoft.SqlServer.Management.RegisteredServers") -eq $null) {return}
$cmserver = New-Object Microsoft.SqlServer.Management.Smo.Server $server
$sqlconnection = $cmserver.ConnectionContext.SqlConnectionObject
try { $cmstore = new-object Microsoft.SqlServer.Management.RegisteredServers.RegisteredServersStore($sqlconnection)}
catch { return }
if ($cmstore -eq $null) { return }
$newparams = New-Object System.Management.Automation.RuntimeDefinedParameterDictionary
$paramattributes = New-Object System.Management.Automation.ParameterAttribute
$paramattributes.ParameterSetName = "__AllParameterSets"
$paramattributes.Mandatory = $false
$argumentlist = $cmstore.DatabaseEngineServerGroup.ServerGroups.name
if ($argumentlist -ne $null) {
$validationset = New-Object System.Management.Automation.ValidateSetAttribute -ArgumentList $argumentlist
$combinedattributes = New-Object -Type System.Collections.ObjectModel.Collection[System.Attribute]
$combinedattributes.Add($paramattributes)
$combinedattributes.Add($validationset)
$SqlCmsGroups = New-Object -Type System.Management.Automation.RuntimeDefinedParameter("SqlCmsGroups", [String[]], $combinedattributes)
$newparams.Add("SqlCmsGroups", $SqlCmsGroups)
return $newparams
} else { return }
}
Function Get-SqlCmsRegServers {
<#
.SYNOPSIS
Returns array of server names from CMS Server. If -Groups is specified,
only servers within the given groups are returned.
.EXAMPLE
Get-SqlCmsRegServers -Server sqlserver -Groups "Accounting", "HR"
#>
[CmdletBinding()]
param(
[Parameter(Mandatory = $true)]
[string]$server,
[string[]]$groups
)
if ([Reflection.Assembly]::LoadWithPartialName("Microsoft.SqlServer.SMO") -eq $null) {return}
if ([Reflection.Assembly]::LoadWithPartialName("Microsoft.SqlServer.Management.RegisteredServers") -eq $null) {return}
$cmserver = New-Object Microsoft.SqlServer.Management.Smo.Server $server
$sqlconnection = $cmserver.ConnectionContext.SqlConnectionObject
try { $cmstore = new-object Microsoft.SqlServer.Management.RegisteredServers.RegisteredServersStore($sqlconnection)}
catch { throw "Cannot access Central Management Server" }
$servers = @()
if ($groups -ne $null) {
foreach ($group in $groups) {
$cms = $cmstore.ServerGroups["DatabaseEngineServerGroup"].ServerGroups[$group]
$servers += ($cms.GetDescendantRegisteredServers()).servername
}
} else {
$cms = $cmstore.ServerGroups["DatabaseEngineServerGroup"]
$servers = ($cms.GetDescendantRegisteredServers()).servername
}
return $servers
}
Function Get-SqlMaxMemory {
<#
.SYNOPSIS
Displays information relating to SQL Server Max Memory configuration settings. Works on SQL Server 2000-2014.
.DESCRIPTION
Inspired by Jonathan Kehayias’s post about SQL Server Max memory (<a href="http://bit.ly/sqlmemcalc">http://bit.ly/sqlmemcalc</a>), this script displays a SQL Server’s:
total memory, currently configured SQL max memory, and the calculated recommendation.
Jonathan notes that the formula used provides a *general recommendation* that doesn’t account for everything that may be going on in your specific environment.
.PARAMETER Servers
Allows you to specify a comma separated list of servers to query.
.PARAMETER ServersFromFile
Allows you to specify a list that’s been populated by a list of servers to query. The format is as follows
server1
server2
server3
.PARAMETER SqlCms
Reports on a list of servers populated by the specified SQL Server Central Management Server.
.PARAMETER SqlCmsGroups
This is a parameter that appears when SqlCms has been specified. It is populated by Server Groups within the given Central Management Server.
.NOTES
Author : Chrissy LeMaire
Requires: PowerShell Version 3.0, SQL Server SMO, sysadmin access on SQL Servers
DateUpdated: 2015-May-21
.LINK
<a href="https://gallery.technet.microsoft.com/scriptcenter/Get-Set-SQL-Max-Memory-19147057">https://gallery.technet.microsoft.com/scriptcenter/Get-Set-SQL-Max-Memory-19147057</a>
.EXAMPLE
Get-SqlMaxMemory -SqlCms sqlcluster
Get Memory Settings for all servers within the SQL Server Central Management Server "sqlcluster"
.EXAMPLE
Get-SqlMaxMemory -SqlCms sqlcluster | Where-Object { $_.SqlMaxMB -gt $_.TotalMB } | Set-SqlMaxMemory -UseRecommended
Find all servers in CMS that have Max SQL memory set to higher than the total memory of the server (think 2147483647)
#>
[CmdletBinding()]
Param(
[parameter(Position=0)]
[string[]]$Servers,
# File with one server per line
[string]$ServersFromFile,
# Central Management Server
[string]$SqlCms
)
DynamicParam { if ($SqlCms) { return (Get-ParamSqlCmsGroups $SqlCms) } }
PROCESS {
if ([string]::IsNullOrEmpty($SqlCms) -and [string]::IsNullOrEmpty($ServersFromFile) -and [string]::IsNullOrEmpty($servers))
{ throw "You must specify a server list source using -Servers or -SqlCms or -ServersFromFile" }
if ([Reflection.Assembly]::LoadWithPartialName("Microsoft.SqlServer.SMO") -eq $null )
{ throw "Quitting: SMO Required. You can download it from <a href="http://goo.gl/R4yA6u">http://goo.gl/R4yA6u</a>" }
if ([Reflection.Assembly]::LoadWithPartialName("Microsoft.SqlServer.Management.RegisteredServers") -eq $null )
{ throw "Quitting: SMO Required. You can download it from <a href="http://goo.gl/R4yA6u">http://goo.gl/R4yA6u</a>" }
$SqlCmsGroups = $psboundparameters.SqlCmsGroups
if ($SqlCms) { $servers = Get-SqlCmsRegServers -server $SqlCms -groups $SqlCmsGroups }
If ($ServersFromFile) { $servers = Get-Content $ServersFromFile }
$collection = @()
foreach ($servername in $servers) {
Write-Verbose "Attempting to connect to $servername"
$server = New-Object Microsoft.SqlServer.Management.Smo.Server $servername
try { $server.ConnectionContext.Connect() } catch { Write-Warning "Can’t connect to $servername. Moving on."; continue }
$maxmem = $server.Configuration.MaxServerMemory.ConfigValue
$reserve = 1
$totalMemory = $server.PhysicalMemory
# Some servers underreport by 1MB.
if (($totalmemory % 1024) -ne 0) { $totalMemory = $totalMemory + 1 }
if ($totalMemory -ge 4096) {
$currentCount = $totalMemory
while ($currentCount/4096 -gt 0) {
if ($currentCount -gt 16384) {
$reserve += 1
$currentCount += -8192
} else {
$reserve += 1
$currentCount += -4096
}
}
}
$recommendedMax = [int]($totalMemory-($reserve*1024))
$object = New-Object PSObject -Property @{
Server = $server.name
TotalMB = $totalMemory
SqlMaxMB = $maxmem
RecommendedMB = $recommendedMax
}
$server.ConnectionContext.Disconnect()
$collection += $object
}
return ($collection | Sort-Object Server | Select Server, TotalMB, SqlMaxMB, RecommendedMB)
}
}
Function Set-SqlMaxMemory {
<#
.SYNOPSIS
Sets SQL Server max memory then displays information relating to SQL Server Max Memory configuration settings. Works on SQL Server 2000-2014.
.PARAMETER Servers
Allows you to specify a comma separated list of servers to query.
.PARAMETER ServersFromFile
Allows you to specify a list that’s been populated by a list of servers to query. The format is as follows
server1
server2
server3
.PARAMETER SqlCms
Reports on a list of servers populated by the specified SQL Server Central Management Server.
.PARAMETER SqlCmsGroups
This is a parameter that appears when SqlCms has been specified. It is populated by Server Groups within the given Central Management Server.
.PARAMETER MaxMB
Specifies the max megabytes
.PARAMETER UseRecommended
Inspired by Jonathan Kehayias’s post about SQL Server Max memory (<a href="http://bit.ly/sqlmemcalc">http://bit.ly/sqlmemcalc</a>), this uses a formula to determine the default optimum RAM to use, then sets the SQL max value to that number.
Jonathan notes that the formula used provides a *general recommendation* that doesn’t account for everything that may be going on in your specific environment.
.NOTES
Author : Chrissy LeMaire
Requires: PowerShell Version 3.0, SQL Server SMO, sysadmin access on SQL Servers
DateUpdated: 2015-May-21
.LINK
<a href="https://gallery.technet.microsoft.com/scriptcenter/Get-Set-SQL-Max-Memory-19147057">https://gallery.technet.microsoft.com/scriptcenter/Get-Set-SQL-Max-Memory-19147057</a>
.EXAMPLE
Set-SqlMaxMemory sqlserver 2048
Set max memory to 2048 MB on just one server, "sqlserver"
.EXAMPLE
Get-SqlMaxMemory -SqlCms sqlcluster | Where-Object { $_.SqlMaxMB -gt $_.TotalMB } | Set-SqlMaxMemory -UseRecommended
Find all servers in CMS that have Max SQL memory set to higher than the total memory of the server (think 2147483647),
then pipe those to Set-SqlMaxMemory and use the default recommendation
.EXAMPLE
Set-SqlMaxMemory -SqlCms sqlcluster -SqlCmsGroups Express -MaxMB 512 -Verbose
Specifically set memory to 512 MB for all servers within the "Express" server group on CMS "sqlcluster"
#>
[CmdletBinding()]
Param(
[parameter(Position=0)]
[string[]]$Servers,
[parameter(Position=1)]
[int]$MaxMB,
[string]$ServersFromFile,
[string]$SqlCms,
[switch]$UseRecommended,
[Parameter(ValueFromPipeline=$True)]
[object]$collection
)
DynamicParam { if ($SqlCms) { return (Get-ParamSqlCmsGroups $SqlCms)} }
PROCESS {
if ([string]::IsNullOrEmpty($SqlCms) -and [string]::IsNullOrEmpty($ServersFromFile) -and [string]::IsNullOrEmpty($servers) -and $collection -eq $null)
{ throw "You must specify a server list source using -Servers or -SqlCms or -ServersFromFile or you can pipe results from Get-SqlMaxMemory" }
if ($MaxMB -eq 0 -and $UseRecommended -eq $false -and $collection -eq $null) { throw "You must specify -MaxMB or -UseRecommended" }
if ($collection -eq $null) {
$SqlCmsGroups = $psboundparameters.SqlCmsGroups
if ($SqlCmsGroups -ne $null) {
$collection = Get-SqlMaxMemory -Servers $servers -SqlCms $SqlCms -ServersFromFile $ServersFromFile -SqlCmsGroups $SqlCmsGroups
} else { $collection = Get-SqlMaxMemory -Servers $servers -SqlCms $SqlCms -ServersFromFile $ServersFromFile }
}
$collection | Add-Member -NotePropertyName OldMaxValue -NotePropertyValue 0
foreach ($row in $collection) {
$server = New-Object Microsoft.SqlServer.Management.Smo.Server $row.server
try { $server.ConnectionContext.Connect() } catch { Write-Warning "Can’t connect to $servername. Moving on."; continue }
if (!(Test-SqlSa $server)) {
Write-Warning "Not a sysadmin on $servername. Moving on."
$server.ConnectionContext.Disconnect()
continue
}
$row.OldMaxValue = $row.SqlMaxMB
try {
if ($UseRecommended) {
Write-Verbose "Changing $($row.server) SQL Server max from $($row.SqlMaxMB) to $($row.RecommendedMB) MB"
$server.Configuration.MaxServerMemory.ConfigValue = $row.RecommendedMB
$row.SqlMaxMB = $row.RecommendedMB
} else {
Write-Verbose "Changing $($row.server) SQL Server max from $($row.SqlMaxMB) to $MaxMB MB"
$server.Configuration.MaxServerMemory.ConfigValue = $MaxMB
$row.SqlMaxMB = $MaxMB
}
$server.Configuration.Alter()
} catch { Write-Warning "Could not modify Max Server Memory for $($row.server)" }
$server.ConnectionContext.Disconnect()
}
return $collection | Select Server, TotalMB, OldMaxValue, @{name="CurrentMaxValue";expression={$_.SqlMaxMB}}
}
}
Set-SqlMaxMemory $name 10000[/code]
Install Developer APPS
[code language=”powershell”]start-process F:\tools\7zipInstall.msi -ArgumentList "/q" -Wait
start-process F:\tools\ccleaner.exe -argumentlist "/S" -Wait
start-process F:\tools\fiddler4setup.exe -ArgumentList "/S" -Wait
start-process ‘F:\tools\Firefox Setup Stub 36.0.4.exe’ -ArgumentList "/S" -Wait
start-process F:\tools\iview438_setup.exe -ArgumentList "/silent" -Wait
start-process F:\tools\LINQPad4Setup.exe -ArgumentList "/silent" -Wait
start-process F:\tools\npp.6.7.5.Installer.exe -ArgumentList "/S" -Wait
start-process F:\tools\paint.net.4.0.5.install.exe -ArgumentList "/S" -Wait
start-process F:\tools\paint.net.4.0.5.install.exe -ArgumentList "/auto" -Wait
start-process F:\tools\PowerGUI.3.8.0.129.msi -ArgumentList "/q"[/code]
#start print spooler for cutepdf
[code language=”powershell”]net start spooler
sc query spooler[/code]
#fix hanging http://d4rkcell.com/archives/1217
[code language=”powershell”]start-process F:\tools\cutepdf-writer.exe -ArgumentList "/VERYSILENT /SUPPRESSMSGBOXES /NORESTART /SP-"
start-process F:\tools\VisualStudio2012\vs_premium.exe -ArgumentList "/adminfile AdminDeployment.xml /passive /norestart" -Wait -NoNewWindow -PassThru
$vsixInstallerPath = "C:\Program Files (x86)\Microsoft Visual Studio 11.0\Common7\IDE\VSIXInstaller.exe"
$extensionPath = "F:\tools\CKS.Dev11.vsix"
Start-Process -FilePath $vsixInstallerPath -ArgumentList "/q $extensionPath" -NoNewWindow -Wait
start-process F:\tools\SPDesigner\setup.exe -ArgumentList "/adminfile updates\adminfile.msp" -wait
start-process F:\tools\en_visual_studio_enterprise_2015_with_update_1_x86_x64_web_installer_8234346.exe -ArgumentList "/S /AdminFile F:\Tools\AdminDeployment.xml" -Wait[/code]
RDP to developer VM as svc_SPSetup and Launch AutoSPInstaller bat file
[code language=”powershell”]start-process F:\tools\AutoSPInstaller\SP\AutoSPInstaller\AutoSPInstallerLaunch.bat -wait[/code]
#Run autospinstaller
#Pre-reqs- 10 minutes w Restart
#Install binaries- 15 minutes
#Automation Fix- CU prompts for internet trusted file. 30 minutes (or right click all 3 CU files and go to Security and unblock, already done for June 2015 CU on AzureShare.).

#UPS Sync- we have to do this manually per install guide
#Add developer as full control of web applications
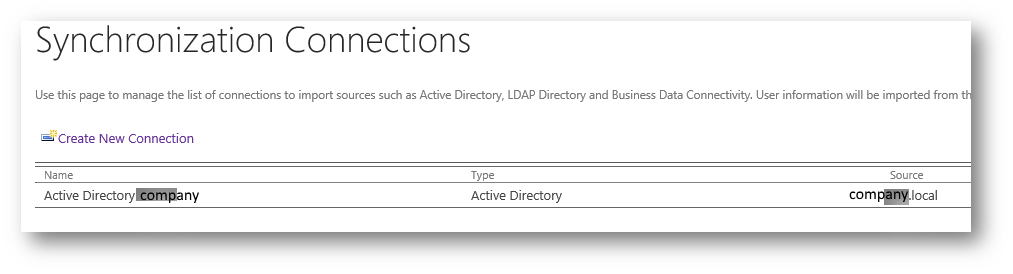
SharePoint- Configure User Profile AD Sync by hand
AD Connection:
Active Directory Company
Company.local
Company\svc_spups
passw0rd
(Sync All OUs)
Enable timerjob 1am daily:

Start full sync:

Manually add developer as full control of web applications.
Done!