Big changes have been happening with External User sharing for SharePoint Online over the past few months now that Azure Active Directory Business to Business (Azure AD B2B) is now generally available. Azure AD B2B allows you to share Office 365 content and line of business applications to users outside your organization. If you are new to Azure AD B2B, watch this great intro on this page: https://docs.microsoft.com/en-us/azure/active-directory/active-directory-b2b-what-is-azure-ad-b2b
The drawback however is the user onboarding process. Security groups, permissions, user onboarding, administration, the cumbersome 4-6 step user invite process to accept and signup/sign-in to your site, etc. make it difficult to see a good OOTB solution. However, after reading most of the Azure AD B2B articles and working with Microsoft support, I have found an improved (not perfect) process for inviting users and allowing them to sign up for a Microsoft account.
This script will:
- Import your users from a CSV file
- Add them to an Office 365 security group (that is permissioned to your app or SharePoint Online site)
- Send them a custom email message with the invite link that fully supports HTML
The goal of this script is to make it easier on the user so they see a custom email and not a generic Office 365 Azure AD email (after all, the users have no clue what Azure AD is)
Administration- CSV import file
When inviting the users, create a CSV file in the following format:
| InvitedUserEmailAddress | Name |
| [email protected] | Eric Schrader (Company Optional) |
| [email protected] | Eric Schrader |
| Etc. |
Above, the first row is the CSV headers which we will reference in PowerShell during the import. The following rows are the actual users valid email where the invite will be sent (but we will intercept this email, so this will just be used as the users identity so we know how to email them in the future). Long story, but the invited email doesn’t have to match the Personal/Organizational account they sign in as, but for this blog post they will match so we don’t get confused with Authorization vs Authentication.
Administration- Create a Security group and set SharePoint Online permissions
The next step is so you don’t have to go into SharePoint Online sites and add each users’ permissions manually.
- Similar to AD groups, create an Office 365 Security Group in the O365 Users > Groups admin center.
- Add the AD group to SharePoint and set any read/write permissions this group will have (so maybe your group is called External Users and they are read only to the root site, then another called External Members with contribute permissions, etc.
Once we import the CSV of users, we will have to add the new users to the O365 groups accordingly.
PowerShell time!
Be sure to install the Azure AD PS module – https://www.powershellgallery.com/packages/AzureADPreview Otherwise, you cannot run these commands.
Get the ID of your security group
Get the security group name you want the external users to automatically be added to:
get-azureadgroup | where-object {$_.DisplayName -ilike “External Users”}
(replace External Users with the name of your Security group you want the users to be added to)
Then copy the Object ID for the group and save this for our script.
The whole enchilada
#1.) Install Azure AD PS module – https://www.powershellgallery.com/packages/AzureADPreview
#Install-Module -Name AzureADPreview
#2.) provide O365 tenant admin cred
$cred = Get-Credential
Connect-AzureAD -Credential $cred
#2.a) second cred for O365 email account (merge var with above if for non-demo O365 tenant)
$adminemailcred = get-credential
#2.b) External User Security Group ID
#get-azureadgroup | where-object {$_.DisplayName -ilike “External Users”}
$groupID = “c9a04711-e307-4370-af42-f48db58f80c5”
#3.) import CSV, update url and csv location below.
$invitations = import-csv C:\azure_ad_b2b.csv
foreach ($email in $invitations) {
#loop over each user in the CSV and create an invite for that user but does not email the user
$result= New-AzureADMSInvitation -InvitedUserEmailAddress $email.InvitedUserEmailAddress -InvitedUserDisplayName $email.Name -InviteRedirectUrl https://mycompanyhere.sharepoint.com/sites/extranet -InvitedUserMessageInfo $messageInfo -SendInvitationMessage $false
$inviteurl = $result.InviteRedeemUrl
$userid = $result.InvitedUser.Id
#automatically add the new user to your Security Group
Add-AzureADGroupMember -ObjectId $groupID -RefObjectId $userid
#send the user a custom email from your Office 365 tenant. Supports HTML.
#Configuration variables for Email#Configuration variables for Email $EmailTo = $result.InvitedUserEmailAddress
$EmailFrom = “Eric Schrader <[email protected]>”
$EmailSubject = “INVITE: Eschrader Extranet”
$SupportEmail = “[email protected]”
$SmtpServer = “smtp.office365.com”
$InviteUrl = $inviteurl
$DisplayName = $result.Name
#HTML Template $EmailBody = @”
<header>
<img src=”https://eschrader.com/wp-content/uploads/2017/05/sileo-logo.png” />
</header>
Congrats $DisplayName,
You have been invited to access the Eschrader extranet.
</p> <p> If you need further assistance, please contact us <a href=”mailto:$SupportEmail”>$SupportEmail</a> </p>
</div>
“@
Send-MailMessage -To $EmailTo -from $EmailFrom -Subject $EmailSubject -Body $EmailBody -BodyAsHtml -smtpserver $SmtpServer -usessl -Credential $adminemailcred -Port 587
}
Note, above HTML was stripped out of my email template. Here is a PasteBin: https://pastebin.com/e1ziPq9U
In the above script,
- Note that #2 and #2a can be combined to just prompt you once. I had to use two because I have two O365 tenants, one is a demo tenant that does not support email and the other is my personal O365 tenant I send the email from.
- YOU WILL NEED TO REPLACE A LOT OF THE HARD-CODED VARIABLES ABOVE IN THE SCRIPT. LOOK CLOSELY.
- Watch out for the fancy quotes
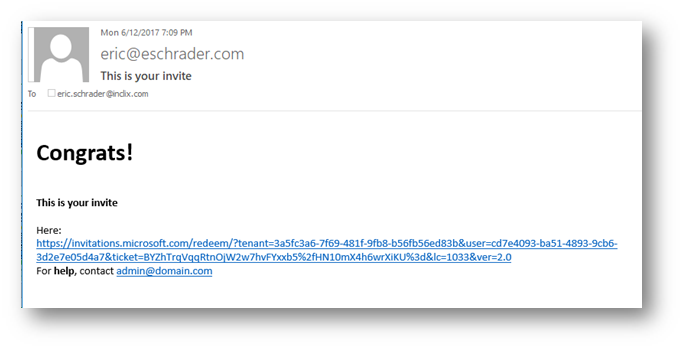
Here is an example email I sent myself to test (I put the access ID for my demo tenant and accepted it, so don’t bother typing it out haha)
If you want to embed images in the HTML message, I believe send-mailmessage has an “attachments” and “-inline attachments” parameter as outlined in this script, which can easily be adapted to your email template https://gallery.technet.microsoft.com/scriptcenter/Send-MailMessage-3a920a6d
You can also add other columns to the CSV file for send-mailmessage such as company, group ID, etc. and really build this script out.
There are lots of hard coded variables, as this is a rough script. Feel free to clean it up!
Links:
Azure AD User/Group PowerShell commands: https://docs.microsoft.com/en-us/powershell/module/Azuread/?view=azureadps-2.0
Send email from Office 365 in PowerShell: https://absolute-sharepoint.com/2016/03/send-email-from-powershell-in-office-365.html
Azure AD B2B invite process overview (OOTB, not PowerShell): https://docs.microsoft.com/en-us/azure/active-directory/active-directory-b2b-invitation-email
A good import script using a different CSV format, a good read: http://artokai.net/2016/SPOnlineAndAzureB2B/